DIY Nightstand Charging Station
Transform a plain nightstand into a functional piece of furniture.

Hide away that unsightly mess of cords with a hidden charging station! This simple project streamlines any nightstand and provides multiple outlets at arms reach—no more searching for a plug to power your devices.
Watch the video to see HGTV's Peyton Lambton guide you through the steps to a functional nightstand. Then keep reading for step-by-step instructions you can pull up as you DIY!
Skill Level: Beginner
Time Required: 30 minutes to 1 hour
What You'll Need:
- Nightstand with drawers
- Power strip cord
- Power drill
- Circular drill bit
- Velcro
- Cleaning cloth or rag
1. Drill Your Hole
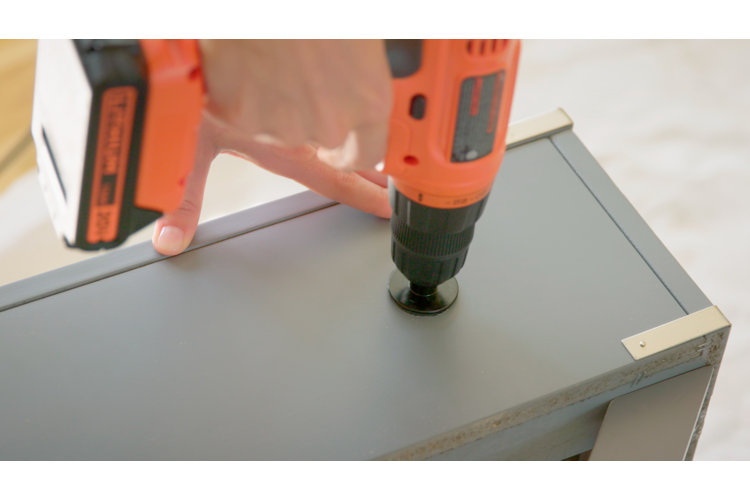
First, place your nightstand on its side on a flat surface. With a circular drill bit, drill a hole through the back of the nightstand, behind and through the top drawer. The hole should be large enough to fit the plug of your power cord. Wipe off any sawdust with a damp cloth.
2. Add the Power Strip
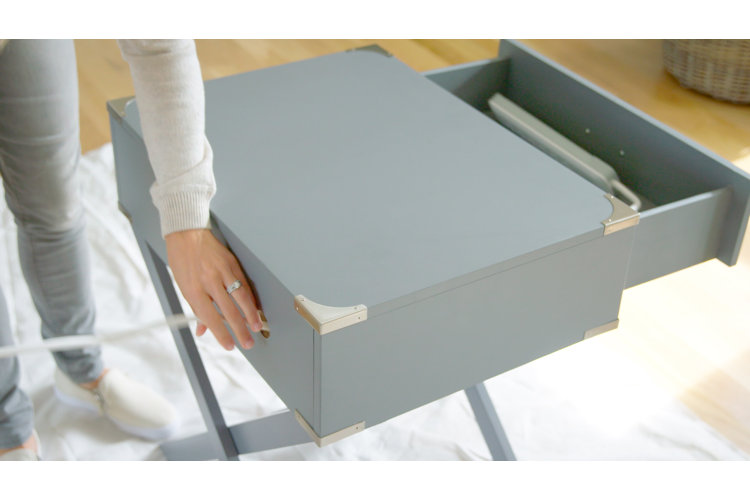
Next, place the power strip in the top drawer of the nightstand. Thread the cord and plug through the back hole, and plug into the nearest outlet.
3. Attach the Power Strip With Velcro
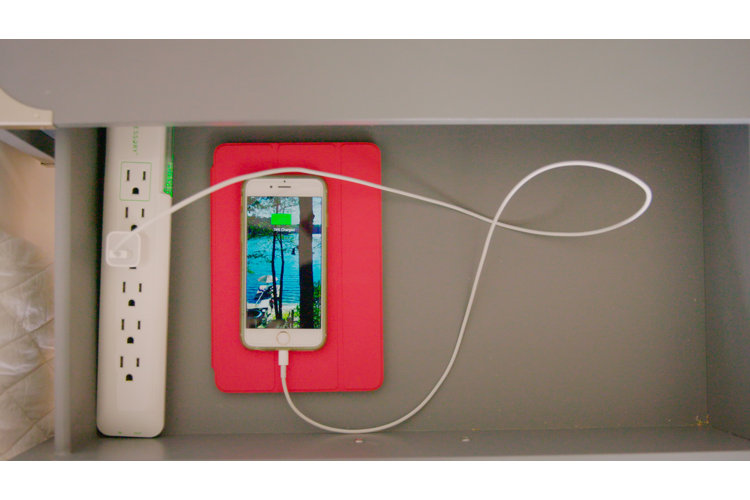
Finally, secure the power strip to the bottom of the drawer with sticky Velcro dots so it stays in place and doesn't rattle around. With all the cords and gadgets hidden away, the nightstand is clutter-free and ready for a beautiful arrangement of small decor items and must-haves.
Tip!
Check out How to Hide Wires: Conquer Cord Chaos in 5 Easy Steps for more ways to keep your electronics organized and clutter-free.
