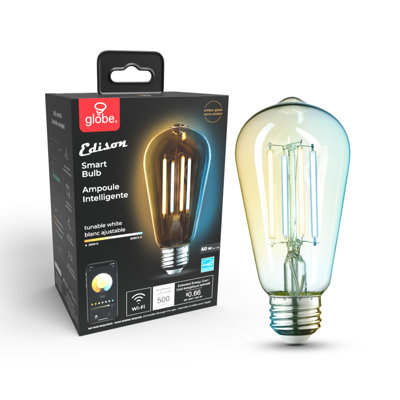
Livraison gratuite
Recevez-le entre le 1 juin-4 juin
à
M4C 1B5

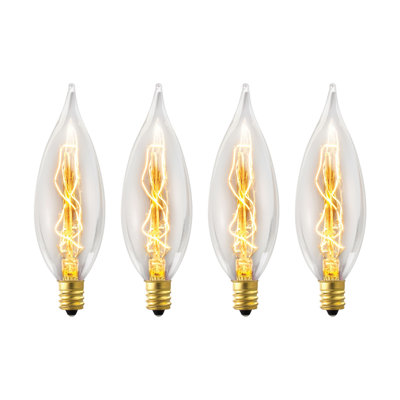
Longueur ajustable

Pavillon inclus

Culot de l'ampoule: E12 / culot de type candélabre

Assemblage requis

Accumulez {RICH_TEXT_POTENTIAL_REWARDS} en récompenses, avec une remise de 5 %¹, en plus d’autres avantages exclusifs.

À propos de ce produit
Caractéristiques
Autres dimensions
Détails
Certifications
Assemblage
Garantie
Documents
Pas convaincu? Les retours sont offerts pour la plupart des articles dans les 30 jours suivant la livraison pour un remboursement ou un bon d'achat.
Apprenez-en plusNoté 5 sur 5 étoiles.
Avis 1-3 de 3
Noté 5 sur 5 étoiles.
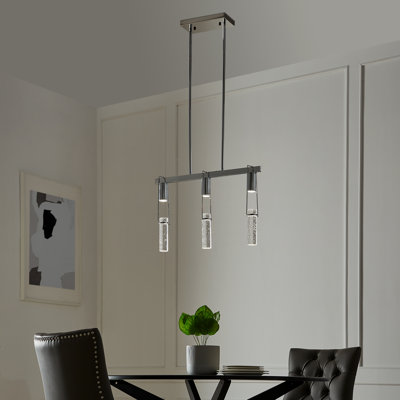
We have been waiting to change out our dining table light for awhile. And this light is a beautiful upgrade to that room. It is very well made. However, it is definitely a light for the advanced installer. I have been replacing all of our fixtures in our house and this one was challenging. Some tips: This light is probably best for a flat ceiling. My ceiling has a slight angle. The description said it was adjustable, but that only means you can vary the height by how many down-rods you use. I was able to make my light work with my angled ceiling by adding one link of chain between the canopy and the quick-link provided. I got lucky and had some extra chain from another light product. The light hangs perfectly level. First, install the bracket in the ceiling and test fit the rectangular canopy cover that fits over the bracket and wires in the ceiling. Get that figured out first because it is difficult to get the two screws to go through the holes in the canopy. You will have to make some adjustments to the bracket screws which are 5-inches apart. Make sure you get proper fitment of the canopy because the full weight of this light fixture will be hanging from it. Take your time to get this correct. Take the light out of the box. It will be easier to install the glass pieces at this point rather than trying to attach them when the light is hanging. You need small hands to screw in the trim rings that keep the glass pieces in place. Attach the down-rods to the light. Be sure to check all the set-screws on the down-rods. Pass the wire through one down-rod. They give you lots of wire. Once I had the down-rods attached, I put the light on top of a ladder to get it closer to its final destination. There are a couple of quick-links that are used to attach the light to the canopy. I trimmed the excess wire and attached them to the ceiling wires. Then I had another person lift the light upwards while I tucked the wires and positioned the canopy into place. Once I got the two screws through the holes, I quickly fastened it into place with the screw bolts. Install your bulbs and enjoy!
Noté 5 sur 5 étoiles.
Purchased for my entry way. Worked perfect! Has an industrial, yet warm effect.
Noté 5 sur 5 étoiles.
I love it
Noté 4.9 sur 5 étoiles.9 votes au total
Noté 4.2 sur 5 étoiles.32 votes au total
Noté 4.7 sur 5 étoiles.242 votes au total