DIY 101: How to Build a Leaning Vertical Herb Garden
A few simple tools and a little bit of elbow grease!
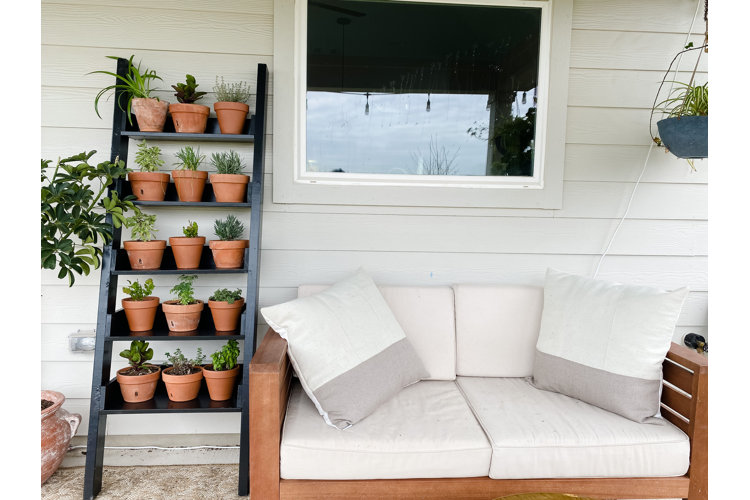
If you’ve always wanted an herb garden but thought you didn’t have the space, then think no further! These leaning herb garden ideas take advantage of the vertical space you have outdoors that is going unused so you can grow an herb garden just about anywhere.
You can build this easy wall garden in an afternoon out of cedar so it will withstand years of use. Add a built-in drip watering system to easily keep your plants watered all summer.
Here is a list of materials you will need to build your garden
- Half sheet of 3’ x 4’ exterior-grade plywood
- Three 8’ 1 x 4 cedar boards
- Two 6’ 2 x 4 cedar boards
- Two pieces of 3 x 4 feet trim, style of your choice
- Wood glue
- 18-gauge nailer
- Level
How to Build Shelves
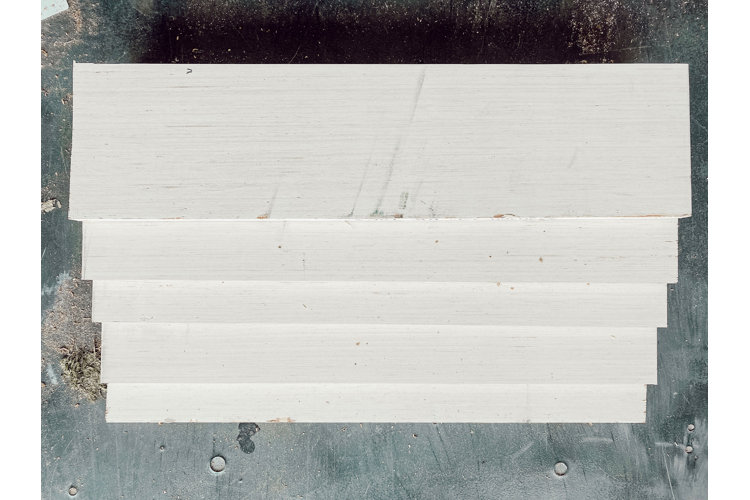
To build the shelves for your leaning herb garden, you’ll need a half sheet of 3’ x 4’ exterior-grade plywood.
These plywoods should be cut in this order as they will act as the bottom of the shelves:
22” x 5.5”
22” x 7.5”
22” x 9.5”
22” x 11.75”
22” x 14”
Then, cut five pieces of 1’ x 4’ cedar wood to 22” – these will be the back of your shelves and will be what rests on the wall. Use wood glue and nails to attach the back of the shelves to the plywood. Be sure these are installed at a right angle (90 degrees) and you can use a speed square to help ensure they’re straight.
Repeat this process for each of your shelves, until you have five shelves of increasing depth.
Next, take each 2’ x 4’ inches piece of cedar and cut one end at a 10-degree angle. Be sure the side pieces are the same length! These will be the legs of the ladder and what holds the shelves in place.
For this next part, having a second pair of hands is incredibly valuable! Start with the bottom shelf and attach each shelf to the side pieces using the wood glue and 18-gauge nails. Use a level to ensure the shelves are level in every direction before attaching them.
Wood glue and two or three 18-gauge nails is enough to hold the shelves in place, but you may want to use a clamp while the glue dries. Everything will be a little unsteady until you have at least two shelves in place. We recommend installing the bottom shelf first, then the top shelf, and then the shelves in the middle.
Spacing will work out nicely if you simply place the shelves so that the front of the shelf lines up with the front of the 2’ x 4’ inches side pieces.
Once all five shelves have been installed, you’re ready to attach the sides of the shelves. Grab a 1’ x 4’ piece of cedar and hold it up to the shelf, then mark where it needs to be cut along the angle of the 2’ x 4’s. It should be a 10-degree cut again. Cut a piece for each side of the shelf, then attach using wood glue and nails. You should attach the side pieces to both the 2’ x 4’ support and to the back support of the shelf.
Finally, cut your 3 feet by 4 feet trim pieces to length and attach to the front of each shelf.
Lastly, prime and paint your shelf in your desired color! Be sure to use exterior-grade paint for the best, most long-lasting results.
This leaning herb garden is a great way to display all of your container plants this spring and summer!
If you use all exterior-grade wood, it should be fine either under a covered patio or exposed to the elements. You can stain or paint it; if you just use stain, it will last longer if you seal it with an exterior-grade sealer like a spar urethane. And, of course, if you’d prefer to display your plants indoors, you can just use interior-grade plywood and pine to build your shelf!
Amanda Hendrix is the blogger behind Love & Renovations, a site all about how to make your house a home, even if you don't have any DIY experience. Amanda shares real life, accessible projects with all of the messes, mishaps, and fun along the way!
