How to Build a Simple DIY Garden Planter Box
Make gardening easy!
Planters are an easy way to add seasonal color to your porch or patio. Planters are usually made of wood, metal, or plastic and come in many different sizes, shapes, and styles. It’s quite common to have planters on either side of a garage or front door, under windows, or along the corners of patios or porches.
Building a planter from scratch gives you the benefit of being able to design exactly the size, shape, and style that best fits your space. You also can select the materials that are within your budget.
Things to Consider When Designing Your Planter
When you are designing your planter, keep in mind the space that you plan to put it. If it is a narrow space, consider tall, slim planters. If it is a small porch, consider window boxes that don’t take up too much square footage. In general, larger planters look better from the street than small ones, so go as big as your space allows.
Additionally, you will want to consider the types of plants that you plan to put into the planter. If you want draping plants like ivy, you can get away with a narrower planter. If you want rows and layers of plants, you will need to design a deeper planting area. (Note that a hanging planter box will require more support.)
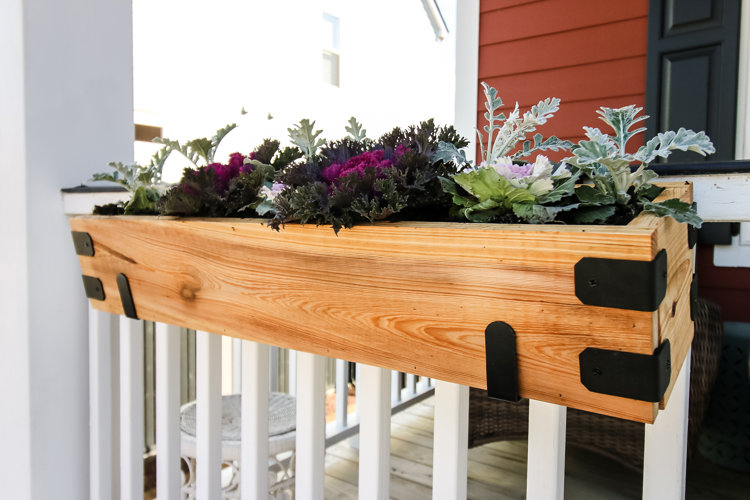
You will also want to select materials that are safe for the outdoors. Woods like cedar and cypress are naturally rot-resistant and will stand up to the elements. You can also select treated wood, which is treated with chemicals to resist water. Treated wood is not recommended for plants that you might eat, such as herbs or vegetables, because of the chemicals. You can use regular wood and treat it with an outdoor sealant as a protective coat.
Finally, you want to consider the general design of your home and outdoor space and build a planter that matches. If you have a more craftsman-style home, you might want to add Shaker-style molding. If your home is more modern, you can play with interesting angles or add modern metal hardware.
How to Build a Planter Box
Estimated cost to build a planter:
The cost to build a planter will vary depending on the exact materials that you select. Our sample homeowner made this planter with one board of cypress that cost approximately $20 at their local hardware store.
Supplies & Tools Needed:
- Wood
- Wood glue
- Nails
- Hanging hardware
- Optional: paint, stain, or sealant and brush to apply
- Optional: decorative hardware
- Circular or miter saw
- Sander
- Nail gun, hammer and nails, or drill and screws
Step 1: Cut your wood.
Cut your boards to create a front, back, two sides, and a bottom piece for your planter. The sizing that you choose will depend on the finished size of the planter that you want.
Step 2: Sand your boards.
Sand the cut edges and flat surfaces of all boards.
Step 3: Assemble.
Each side of this planter will be assembled by putting a line of wood glue on the seam and then pressing the boards together and nailing in place. A nail gun is the fastest way to do this, but you can also use a hammer and nails or a drill and screws if you do not have a nail gun.
Assemble your planter by attaching the two short sides to the long front piece and then attaching the back to the two short sides. Finally, add the bottom.
Step 4: Paint or stain.
Apply any paint, stain, or oil and allow to dry.
Step 5: Add decorative hardware.
Add decorative hardware if desired to give the piece a more distinct style.
Attach any hanging hardware if you plan to hang it, or just set it on your porch. Enjoy!
Morgan McBride is DIY lover and home decor enthusiast living in Charleston, South Carolina. She has been blogging at CharlestonCrafted.com alongside her husband since 2012, where they empower their readers to craft their home into their dream home through the power of DIY.
