Chandelier Installation 101: How to Install a Chandelier
Realize your ceiling's full potential.
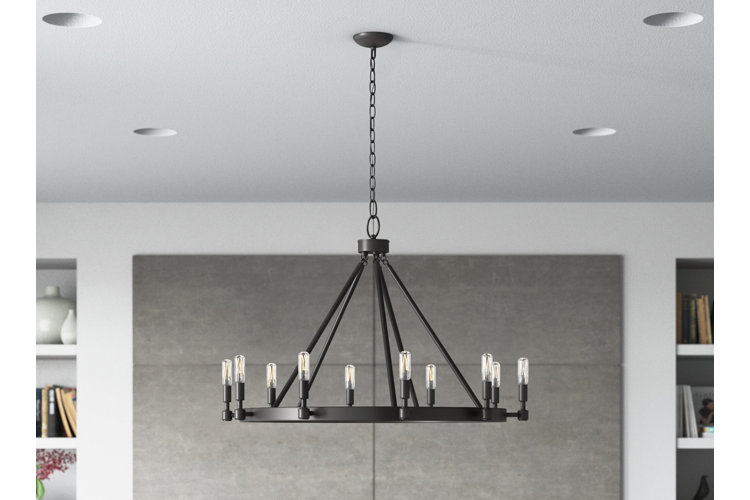
Chandeliers add decorative flair and accent lighting to any room, which makes them a go-to decor option when looking to update the interior of your home. Follow these steps to install one successfully.
Time Required: Approximately 2 hours
Number of People: 2–3
What You'll Need:
- Wire cutter (to trim excess or damaged wire)
- Wire stripper (to prep chandelier wires)
- Wire connectors (to connect and secure wires together)
- Voltage meter (to check for hot wires in the ceiling box)
- Pliers (to add or remove chain links from chain-hung chandeliers)
- One or two 6' or 8' ladders (to accommodate your ceiling height)
- Power drill & drill bits (to make installation quick and easy)
- Tool kit with screwdrivers (preferably a flathead and a Phillips, or others specified by the manufacturer)
- Notepad & pencil (to record measurements)
Important Note:
Working with electrical components requires a certain amount of knowledge and safety precautions. For this reason, we highly recommend enlisting the help of a licensed professional electrician to ensure a smooth, stress-free experience. Many chandelier products on Wayfair have an option for professional installation when you go to add the product to your cart!
1. Choose the Right Installation Spot
First, pick out the right installation spot. Most rooms may have electrical boxes (also called ceiling boxes) located in the ceiling that already have supports and electrical wires routed to the spot. Your ceiling box will look like a visible hole in the ceiling unless it is already occupied by a light fixture you want to replace. If you want to install a chandelier in a location without an existing light fixture or ceiling box, you may need to install the ceiling box yourself (this likely requires professional help unless you have experience with routing electrical wires).
Once you have your spot picked out, you also need to think about what chandelier type would suit the ceiling. Some chandeliers are designed to hang from high or sloped ceilings to help maximize your options. Other models are made to withstand moisture and water exposure, which makes them perfect for bath or shower rooms.
2. Measure the Floor-to-Ceiling Height
This is where you'll need a ladder and an extra pair of hands! Even if you have an idea of how tall your ceilings are, it never hurts to check.
- Have a helper keep the end of the measuring tape on the ground as you measure up to the ceiling with the assistance of a ladder.
- Record the height in feet (or inches to convert to feet). The general rule of thumb is that you should have at least 3" of chain to hang the chandelier for every 1' of floor-to-ceiling height.
- For example, if you have 8' ceilings, you need a minimum of 24" of chain to hang the chandelier from.
- You also need to take into consideration the size of the chandelier itself and how that could impact its hanging height. This is because the chandelier will hang down from the bottom of the chain and add additional length to the display.
- Planning to hang your chandelier over a dining table? Position your tape measure on the table surface instead of the floor and measure to the ceiling that way.
Tip!
Opt for a chandelier with an adjustable-height feature if you want more flexibility in terms of hanging length. You can also always add additional chain links if needed.
3. Purchase & Put the New Chandelier Together
Now that you've established the best installation location and chandelier size for your ceiling, it’s time to find a model you love and put it together.
- Review our Chandelier Buying Guide to make sure you choose the best option for your space.
- Then, put it together following the instructions provided by the manufacturer for your specific chandelier to ensure the best results.
- You may need a tool kit to help put the chandelier together, but some chandeliers come with tools designed for the specific model.
- Check the specifications tab on the product page to determine if the chandelier you're planning to purchase comes with tools or not.
Tip!
Do not attach the lightbulbs to the chandelier yet. This prevents them from accidentally falling or breaking during the installation process.
4. Turn Off the Electricity
This is a key step in the installation process that ensures your safety.
- First, you need to find your home's main circuit breaker. This is a large electrical panel (usually located in the basement) that has individual circuits for each room in your home.
- Find the circuit for the room where you want to put the chandelier and switch the circuit to the “off” position.
- This disrupts the electric current to that part of your home and makes it safe for you to work around and engage with electrical wires.
5. Check Light Switches in the Room Before Beginning Installation
Turn each light switch in the room on and off to make sure none of the other light fixtures or home appliances are still turned on. If they are, this means there is still an active electrical current and it isn't safe to start working. If none of the light fixtures or appliances respond to the light switches being turned on, you are good to continue.
6. Remove the Current Light Fixture From the Ceiling Box
You can skip this step if you're working with an empty ceiling box and there isn't another light fixture occupying the space! Use a ladder to access the current ceiling fixture. Have an extra pair of hands close by to pass you screwdrivers and to help you lower the light fixture from the ceiling.
- If there are visible lightbulbs, unscrew them and store them away now to prevent breakage during the removal process.
- Unscrew the light fixture's canopy to reveal the ceiling box and wire components.
- Untwist the wire connectors that are connecting the light fixture's wires to the ceiling box's wires to free the fixture wires.
- Have another pair of hands to help hold the light fixture as you unscrew the mounting bracket (the support system that attaches to the ceiling box and holds the light fixture in place). This might require your helper to also be on a ladder.
- Gently lower and remove the light fixture and its mounting bracket from the ceiling box.
- Look over the wires in the ceiling box (there's usually one black wire that conducts a current and one white wire that acts as a neutral component).
- If you are unsure which wire is a “hot wire” (the one that conducts electric currents), you can use a voltage meter. These devices detect hot wires when held up to a wiring system.
- This ensures that you match the right wires together when installing the new chandelier.
- You should also use this time to look at the existing wires in the ceiling box. If you notice fraying or damage to the end of the wires that could be hazardous, you'll need to make adjustments.
- If there is damage, use a wire cutter to remove the damaged ends and a wire stripper to remove 0.5" of insulation from the wire. This results in a clean wire that will conduct electricity safely and efficiently.
7. Secure the New Chandelier's Mounting Bracket to the Ceiling Box
The next step is to attach the chandelier's mounting bracket (the support system that attaches to the ceiling box and holds the light fixture in place) to the ceiling box. Use a power drill and appropriate screws (these should come with the product) to drill the mounting bracket into the ceiling box. Once you're satisfied that it's secure, you're good to move onto the next step!
Tip!
Ceiling boxes can usually hold 50 lbs. to 70 lbs. of weight, so make sure to check the weight of your chandelier before you hang it up. You may need to add additional supports to your ceiling box – a process that requires professional assistance.
8. Install the Chandelier's Canopy
Now it's time to install the canopy (a decorative plate with a central hole through which the chandelier's mounting stem/cord/chain connects to the mounting bracket). The canopy helps cover the ceiling box and mounting bracket components for an aesthetically-pleasing look.
- You may or may not need another pair of hands to help hold the canopy as you turn or screw it onto the end portion of the mounting bracket.
- You need to install the canopy now because you won't be able to install it after you add your chandelier.
- As a heads up, you will have to loosen it to access the ceiling box and thread the chandelier wires through in Step 12.
9. Secure the Chain or Hanging Mechanism to the Mounting Bracket
Most mounting brackets have a hook or hanging mechanism designed to support/hang the chandelier. Make sure to follow the manufacturer's instructions for your specific model and mounting bracket. You might not need to complete this step for cord or downrod varieties that are pre-attached to the chandelier.
10. Connect the Chandelier to the Chain/Hanging Mechanism
Once you have your hanging mechanism securely attached to the mounting bracket, you can hang up your chandelier. Have a helper assist with passing the chandelier to you and supporting its weight as you secure it on the chain/hanging mechanism. Take a moment to inspect the length of the chandelier in its current hanging position. Use a pair of pliers to add or remove chain links to achieve the desired hanging length.
11. Thread the Chandelier's Wires Through the Chain
If your chandelier has a downrod hanging mechanism (with the wires already secured inside) or a cord mechanism (where it's just the electrical cord), you can feel free to skip this step.
- Threading the wire through chain links helps disguise the electrical wiring and keep it from looking messy.
- Keep in mind that you don't have to thread the chandelier's wires through every chain link.
- Thread it through a few of the chain links – once at the bottom near the chandelier, once in the middle of the chain, and once at the top, close to the canopy. You can make adjustments if needed.
12. Unscrew the Chandelier's Canopy to Access the Ceiling Box
Unscrew the chandelier canopy to regain access to the ceiling box now that your chandelier is attached and ready to go so you can access the wires and complete the electrical portion of installation.
13. Use Wire Cutters to Cut Excess Wire From the Chandelier
Before you go further, stretch the rest of the chandelier's wires up to the ceiling box. Allow for an extra foot of wire than you think you will need, so if you mess up, you have more wire to work with. Use wire cutters to remove the excess wire from the chandelier. You should still have a generous piece of wire to work with.
14. Thread the Remaining Wire Through the Canopy
Using your hands, thread the rest of the chandelier's wires through the hole in the center of the canopy and up into the ceiling box. Thread them back downwards through the mounting bracket so you can connect them to the ceiling box wires with ease. At this point, the canopy should still be unscrewed from the ceiling box.
15. Remove Insulation From the Chandelier's Wires
Use your tape measure to mark 0.5" on the end of each of the chandelier's wires. Then, use a wire stripper to strip the insulation from the 0.5" marker to the end. The result should be exposed electrical wire at the ends. This is the portion that will connect to the ceiling box wires.
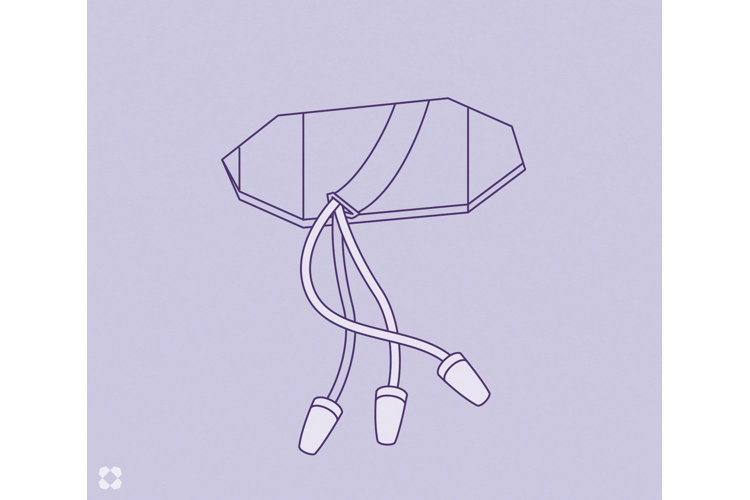
16. Use Wire Connectors to Attach Wires From the Chandelier to Those in the Ceiling Box
In the ceiling box, you typically have one hot wire (usually black) and one neutral wire (usually white), but there may also be a ground wire (usually copper) to help prevent electric shock if you touch metal light fixtures and other materials when an electric current is present. Your chandelier may only come with a hot wire and a neutral wire. In which case you should leave the ceiling box ground wire alone (make sure it's covered with a wire connector). But if it does come with a third (ground) wire, you need to connect it to the corresponding ceiling box wire.
- When it comes to connecting ceiling box wires to the chandelier wires, you want to pair like with like. This means pairing hot wires with hot wires and neutral wires with neutral wires. If you don't, it could cause a blown fuse.
- Position the end of the hot wire from the ceiling box and the hot wire from the chandelier next to each other. Twist the ends together. Then twist on the wire connector. Repeat this process for the other wire(s).
- Be sure to reference the chandelier's instruction manual to identify which wires are which and to gather further information about how to install them properly.
17. Reinstall the Canopy
With wires connected, you can reinstall your chandelier canopy. Twist or screw it into place on the mounting bracket so that it rests perfectly against the ceiling and covers the ceiling box.
18. Add Lightbulbs to the Chandelier
Now you can screw on the lightbulbs that came with your chandelier or your own options that match the voltage requirements of the chandelier model.
19. Turn the Power On & Enjoy!
With your chandelier installed, you can now go back to the main circuit breaker and switch the circuit for the room back to the “on” position. Then turn on the light switch. Now for the fun part – sitting back and admiring your hard work!
You Might Also Like
Glow-up your interiors, now!
