DIY 101: How to Build & Enjoy a Fire Pit
Are you in need of a perfect spot to cozy up in your home? Learn how to build a fire pit.
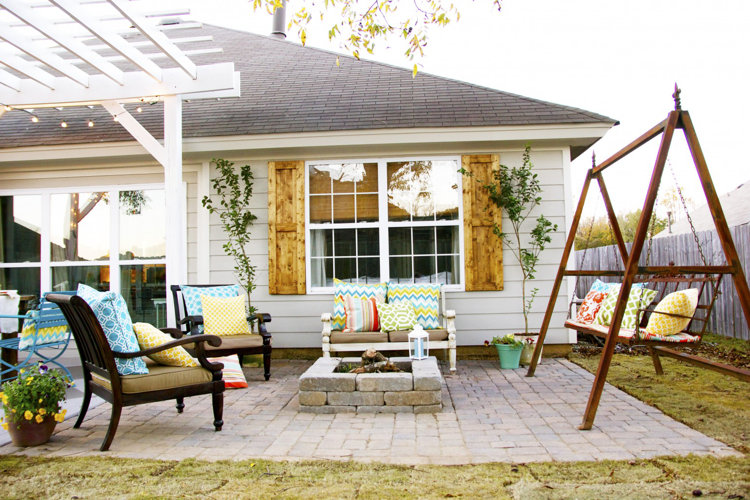
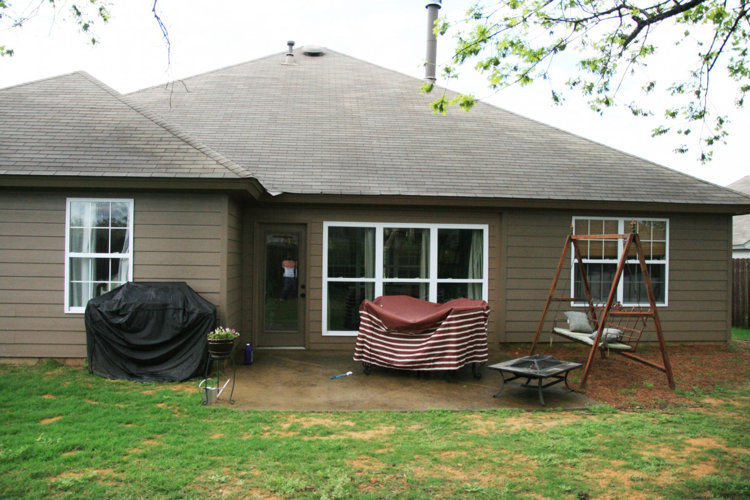
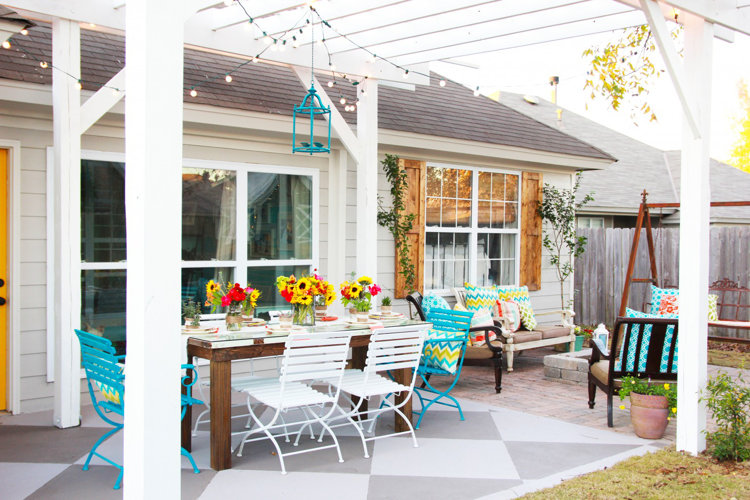
With cooler weather on the horizon, this is the perfect season to start thinking about enhancing all things outdoors. It's also a great way to add value to your home. Nothing says cozy and comfortable like flames crackling in a backyard fire pit. When our sample homeowners bought this house, the backyard was a little plain and drab. But the family upped the ante with this fire pit and its amazing gathering potential.
Imagine gathering with friends and family sipping wine, roasting hot dogs, and making s’mores around your own fire pit during cool fall nights. Relax and enjoy this easy project that takes a weekend of time with big returns.
Basic Steps to Building a Fire Pit
Size & Location
This family expanded their existing patio to make it a larger gathering spot. Planning ahead of time is the key to making the most of the space. So mark out the area to decide how large it will need to be. Find the square footage of the patio. A quick reminder: The formula to determine the square footage of a space is length × width. This example patio is 10ʹ x 10ʹ, so the patio measures 100 square feet.
Gather Supplies
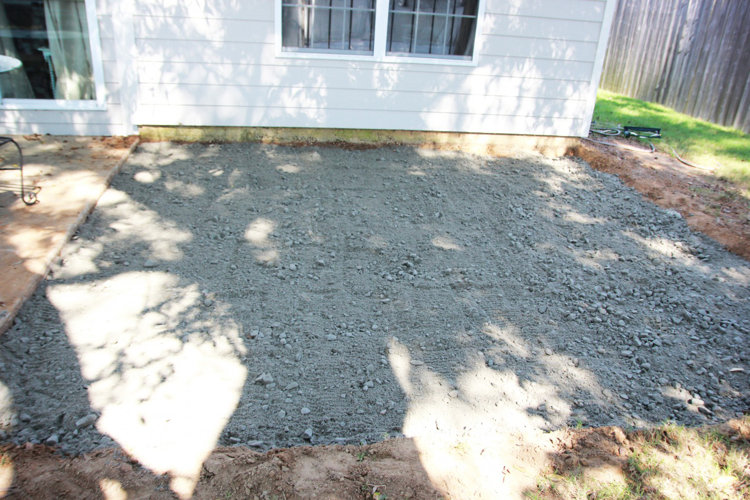
This particular fire pit was made from pavers as an extension of the existing concrete patio. So it helped to know how much material would be needed ahead of time.
• Crushed gravel: enough for a bed that is 3 inches (or 1/4 foot) deep. 100ʹ x 0.25ʹ = 25 cubic feet of gravel. If you have really soft soil, plan for a deeper base of gravel.
• Sand: enough for a bed that is 1 1/2 inches deep. 100ʹ x 0.125ʹ = 12.5 cubic feet. Make sure you have a little extra for filling in the cracks.
• Pavers: enough for the square feet of the patio. The amount you need will depend on the size of the pavers.Remember that you will not need pavers for the area covered by your fire pit.
• Tamper
• 2ʹ x 4ʹ x 10ʹ board
• Chisel or saw to cut the pavers
• Stakes to stake your corners
• String
• Brush
Side note about materials: Always add a little extra, just to be safe.
Total cost: The total rough cost of this fire pit area (including rental equipment) was under $1,000.
Place Stakes in All Patio Corners
First, place stakes in all four corners of your future patio. Next, run some string from corner to corner to define the edges.
Dig out the square formed by this boundary to form a depression that is 4 1/2 inches deep plus the thickness of the pavers. So if the paver is 1 1/2 inches thick, dig out the area to a depth of 6 inches. (3 inches for gravel + 1 1/2 inches for sand + 1 1/2 inches for paver = 6 inches.)
For a little extra money, you can rent a mini skid steer to save from manually digging... unless you want the workout.
Once you have the area ready, it's time to spread the gravel. Pour and rake it evenly across the patio area. Use your tamper to level the surface.
When the gravel is semi-level, spread the sand over the gravel. Rake it out and use the two-by-four to level the surface, starting at one corner and working your way to the far corner. Pour extra sand as needed so the ground will be level once the pavers are added.
Lay the Pavers
Begin in one corner, and work to the far corner. Spread a little extra sand while working to keep a level surface. Step back and check your progress every 10 pavers. Also, use a 4-foot level to ensure the pavers lay flat.
For the fire pit, make sure to measure out where it will go and build around it. Chiseling a few pavers to make everything fit may be necessary.
To chisel a paver, draw a line on the paver with a pencil. Then use the corner of the chisel to score the paver along the line (this will require you to run your chisel along the line a few times). Place the paver on soft ground to prevent bouncing. Place the chisel on the scored line and hit it with a hammer. The paver should break on the score. You can also cut the pavers using a saw and a diamond-tipped blade.
Double-check to make sure the ground is level once all the pavers are laid, and sweep a little sand into the cracks with the brush.
Make It Cozy
Adding some cozy outdoor chairs, pillows, and lights make your fire pit a one-of-a-kind space for everyone to gather. It's all about bringing the comfort outdoors for those wonderful, cooler nights. Gather the firewood, serve up some s'mores, and tell some fun stories.
Enjoy!
Jamin and Ashley Mills are the design duo behind The Handmade Home design studio in Nashville. They help clients locally and nationally achieve realistic, attainable homes while living by their mantra of "we don't believe in the dream home we believe in your home." They've been recognized nationally by numerous TV and media outlets as well as named as two of the most creative people in the country by Country Living Magazine. Check out their designs and creations at thehandmadehome.net as well as on Instagram, Pinterest, and Facebook.
