How to Build a Hydroponic Garden
Water your way to homegrown food.
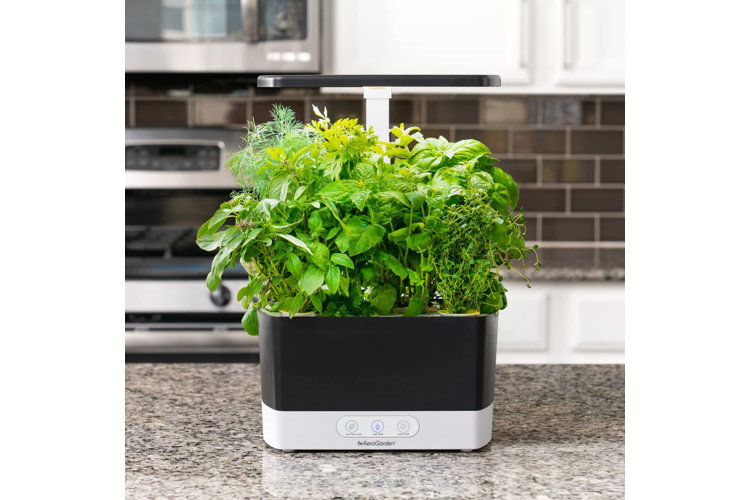
The hydroponic garden provides a functional alternative to traditional gardening for green thumbs and beginners alike. Whether you want to grow salad greens on your kitchen counter, have fresh herbs at your fingertips, or enjoy vibrant flowers – minus the soil – there are so many advantages to hydroponic gardening. But first, you need to learn how to build a hydroponic garden that works for your space and growing needs. Read further to get in on this savvy garden method and get growing!
What Is a Hydroponic Garden?
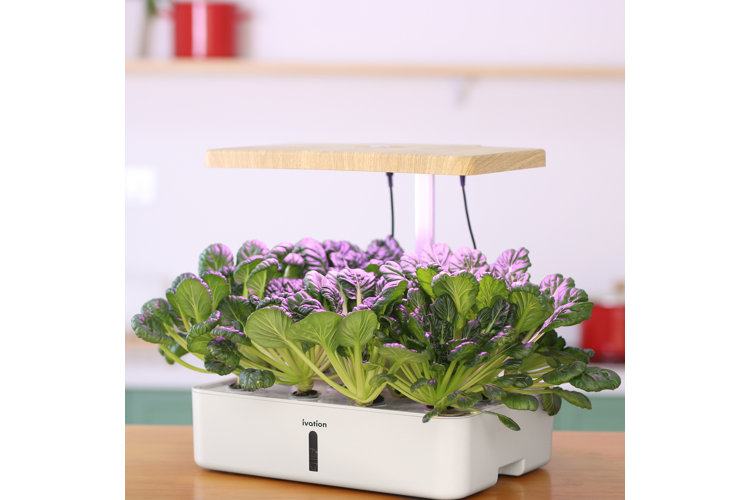
A hydroponic garden is a growing system that uses water instead of soil to grow a range of vegetables, herbs, flowers, or houseplants. Hydroponic gardens work well indoors because they only require non-soil material like coco coir and rock wool to get your seeds sprouted (already have established seedlings? You don't need coco coir or rockwool – just pop them into net pots to suspend their roots in water). This soil-free growing system also provides a healthy environment for your plants to grow because the lack of soil also means the lack of pests and diseases that come with it. The result? Fresh vegetables, fruit, and herbs (or flowers to admire) right in your own home with less mess!
With a better understanding of what a hydroponic garden is, check out this next section for everything you need to know for setting up a hydroponic system.
How to Build a Hydroponic Garden
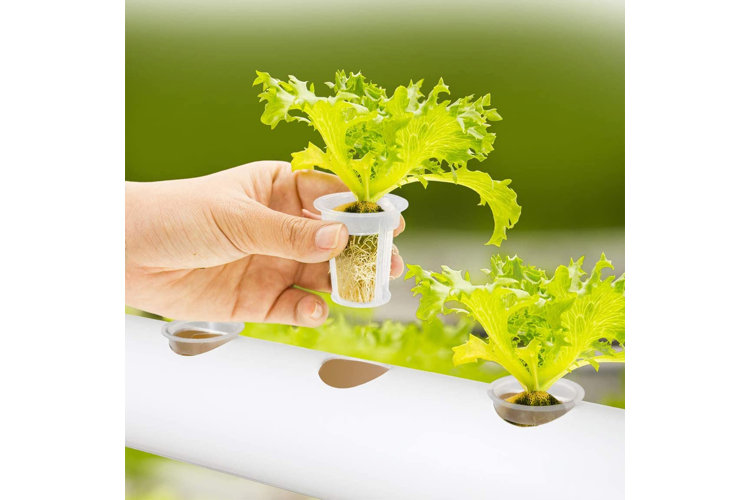
DIY hydroponic gardening is super beginner-friendly. There are a variety of ways to build your own hydroponic gardening system using basic items. Review the materials list below and read further to determine which building method works best for you.
Time for Completion: 1–2 Hours
Number of People Needed for Assembly: 2
Most steps can be completed by one person, but we recommend having an extra pair of hands to help hold pieces steady when you drill the holes in the PVC piping and/or the top of the reservoir lid.
What You Will Need:
Either a plastic storage tote with a lid, PVC piping, or a bucket and the following materials:
- Power drill
- Regular drill bit & hole saw drill bits
- Tape measure (to measure the spacing of each hole and the interior of the water reservoir)
- Pencil or marker (to mark and outline hole placement)
- Water reservoir (either a plastic storage tote with lid or a sealable bucket)
- PVC tees & elbows – optional
- Submersible water pump (to help sprayers maintain pressure and water circulation) – optional
- Drip emitters/sprayers (to keep water moving and prevent bacteria build-up) – optional
- Drain & drain hose (to help ease the water cleaning process) – optional
- Net pots (or plastic cups with holes in the bottom and sides)
- Seed pellets (preferably made of coco coir or rock wool)
- Neoprene collars (these hug the upper stem of the plant to keep them centered and sturdy in the net pot) – optional
- Seeds or freshly germinated seedlings
- Hydroponic nutrient solution
1. Pick Your Water Reservoir
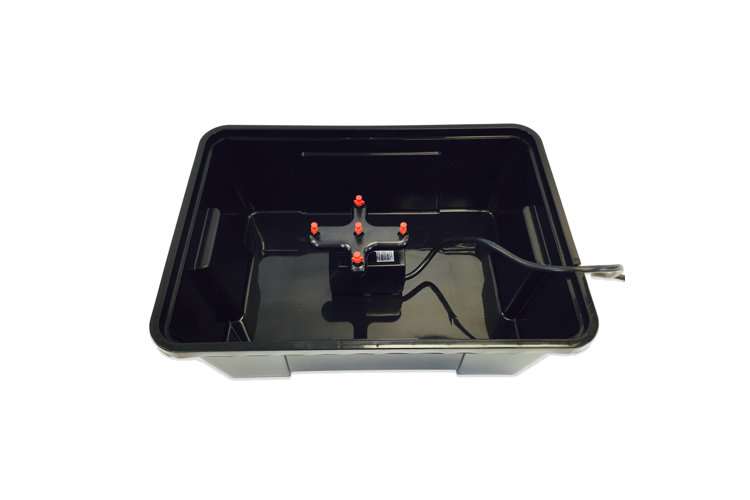
One of the most common hydroponic DIY systems requires a simple plastic storage container with a lid. However, you can also create a hydroponic garden using a bucket and other water-tight containers. Some designs include PVC piping inside the water reservoir to activate sprayers via water pumps and circulate water to ensure proper oxygenation and even watering throughout the container. We'll break down the steps for each method so you can decide the best option.
Tip!
Make sure to choose a container size that accommodates the number and size of the plants you want to grow. Typically, small- and medium-sized plants need at least ½ to 1 gallon of water each to thrive, while larger plants may need up to 2 gallons each. If you have a 10 gallon container, you should be able to grow 8 to 10 small-/medium-sized plants or 5 large plants.
2. Measure the Interior of the Water Reservoir Container (Especially if Using PVC Piping)
You should measure the length, width, and depth (height) of your water reservoir container to ensure you cut PVC pipes at the right lengths to fit snugly inside the reservoir above the water pump. Even if you don't plan to use PVC piping inside, it's still important to measure the depth (height) of the container because you want to make sure that the water pump or spraying mechanism isn't too large for shallow reservoirs.
3. Assemble the PVC Piping System (If Not Using This Method, Skip to Step Five)
Typically, these systems have six pipes that make up the outer and inner frame. These connect at each corner with PVC elbows. On either side of the structure, two pipes connect to a PVC tee, which connects the sides to the center of the frame. At the center is another PVC tee pointed downwards to attach to a water pump.
Tip!
When learning how to build a hydroponic garden, it's important to note that you can make PVC piping systems as elaborate or simplistic as you'd like. You can make it as simple as two capped pieces of pipe connected to a water pump by a PVC tee.
4. Drill Holes in PVC Piping & Add Sprayers
Mark one spot (or two for longer PVC pipes) on each piece of pipe (excluding tees and elbows) where you plan to insert sprayers. Spread the marks evenly as these determine where the sprayers will go (and could affect whether water sprays evenly throughout the container). Then, using a normal drill bit on your power drill, carefully drill into each of the marked spots on your PVC pipes. Refrain from drilling all the way through to the other side of the pipe as this could interfere with the water pressure. With the holes drilled, remove any remaining debris from the pipes and plug each hole with a micro-sprayer (sometimes referred to as spray nozzles).
5. Place the Water Pump in the Reservoir
You don't necessarily need a water pump (unless you're using PVC pipes), but they can help circulate the water to increase oxygenation and reduce a buildup of algae and bacteria. This ultimately helps your plants thrive with the right balance of air, water, and nutrients. There are a variety of pump types available so you can find one that works for your container size. Position the water pump in the center of the reservoir with the pump outlet pointing upwards.
6. Drill Holes for the Pump Cord and Drain Mechanism
Ensure the hole saw drill bit is large enough to fit the water pump's plug and cord through with ease. Drill the hole a few inches from the top of one of the sides of the reservoir and run the cord through. You aren't required to have a drain, but it makes it much easier to release old water without having to lift off the lid and risk hurting your plants and their root systems. If you do want to drill a drain hole, consider using a drill hole saw bit that's no more than 1"–1 ½" in diameter. Have someone hold your water reservoir container steady and drill a hole a few inches from the bottom of one of the sides of the reservoir. This ensures you don't drill through a seam and crack the container. With the hole drilled, seal it with a drain plug.
7. Add Water & Test the Pump System
Fill your water reservoir so that it's just covering the top of the water pump. If you aren't using a water pump, you can skip to step eight. If you are, plug in your water pump and observe its efficiency. You may determine you need to increase or decrease the pump's pressure to create the right spraying conditions throughout the PVC piping system or, generate the right level of air bubbles without splashing. This prevents leaks from overactive pumps or sprayers while ensuring there is enough water pressure to evenly water the entire space and generate oxygen.
8. Trace & Drill Holes Through the Container Lid
With the interior of your water reservoir complete, it's time to focus on the lid design. To start, place a net pot upside down so that the rim is on the lid of your reservoir. Use your marker to trace around the edge of the net pot. Allow for 1"–2" of space between each hole. You may want to take out your tape measure for this bit to ensure you're marking the same distance between each hole marker. Not only is this aesthetically pleasing, but it also ensures that your plants receive proper air flow once they’re mature. You may need to adjust the spacing between the holes depending on the mature size of the plants you plan to grow.
With this step complete, cut or drill inside the outlines you've drawn (this way, the net pots won't fall all the way through the holes). If using a hole saw drill bit, you'll want to make sure that the rim diameter of the hole saw bit is slightly smaller than the outline you drew.
9. Add the Net Pots, Seed Pellets, & Seedlings/Seeds
Once you have the holes drilled and the lid secured on your water reservoir, it's time for the fun part: adding the plants! Start by placing a net pot in each of the lid holes. If you already have established seedlings in seed pellets, go ahead and pop them in each net pot (stick to one seedling per net pot to allow it to mature and thrive). Place neoprene collars around each plant to help keep them secure.
It's also totally doable to start seeds in a homemade hydroponic system. Just make sure you provide a pre-made seed pellet like rock wool or coco coir (as it doesn't interfere with the water's pH) to keep your seedlings safe and moist. Pop a couple seeds in the seed pellet before putting it in the net pot. Repeat for each of the net pots. Refrain from adding a neoprene collar until the seedling has time to mature, otherwise, the collar might hurt the stems.
Filter for net pots on plastic planter pages using the "Search this Category" tab to the bottom left-hand side of the product page.
Tip!
The top of the water line should rest at the bottom of the net pot – any higher and the roots could rot. You want a good mixture of air and water inside the container.
10. Add Hydroponic Plant Food Regularly
When growing a hydroponic garden, you typically need to add a hydroponic nutrient solution every week to two weeks. This may vary depending on the types of plants you grow, how quickly the water level falls, or how often you change out the water. Always make sure to adhere to the product's dose and feed interval suggestions to ensure you provide the proper amount of nutrients to your hydroponic garden without overdoing it.
11. Encourage Healthy Growth With a Grow Light
Seedlings need adequate, consistent light in order to stay healthy and grow to their full potential. Pair a grow light system with your hydroponic garden to ensure you get bountiful harvests from your set-up. Grow lights are available in a variety of configurations including freestanding, wall-mounted, and hanging options so you can determine the right one for your space. Make sure to reference a grow light product's directions to determine how close it should be to your plants. Too close and grow lights can burn your plants, too far and they can cause stringy seedlings.
Tip!
Check out the 8 Best Grow Lights for Plants to pair with your hydroponic garden set-up.
Tips for Hydroponic Gardening at Home
There are a few things to keep in mind once you know how to build a hydroponic garden. Review these tips to ensure you grow happy, healthy, and hydroponic-suitable plants:
- Opt for Shallow-Rooted Plants: Lettuce greens and herbs do well in hydroponic environments compared to larger plants and vegetables. However, you can always use a deeper water reservoir if you want to grow larger tomato plants and other veggies. Container-friendly strawberries are also a fun option for hydroponic gardens. Root vegetables (carrots, potatoes, onions) typically don't work in hydroponic environments.
- Change/Refill Water Reservoir Regularly: Change the water in your reservoir every two weeks for larger containers. For smaller containers you may need to change or top-up the water as often as every few days to a week at a time. Just make sure to check the water levels each day to ensure the water line reaches a portion of the plant roots.
- Use the Cut-and-Come-Again Harvesting Method: For a lot of herbs and lettuce varieties you can use the cut-and-come-again method. For lettuce plants, this means only harvesting the outer leaves, working your way inwards until the plant goes to seed. For herbs, this means cutting the plant stems to encourage additional growth and prevent the herb plant from going to seed.
- Stagger Growing So You Always Have a Harvest: Planning a hydroponic lettuce garden? Try staggering the seed starting process so you have a few plants ready to harvest, and a few more not far behind. This way you won't have an abundance of one crop at the same time, allowing you to maximize the duration of your harvest.
Tip!
Get more inspiration with Indoor Herb Garden Ideas: How to Grow an Indoor Herb Garden.
Now that you know how to build a hydroponic system, get browsing!
