How to Install Baseboard in 10 Steps
Make baseboard installation easy.
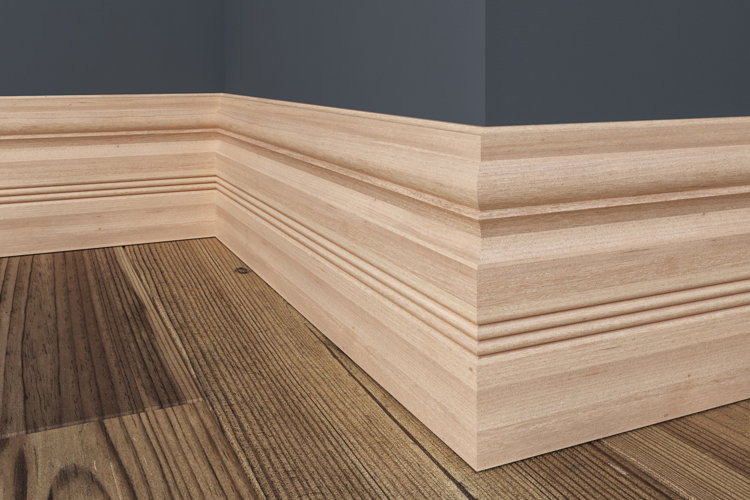
Baseboards are pieces of trim placed where the floor meets the wall to provide a polished finish that elevates the room. Knowing how to install baseboards can help you complete home renovation projects and boost your DIY skills. Our guide walks you step-by-step through baseboard installation, including tips on measuring, cutting, and removing your existing baseboard.
Tip!
Read our guide What Is a Baseboard? to learn more about this type of floor trim.
How to Remove Existing Baseboard
How to Install Baseboard
How to Remove Existing Baseboard
Before you can start installing new baseboards, you'll need to remove the existing ones. If you're working on a new build, skip to the section below to start the baseboard installation process.
What You'll Need:
- Utility knife
- Pry bar
- Sandpaper
Step 1: Cut Along the Top of the Baseboard
Use a utility knife to cut along any caulk or paint that connects the baseboard and the wall. This step will make it easier to pry the baseboards away from the wall and prevent the wall paint from chipping.
Step 2: Pry the Old Baseboards Away
Take your pry bar and slide the end between the wall and the baseboard, gently pulling the old baseboards from the wall.
Step 3: Clean Up the Walls
After you've removed the old baseboard, remove any nails that remain in the wall and use sandpaper to remove any leftover caulk or construction adhesive.
How to Install Baseboard
After you've removed the existing baseboard, it's time to start the new baseboard installation.
What You'll Need:
- Measuring tape
- Baseboard
- Level
- Pencil
- Chalk line
- Metal compass with a pencil
- Table saw or jigsaw
- Miter saw
- Coping saw
- Nail gun
- Nails
- Wood glue
- Primer and paint
Step 1: Measure the Perimeter of the Room
With a tape measure, measure the length of each wall. Installing baseboards on your own doesn't have to be tricky as long as you take a "measure twice, cut once" approach, so it's best to measure each wall two times. Write down your measurements so that you can reference them while purchasing your new baseboard.
Tip!
Make sure to add a few extra inches to account for outside corners. We also recommend purchasing extra baseboards just in case you make mistakes while cutting.
Step 2: Choose Your New Baseboard
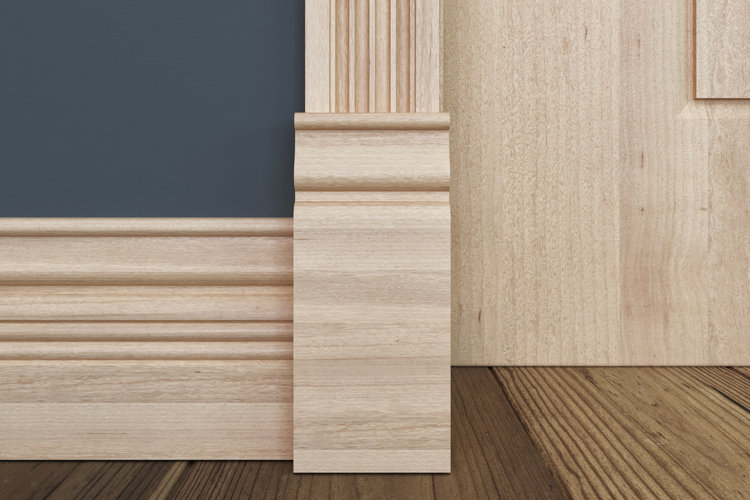
Once you have your measurements, you'll need to decide which baseboard works best for your space. There are three components that can make up a baseboard: cap molding, baseboard, and shoe molding.
- Baseboard is a flat panel that is typically between 3" and 6" tall. This makes up most of the general baseboard design.
- Cap molding is optional, decorative molding that is placed on top of baseboards. It is often paired with wainscoting or chair rail molding.
- Shoe molding is an ornamental piece of molding placed at the bottom of the baseboard. This type of molding is also optional and usually added when installing new flooring.
Step 3: Prep for Installation
Before you can start the baseboard installation, you'll want to prepare with these tasks:
- Take your baseboards inside, open the box, and let them acclimate to the temperature and humidity of your home for a few days. This helps the boards adjust to the atmosphere of your space so that they don't bend or warp after you've installed them.
- Most boards are 8' long, so you'll likely need to cut your boards to size. Measure and cut the boards to the correct size to fit the perimeter of the room, leaving an extra 6" of room when cutting boards that will meet at outside corners.
Step 4: Check Your Floors With a Level
Use a 4' level to see if your floors are level. Floors that have a slope less than ¾" are much easier to work with. If your floors are relatively level, you can proceed to step 6.
If your floors have a slope higher than that, use your level to find the lowest point in the room. Take a small scrap piece of baseboard and place it in the lowest point. Using the top of this piece of baseboard as a reference, create marks with a pencil on each side, staying level and marking every few inches. Use a chalk line over these marks to indicate where the top of the baseboard will be once it's installed. You'll use these lines later to ensure that your baseboard is level.
Step 5: Scribe If Needed
If your floors are too unlevel, scribing the bottom of the baseboards might be required. This process uses a compass (a small metal mathematical tool with a point on one end and a pencil on the other) to trace the odd or wavy edge of the floor to the bottom of the board, which will help you cut the board to create a custom fit.
To scribe, start by placing the baseboard at the bottom of the wall and setting your compass points ¼" apart. With the pencil side placed on the baseboard, slowly drag the compass along the floor to start outlining the entire length of the baseboard. This will mirror the unique surface of the floor so that you can cut the baseboard for a perfect alignment. Use a table saw or jigsaw to cut along the line that you just drew with the compass. After you've cut the baseboard to size, place it back against the wall to see if it lines up.
Step 6: Measure & Cut Outside Corners
When working with outside corners (where the boards meet on an exterior corner), start by placing the board at the bottom of the wall with one side fitted against the inside corner of the wall. Use a pencil to draw a vertical where the corner is on the back of the baseboard and mark that spot on the top of the board. Do the same with the other board. Use your miter saw to cut each piece at a 45° angle, sloping outward from your pencil mark. Put both boards back at the corner to see if they fit properly. If they join too tightly, use a sanding block to help achieve the right fit.
Tip!
It's best to cut your pieces of baseboard too long because you can always cut again or use a sanding block to create a well-fitting joint.
Step 7: Cut Inside Corners
For inside corners, you can connect them in one of two ways: mitered or coped joints. Mitered corners follow the same process above, but reversed so that the angled edge meets in the inside corner. Coped joints are great for corners that aren't exactly 90°.
To create coped joints, measure and cut one baseboard so that it fits against the wall and into the corner. Use a miter saw to cut one board with a 45° angle. This will be the coped baseboard. The other board that will fit into the corner does not need to be cut. The coped baseboard will have its angled edge that reveals the "profile" of the baseboard (the curved or sloped decorative features) against the plain wood beneath the paint. Take your coping saw and saw along the edge of the paint and plain wood, angling the cut so that you're undercutting the edge to create an inward angle. Sand the edges and place the coped board against the other board to test its fit.
Step 8: Create Scarf Joints
If you have two boards that meet in the middle of a wall, you'll need to make a scarf joint. Miter the two boards at 45° in opposite directions so that you can overlap the mitered ends.
Step 9: Attach the Baseboards
Align your boards and make sure that they line up with the chalk line you've created earlier. Once the boards are in the right position, use a nail gun to nail each baseboard to the wall. For outside corners, apply a small bead of wood glue to the mitered edges to ensure a tight joint.
Step 10: Add Final Touches
To finish your baseboards, you'll want to install any cap or shoe molding using the same steps you used to install the baseboard. Caulk the top edge, corner edges, and nail holes before applying a coat of primer. Then, apply a coat or two of your desired paint to complete your baseboards.
Tip!
Read our guides Types of Molding and Types of Floor Trim for Your Home to learn more about the other types of molding.
