How to Start a Garden Step-By-Step
Flowers, food, or both, here’s how to do it!
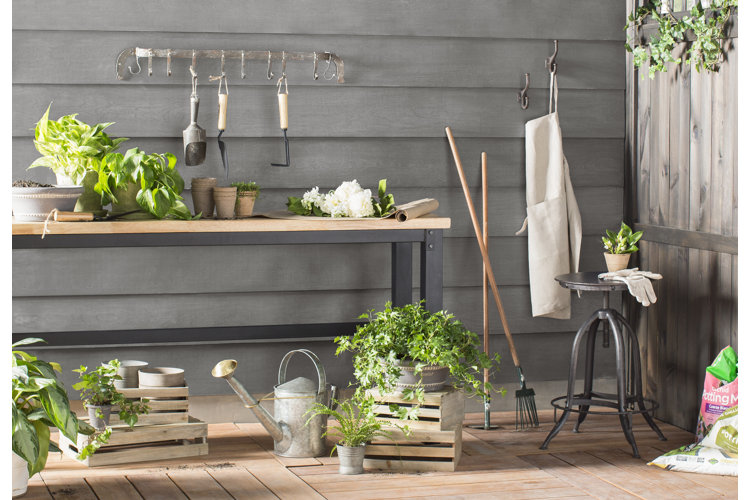
Starting and maintaining a garden can feel very empowering. Watching the plants you grow flourish into vibrant blossoms or delicious food can be very rewarding, but to reap what you sow (pun intended), there are certain steps you need to follow to ensure the process is done correctly. Here’s our beginner-friendly step-by-step guide on how to start a garden so you can enjoy your harvest.
How to Start a Garden
1. Decide What to Plant
Every plant – floral, herbal, or vegetable – requires specific care and placement in order to blossom to their full potential. Before you start buying materials and preparing your yard, decide what you want to plant.
Are you interested in a flower bed? Growing your own produce? If you are leaning towards a floral garden, decide which type of flowers and which season of flowers you would like to plant.. If you decide to plant a food garden, choose vegetables and herbs that your family already eats or would like to try. Each plant you choose comes with specific care instructions, which include where it grows best, how much water and light it needs, whether it’s an annual that will need to be replanted or a perennial that will come back on its own each year, and many more. Research is key at this stage if you’d like to have a successful garden!
If this is your first garden, the best rule of thumb is to start small. Since every type of plant has different maintenance needs, starting with a smaller garden will keep you from feeling overwhelmed as you grow accustomed to garden care.
Tip!
Be prepared for your plants to grow with our How to Repot Plants guide!
2. Select Your Gardening Spot
There are a lot of things to consider when finding the perfect spot in your yard for your garden. The best place to plant most floral and vegetable plants is an area in direct sunlight, since most plants require 6 to 8 hours of sun. Most plant tags and seed packets have time requirements printed on them for you to see how many hours of sun the plant needs. These tags will also specify whether you should plant in direct sunlight or partial sunlight.
Your gardening spot should also be mostly flat. Planting a garden on a hill or sloping area can cause problems in the future. It’s also more time-consuming to maintain a garden on a sloping area. Starting a garden on a hill can cause the soil to be too dry due to the unevenness of the land, which can make a garden difficult to maintain.
To really find the perfect garden location, you should spend a few days observing your yard. Watch where the sun hits at various times of the day and note what areas are mostly shaded. This way you will know where most of your sunlight hits so you can plant plants that require longer hours of sun in that area.
3. Gather Your Materials
When getting ready to plant, you should have the right materials on hand. Here’s a checklist of materials to help you ace every gardening project.
- Gardening gloves to protect your hands
- A spade for digging holes
- Gardening fork for turning the soil
- Hand trowel to remove weeds and move soil mounds
- Pruning shears to trim branches and keep your garden looking neat
- Rake for removing leaves or other debris in the yard
- Hoe to prepare your soil bed and remove weeds
- Gardening hose or watering tin for watering your plants
- Wheelbarrow or garden carts to move soil or other plants with ease
Tip!
For specific gardening accessories, read our 14 Best Garden Tools & Essentials guide to get your garden expert-ready!
4. Test Your Soil
Before you start tearing up the ground to get ready to plant, you need to test your soil. Testing the soil will indicate how healthy your yard is and if you need to fertilize it for your specific crops to grow.
When you test your soil, you will be testing for the pH level and its overall health. The best range for planting vegetables, herbs, or flowers is between 5.8 and 6.5. If your soil is too acidic (less than 5.8) or too alkaline (more than 7.5), you will need to treat your soil by adding fertilizer to neutralize the acid that is present in the soil.
Here’s step-by-step instructions for testing the pH levels of your soil at home:
Materials Needed:
- 1 tbsp measuring spoon
- Soil
- 2 bowls
- ½ cup vinegar
- ½ cup vinegar
- ½ cup baking soda
- Distilled water
Instructions:
- Gather 2 tbsp of soil and place it in your bowl. Add ½ cup of vinegar. If your mixture begins to fizz, this means your soil contains too much alkaline.
- Gather new 2 tbsp of soil and place it in another bowl. Moisten the soil with a splash of distilled water, then add ½ cup of baking soda. If your mixture begins to fizz, this means your soil contains too much acid.
If your mixture does not fizz during each test, this means you have healthy soil that is neutral and ready to plant!
5. Get the Ground Ready
Once you’ve narrowed down what you are going to plant and where, it's time to set the framework! Start by clearing the ground with a gardening hoe to remove weeds and strip the grass to get down to the soil in the location you plan to plant. You will need to loosen the soil with your spade so it’s easy to dig. When you loosen the soil, loosen it 8” to 12” down so your plant roots have enough room to grow down.
As you loosen the soil, it’s important to mix in at least 2” to 3” of organic matter to give your soil nutrients and keep it healthy during the planting and sprouting phase. Organic matter is very beneficial to your soil since it moistens it provides essential nutrients for plant growth.
6. Or Start on the Garden Beds
If you are opting for a raised garden bed (a garden bed in a planter that sits on top of your existing soil), then you will obviously not need to get your ground ready for planting.
Raised garden beds are planters that can be used to grow flowers or vegetables. They’re easier to maintain since the garden space is contained and does not require you to till the ground, and they give you the option to plant a garden anywhere, whether you’re working with a small yard, only have an apartment-sized patio space, or if you live in an area where the soil is hard to keep healthy.
Here’s how to start a garden in a raised garden bed:
- Select your aesthetic with a garden bed in a finish or color that speaks to your aesthetic and suits the size you need, both in terms of your location and considering the size and depth your desired plants need.
- Place your raised garden bed in a flat area of your yard.
- Fill the bed with soil mix that contains topsoil and compost to promote healthy growth. If you are planting vegetables, spread loam soil around. For flowers, use sandy loam. You do this by hand or by dumping the entire bag and spreading it out into an even layer.
- Soften the soil by mixing it with your hands.
- Dig a hole in your raised garden bed soil with a spade. Established vegetable gardens only need holes 4” to 6” deep whereas new gardens require 8” to 10”. Annual flowers need 12” where perennials need 18”.
- Plant your seeds or sprouts into the dug holes then cover them back up.
- Water and maintain your raised garden bed like you would an in-ground garden.
Maintaining a raised garden bed works the same as maintaining a garden in your yard. You still have to prepare the soil and water your plants daily. The biggest difference is that your raised garden does not have your garden sprouting from your yard, so it’s transportable and renter-friendly!
7. Start Planting
When your ground or raised garden bed is ready, you can start planting your garden! The planting process requires you to dig a hole in your soil to plant the seeds or sprouts. The typical rule of thumb is to dig a hole between 6” and 10” to plant your seeds or sprouts, but certain flowers or vegetables will have specific requirements. Be sure to check your seed packet or tags to find the appropriate length to dig.
Once you’ve dug a hole in your soil with your spade and placed your seeds or sprouts, cover the hole back up with soil. If you’re planting vegetables, add plant food to the soil and mix it together to provide nutrients for optimal growth. For flowers, coconut coir is a great addition to keep the soil moist and help it retain water so your plants do not dry out.
8. Care for Your Plants
Watering your plants daily is crucial for their growth. Most plants need to be watered every day, so make sure to add a watering can to your gardening materials. Watering cans are perfect for giving your plants the required amount of water at a slower pace so the water absorbs in the soil and doesn’t drown the plants.
As your plants mature and grow, you will not need to water them daily – cut it down to every other day or at least once a week. Keep in mind that plants that have been rained on do not need extra water, as this can drown them.
An expert tip (and optional step) for protecting your gardening area is to apply a layer of mulch over the top of your soil. Adding mulch has been known to prevent weeds from taking over your garden and to lock in soil’s moisture. If you decide to add mulch over your soil, you will not need to water your garden as often.
Mulch also nourishes the soil as it decomposes, which helps to keep the soil in a healthy state for your plants. Vegetables can benefit from mulch that decomposes within a few months, whereas flowers need mulch that lasts longer, like bark chips. Make sure the mulch matches the harvest time for what you’re growing to ensure your plants are receiving appropriate nutrients the whole time they’re growing.
10. Maintain Your Garden For Optimal Results
Garden maintenance is key for seeing results you’re proud of. To practice proper garden maintenance, stick to a watering schedule so your plants don’t dry out. You should also remove weeds before they start to seed and get rid of bugs that could be damaging your plants by picking them off or using pesticides.
If you’re planting vegetables that need extra support, like tomato plants or flowers that grow tall, plant a trellis around the stems. If you’re growing vegetables, make sure to harvest them at the right time to savor the taste and give your plants more space for more produce.
Starting a garden is a process you have to be dedicated to, but by following these steps, you will enjoy what you grow and feel proud to see your accomplishments!
Now that you know more about how to start a garden, it’s time to start planting!
