How to Use a Panini Press
Make perfect hot sandwich creations every time!
Does the thought of making a panini sound scary to you? Sure, paninis are fancy sandwiches, grilled to perfection, but the process of making a panini is not as daunting as it seems. If you’re craving a hot sandwich, here’s how to use a panini press to make your meals with confidence – and ease!
Step 1: Gather Your Ingredients
To make the process of grilling your sandwich easier, gather your ingredients (and items) before constructing your meal.
Here’s everything you will need to use a panini press:
Sandwich items: Bread, sandwich meat, cheese, toppings… have it all handy to build your sandwich once your panini press is hot and ready!
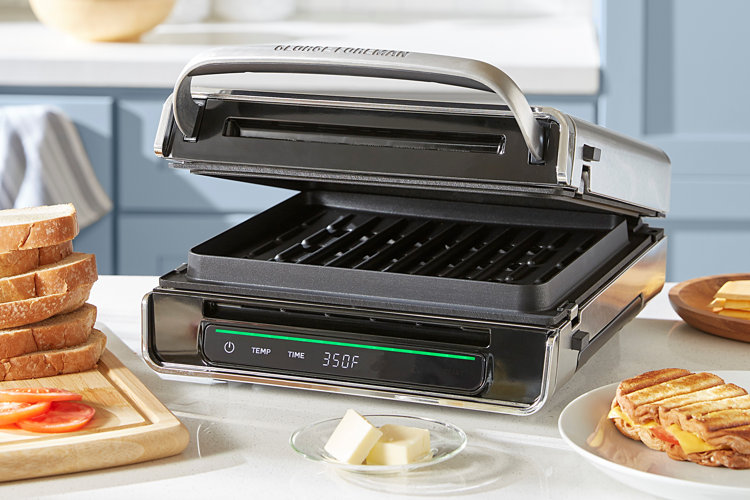
Panini press: The crucial element to making a grilled sandwich is the panini press, of course!
Meat thermometer: If your sandwich includes cooking raw meats, having a meat thermometer is necessary to check if the meat has reached a safe temperature.
Cheese plane: Get your cheese really gooey and melted to perfection with a cheese plane. These kitchen tools cut thin slices of cheese so the end result is soft and luxurious. Cheese planes work best for semi-hard cheeses such as swiss, fontina, or havarti.
Cheese grater: If you’re in the mood for shredded cheese, then opt for having a cheese grater. Cheese graters produce thin shreds of cheese to top your sandwich with and melt evenly. They work best with cheddar, parmesan, or pecorino romano cheeses.
Basting brush: When you coat your panini press with oil, a basting brush coats the griddle evenly so nothing sticks and burns during the cooking process.
Cutting board: Cutting boards are handy tools to set your sandwich on to cool after it comes off the press. A cutting board also gives you a firm foundation to cut your sandwich in half before plating.
Serrated knife: Cut your panini in half with a serrated knife. These knives are made with a sharp scalloped edge to cut crusty bread like a saw.
Spatula: To save your fingers from burning when it’s time to remove your sandwich from the griddle, let a spatula do the work by scooping it up and placing it on your cutting board.
Tongs: But if you want a stronger, sturdier grip on your sandwich, a set of tongs will work just fine too!
Plates: Of course, plates are essential for serving your sandwich and collecting crumbs or any falling pieces that spill out as you eat. You can even use the extra room to pair your panini with a pickle or some tasty chips.
Step 2: Plug In Your Panini Press
When you have all of your items ready to go, plug your panini press into the outlet and turn the panini press on.
Before plugging it in, inspect your panini press to make sure it’s clean and ready to go. If you need to wipe it down, use a clean, damp dishcloth.
Once your panini press is clean, turn it on. Depending on the settings your panini press has, you may have to set it to a certain degree that you want the press to cook on. The best temperature to use for a panini press is a medium to high temperature between 325° and 375°.
Step 3: Oil-up Your Griddle
As your panini press is heating up, rub some oil over the grill area so your food doesn’t stick to the grill and burn. You can use either cooking spray or a different oil you have on hand.
Regardless of which type of oil you use, take your basting brush and run the oil all over the grill to make sure it’s coated entirely. If your panini press has a non-stick coating, you can skip this step.
Step 4: Preheat The Press
Once you’ve turned on your panini press and rubbed it down with oil, it’s crucial to let it preheat so the plates are hot enough to ensure you get a crisp finish on your bread. Do this by closing the lid and allowing it to heat up for several minutes.
Some modern panini presses have a light feature that will light up to signify when it’s done preheating. If it doesn’t, close the top and let the panini press come to heat for at least five minutes.
Step 5: Build Your Sandwich
As your panini press is preheating, assemble your sandwich according to the recipe you are following, or however you would like to build it!
Tip!
While a packed sandwich is tasty, be sure to not overfill your bread! This can cause ingredients to spill over and make a mess on the press.
Step 6: Cook Your Sandwich
Once your panini press is done preheating and your sandwich is assembled, it’s now time to cook! Open up your panini press and carefully sit your sandwich onto the grill. Close the lid on top of the sandwich firmly and cook it according to the directions.
It typically takes sandwiches around three to five minutes to cook and get a golden, crispy exterior. If your sandwich is more packed, it may take longer, around five to seven minutes, to cook.
Step 7: Plate & Enjoy!
When your sandwich is ready to come off the panini press, turn off the press and open the lid. Use your spatula or tongs to remove the sandwich from the grill so you don’t burn your hands.
Place your sandwich on a cutting board and allow it time to cool (up to five minutes), before using your serrated knife to cut your sandwich in half.
Plate your cut panini sandwich and enjoy!
Step 8: Clean Your Panini Press
Wondering what to do when you’re done eating? Before you go any further with cleaning your panini press, make sure it’s turned off completely and unplugged.
Here’s how to clean a panini press so you can keep the griddle coating in good standing for future sandwiches:
Removable plates: Some panini presses may have removable plates that pop out the press. If yours has this feature, you can wash them like you would normally wash dishes with warm soap, water, and a soft sponge.
Steaming: If your panini press does not have removable plates, then this method is best. Start by making sure your panini press is slightly warm (this will help the water you pour on it later turn to steam and effectively clean). If your panini press has cooled completely, plug it back in and put it on the lowest setting to let it heat up for up to two minutes. Then, turn it back off and unplug it. Your griddle plates should not be scorching, but just warm enough to touch. Take a paper towel or dish towel and wet it. Using the damp towel, wipe away any grease or food bits on the griddle plates with the towel before letting it dry and storing it.
Now that you know how to use a panini press, it’s time to get cooking!
