Our Beginner's Guide on How to Make Beer at Home
Easy steps for brewing your own beer.
Whether you love craft beers or simply want to try your hand at home brewing, our guide will walk you through the steps so you can learn how to make beer at home. Keep reading to become the master of at-home brewing.
Before You Begin
How to Make Beer at Home
Before You Begin
Making beer at home isn't as difficult as you might think. All you'll need are a few affordable pieces of equipment and ingredients to try home brewing as your new hobby.
Key Ingredients
When making beer at home, there are a few key ingredients that you'll need.
Water: Water makes up almost 90% of the beer, so the flavor of the water can impact the taste of your beer. You can use bottled or distilled water if you don't like the taste of tap water. If you choose to use tap water, make sure to boil the water first so that the chlorine and other chemicals can evaporate. This ensures those chemicals won't affect the brewing process.
Malt: Malt adds the color, body characteristics, and a subtle sweetness to your beer. It comes in both extract syrup and powder forms to suit your recipe. Using malt extracts rather than mashing your own grains speeds up the brewing process and is a great place for beginners to start.
Hops: Hops are cone-shaped flowers that come from the hop vine. They add the right amount of bitterness to balance the sweetness of the malt. The hops also keep the beer fresher for longer and help the beer retain its foamy head.
Yeast: Beer yeast is specifically formulated for brewing beer. The active microorganisms in the yeast ferment the sugars in the beer and convert them into alcohol and carbon dioxide gas, which gives the beer a bubbly finish.
There are two broad categories for beer yeast: ale and lager. Ales are darker and more alcoholic while lagers are lighter and crisper.
Equipment You'll Need
Here are the pieces of equipment you'll need to get started.
Brewing Pot: A brewing pot or brew kettle needs to be about 20 qts.
Stainless Steel Stirring Spoon: A large stainless steel spoon is best for stirring the beer wort, which is the sugary grain water that gets fermented during the brewing process.
Brewing Cleanser: It's important to use a strong alkaline cleanser designed to sanitize brewing equipment. Using household dish detergents can leave a residue that changes the flavor of your beer.
Thermometer: A thermometer allows you to check the temperature of the beer wort.
Hydrometer: A hydrometer is similar to a thermometer, but lets you check the levels of fermentation and alcohol so that you know when it's time to bottle the beer.
Primary Fermentation Vessel: This vessel should have enough room to hold your batch and some extra room for foaming. For example, if you're making a four gallon batch, you'll need a vessel that can hold five gallons.
Secondary Fermentation Vessel: The beer finishes fermenting in this vessel, so choose a vessel that is the same size as the primary fermentation vessel. This vessel should have an airlock, which is a piece of equipment that allows CO2 to escape from the vessel without letting any air or bacteria from entering the vessel.
Siphon/Racking Cane: This tool siphons the beer out of the secondary fermentation vessel into your desired containers.
Bottling Bucket: This container features a faucet at the bottom where you can attach a hose for transferring the beer into bottles.
Tip!
Make the beer brewing process even easier with a home brewing kit that includes everything you need.
How to Make Beer at Home
Now that you've gathered all of your equipment and ingredients, use our easy instructions to learn how to make beer at home.
Step 1: Prep Your Equipment
Sanitize each piece of equipment using a brewing cleanser.
Step 2: Heat the Water
Bring the water to a boil and remove from the stove.
Step 3: Add the Malt Extract
Add the malt extract and stir until the extract is fully dissolved into the water. It's important to dissolve the malt entirely because unmixed malt will settle to the bottom of the pot and burn. After the malt dissolves, return the pot back to the stove and bring the wort to a boil.
Step 4: Add the Hops
Add the hops to the pot and continue stirring. After the hops have boiled for a few minutes, remove the pot from the stove and place the pot in an ice bath in your sink.
Step 5: Cool & Transfer the Beer
After the beer has cooled to a temperature around 90°, use a funnel to pour the beer into your primary fermentation vessel. Make sure not to add the hops to the new vessel.
Step 6: Add Water to the Primary Fermentation Vessel
Add water to the vessel until the total volume of liquid is five gallons and stir the mixture thoroughly.
Step 7: Determine the Original Gravity
After you've added water to the wort, you'll want to read the hydrometer to find the original gravity (OG), which is the amount of fermentable sugars in the wort. Record this number so that you can calculate the alcohol by volume (ABV) later in the brewing process.
Step 8: Pitch the Yeast
Check the hydrometer to see if the temperature is ideal for the beer yeast. This should be around 78°, but it's best to check the temperature labeled on your package of beer yeast. At this step, the yeast will start to "eat" the sugars in the malt and ferment them into alcohol and carbon dioxide gas.
Step 9: Add the Airlock
Affix the airlock to the primary fermentation vessel and fill the airlock with clean water. This keeps air and bacteria from contaminating the beer, but also allows the excess CO2 to escape from the container.
Step 10: Let the Beer Ferment
Place the fermentation vessel into a dark, temperature-controlled space. You'll be able to see some progress within 24 to 48 hours as the CO2 starts to escape through the airlock. Because the fermentation process takes one or two weeks, you'll need to keep the vessel in a spot where it'll stay undisturbed.
Note: Some brewers like to transfer their beer to a secondary fermentation vessel after a week. You'll need to use a racking cane to siphon the beer from the primary fermentation vessel to the secondary fermentation vessel where it'll continue to ferment for another week. This transfer allows the beer to mellow and reduces excess sediment for improved clarity.
Step 10: Calculate the Final Gravity & ABV
Use the hydrometer to measure the final gravity (FG) of the beer. Then, take use the following formula to determine the ABV of your beer:
ABV = (OG - FG) x 131.25
While the formula will only get you a close estimation of the ABV, it's an easy way to measure the ABV for home brewing purposes.
Step 11: Keg or Bottle Your Beer
After your beer is done fermenting, use the siphon to transfer the beer from the fermentation vessel and into a bottling bucket. Then you'll be able to pour the beer into individual bottles or into a keg.
Tip!
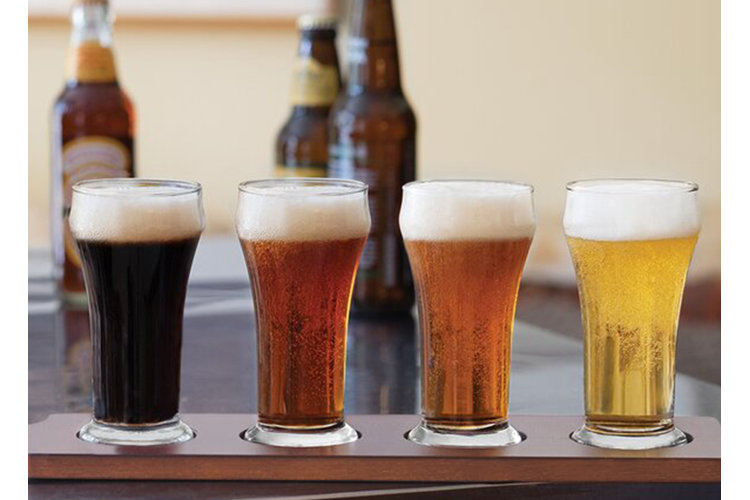
After you're finished brewing your beer, you might need to stock your home bar with fresh beer glasses to enjoy your brews. Check out our guide A Guide to Beer Glass Types to learn more about the different types of beer glasses to complement each type of beer.
Now that you know how to make beer at home, browse our collection of home brewing kits.
