Replacing a Bathroom Sink Drain: Everything You Need to Know
Bathroom sink drain replacement made simple.
Replacing your bathroom sink drain is a simple way to fix leaks, refresh your sink’s look, or upgrade to a new finish. In this guide, we’ll walk you through what to consider before you start and how to remove and install a bathroom sink drain – no advanced plumbing experience required.
How to Replace a Bathroom Sink Drain
Skill Level: Beginner to intermediate
Time Requirement: 30 to 60 minutes
Number of People: 1
What You’ll Need
- New bathroom sink drain
- Measuring tape
- Bucket
- Rags
- Adjustable wrench
- Pliers
- Putty knife
- Plumber’s putty or silicone sealant
- Plumber’s tape
What to Consider Before Replacing a Bathroom Sink Drain
Before you begin, make sure your new drain is compatible with your sink and plumbing setup.
Drain Type
Bathroom sink drains typically come in two main types: pop-up drains (controlled by a lift rod) and grid drains (a fixed cover with no stopper). Choose the style that matches your sink and faucet setup and how you use your sink.
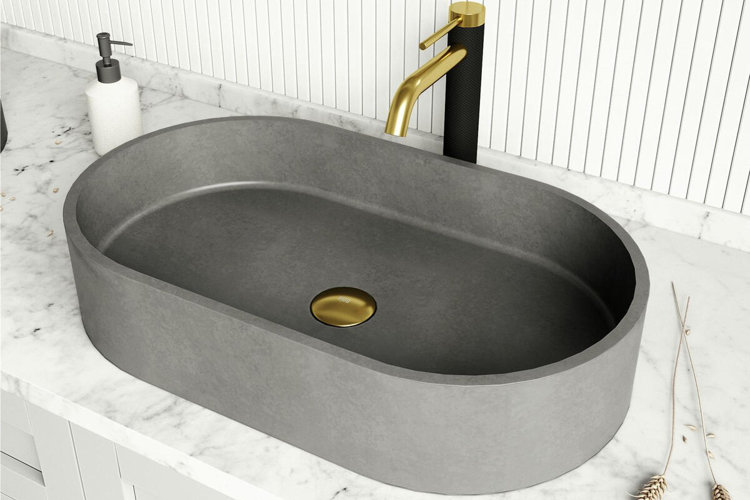
Drain Hole Size
Most bathroom sink drain holes are 1.25 to 1.5 inches in diameter, but it’s important to measure yours from edge to edge. A drain that’s too small or too large won’t seal properly and can lead to leaks.
Under Sink Clearance
Check the space beneath your sink to ensure there’s enough room to loosen and remove the tailpiece and locknut. Tight or obstructed spaces can make installation more difficult.
Sink Type & Overflow
If your sink has an overflow hole (typically near the top of the basin), you’ll need a drain designed to accommodate it. Using a non-overflow drain can affect how water drains and may cause backups.
How to Remove an Old Bathroom Sink Drain
If you're installing a new drain without removing an old one, you can skip to the next section.
1. Measure Your Current Drain
Use a measuring tape to determine the diameter of your existing drain from the top of the sink.
Then, go underneath the sink and measure the length of the tailpiece (the vertical pipe connected to the drain). This helps ensure your replacement drain will fit your existing plumbing.
2. Turn Off the Water & Prep the Area
Clear out the cabinet beneath your sink and place a bucket directly under the drainpipe to catch any water.
Turn off the water supply using the shut-off valves under the sink, then briefly turn on the faucet to release any remaining water in the lines. Keep rags nearby for any drips.
3. Disconnect the Drainpipe
Locate the slip nut connecting the tailpiece to the P-trap (the curved pipe).
Using an adjustable wrench or pliers, loosen the slip nut by turning it counterclockwise. Carefully remove the tailpiece and set it aside, allowing any remaining water to drain into the bucket.
4. Remove the Drain Assembly
From underneath the sink, locate the locknut that secures the drain to the sink basin.
Use pliers or a wrench to loosen the locknut. As you do this, hold the drain from above to keep it from spinning. Once loosened, push the drain upward through the sink and remove it from the top.
If the drain feels stuck, use a putty knife around the flange to break the seal created by old plumber’s putty.
5. Clean the Area
Use a rag or paper towel to remove any leftover plumber’s putty, grime, or debris from around the drain hole, both above and below the sink.
A clean surface is key to creating a tight, leak-free seal with your new drain.
How to Install a New Bathroom Sink Drain
Once you’ve removed the old drain, installing a new bathroom sink drain is a straightforward process that helps ensure a secure, leak-free seal and smooth everyday use.
1. Apply Plumber’s Putty or Sealant
Roll a small amount of plumber’s putty between your hands until it forms a thin rope.
Apply it to the underside of the new drain flange (the visible top piece) or around the drain hole. This creates a watertight seal when the drain is pressed into place.
2. Insert the New Drain
From above the sink, lower the drain flange into the drain hole and press down firmly.
You may notice excess putty squeezing out around the edges – this is normal and indicates a tight seal.
3. Secure the Drain From Below
Move underneath the sink and slide the rubber gasket and washer onto the drain body so they sit flush against the underside of the sink.
Thread the locknut onto the drain body and hand-tighten it to hold everything in place. Once aligned, use an adjustable wrench to tighten it further until snug. Avoid overtightening, which can damage the sink or components.
4. Reattach the Tailpiece
Wrap plumber’s tape around the threaded end of the drain tailpiece to help prevent leaks.
Align the tailpiece with the drain body and reconnect it to the P-trap using the slip nuts. Tighten by hand first, then secure with pliers for a snug fit.
5. Wipe Away Excess Putty
Return to the top of the sink and use a damp rag or paper towel to wipe away any excess putty around the drain flange for a clean, finished look.
6. Test for Leaks
Place a bucket beneath the sink and turn the water supply back on.
Run the faucet for a minute or two while checking all connections underneath the sink. If you notice any leaks, tighten the slip nuts or connections slightly until the dripping stops.
Tip!
Browse our guide on How to Install a Bathroom Sink for everything you need to know before drain installation.
