Amazing Backyard Makeover: Before & After
With our tips, your dream backyard makeover can become a reality.
You don’t need a special occasion to make your backyard makeover dreams a reality. Backyard makeovers are a fun, go-to home project for many homeowners. The most favorable time to begin your makeover runs from late spring to early fall, as this is when summer heat is fading fast in most areas. Backyard makeovers are creative and fun, and they are a great way to enjoy the cooler weather and embrace the fall season. A cost-effective makeover can transform your backyard into a cozy entertaining space for family and friends.
We’ll go over tips using a real-life homeowner’s backyard makeover to show you the before-and-after.
Before You Start
The cost of a backyard makeover can seem daunting, but with some planning, some work, and a little renovation, you can upgrade your backyard without breaking the bank.
Think about the current layout of your backyard, consult a contractor if need be, create a budget, and get necessary permits.
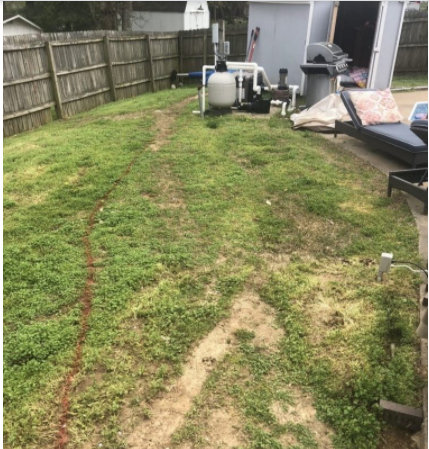
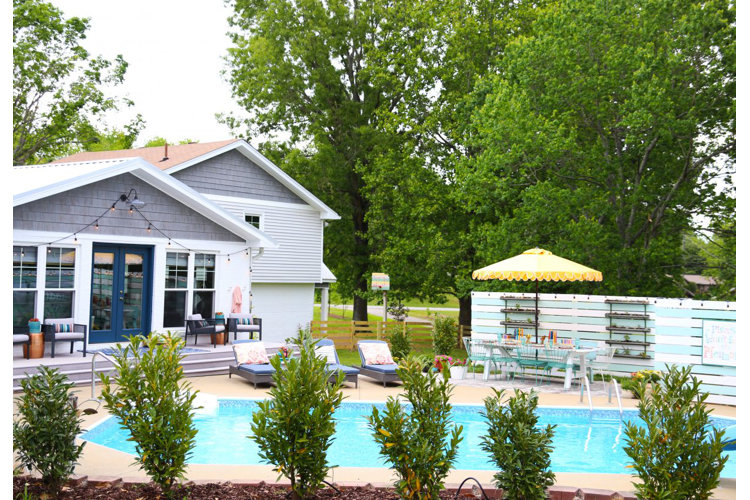
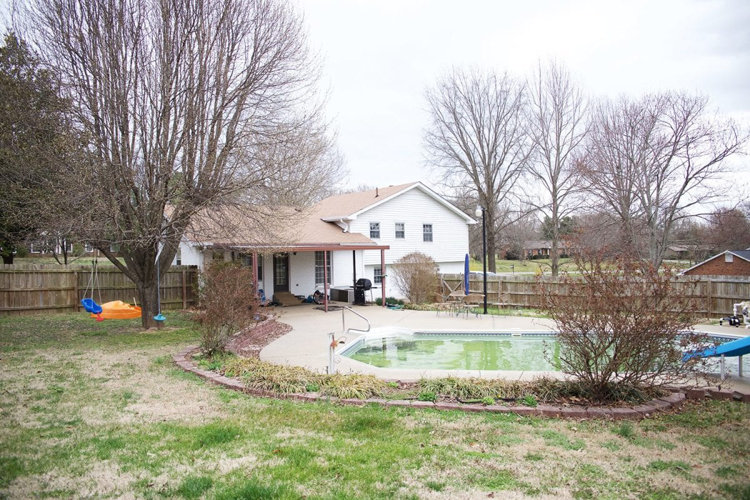
In this particular yard, the owners were hoping to create an inviting space. Their challenges included a tiny fence on a 1 acre lot and an awkward location for the pool pump which was a bit of an eyesore. Their goal was to open up their backyard and provide a delightful spot for the entire family.
Best Tips for a Backyard Makeover
1. Have a plan.
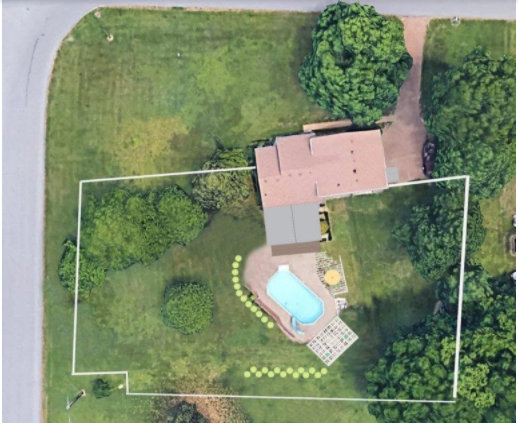
Draw it out: These homeowners weren't sure where to begin, so they decided to mark out their yard from overhead with Google Earth to plan their grand vision. Once they took a screenshot, they used various programs to roughly mark what they ultimately wanted.
Zoom out on your property from an overhead view to gain a better perspective on the scope of your project. These homeowners started with a big dream and then focused on phase one. This included a new fence for the entire backyard, a new dining area, and a privacy wall which remedied the eyesore of a pool pump that was installed by the last owner.
Note: The overhead view of this image shows the plan for a pergola at the base of the pool. Setting the entire end goal helped these homeowners focus on the first few steps and prepared them for phase two.
Mark it in real life: Mark out the yard. These homeowners indicated the layout for their dining area so that they knew how much of their yard they were working with. Chalk dust, spray paint, and tape are all great options to help establish parameters and get a good idea for the actual scope of work.
Budget on paper: When diving into a full-on project, creating a budget helps adjust expectations. Include measurements and materials to avoid surprises. Once that is finalized, get ready for everything you might need. These homeowners rented an excavator since the spot in their yard would need some leveling.
Here is a rough cost breakdown for this backyard project.
- Rental of a mini-excavator and skid steer with a post hole digger: $350
- Brick: $650 per bundle
- Sand and gravel: $1 per sq.ft
- Fence material: $4 per ft
- Wooden privacy wall: $10 per ft
2. Be willing to work within limitations.
Each yard comes with its own set of challenges. Be willing to work with these challenges and with the local rules. It helps to be aware of local codes, homeowners association rules, and more.
Our homeowners knew they wanted to expand the fence and dining area. But the owners couldn't have anything permanent due to a local codes rule regarding septic tanks. So they ended up using leftover bricks from a previous addition to the house and finished them with a German schmear technique to give them a fun, aged look. Because they used alternative materials, these homeowners were able to get their desired look while still adhering to the rules so they won’t run into problems down the road.
No two yards are alike, and it helps to be willing to embrace limitations.
3. Get creative.
From materials to the final look, half the fun is not only embracing those limitations in creative ways but finalizing the project with lots of personality. A backyard renovation is a great opportunity to bring in some fun, one-of-a-kind pieces and accents from Wayfair. Don't be afraid to bring in lots of color and personal touches (such as accessories), and above all, have fun!
Jamin and Ashley Mills are the design duo behind The Handmade Home design studio in Nashville. They help clients locally and nationally achieve realistic, attainable homes while living by their mantra of "we don't believe in the dream home we believe in your home." They've been recognized nationally by numerous TV and media outlets as well as named as two of the most creative people in the country by Country Living Magazine. Check out their designs and creations at thehandmadehome.net as well as on Instagram, Pinterest, and Facebook.
