Everything You Need to Know About Carpet Tile Installation
Learn how to install carpet tiles in no time.
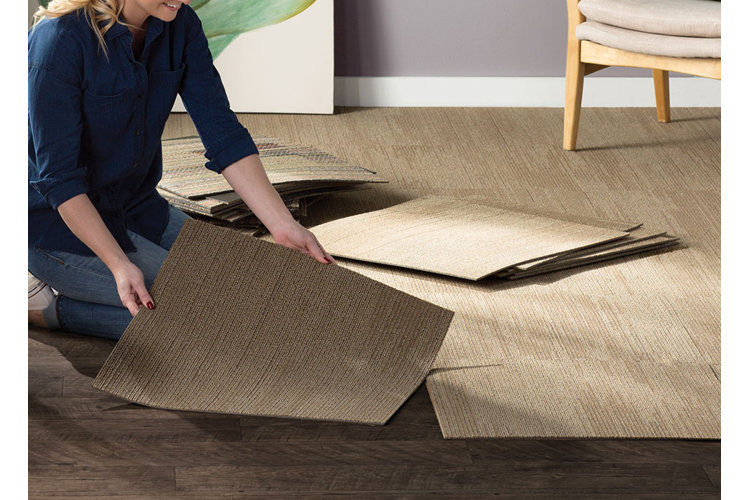
If you’re looking for one of the easiest DIY-flooring techniques, you’ve come to the right place. In this guide, we’ll walk you through each step of carpet tile installation. Trust us, you can do it!
Project Overview
Time: 2–4 hours
Skill Level: Beginner
Number of People Recommended: 1–2
What You’ll Need
- Tape measure
- Notepad
- Marker
- Chalk line reel
- Safety gloves
- Straight edge ruler
- Utility knife
1. Prepare the Room
Before attempting to install carpet tiles, it’s important to know what subflooring you’re working with. Carpet tiles can adhere to any clean, hard surface. They cannot be placed on top of carpet because the soft foundation will cause your carpet tiles to move. If you currently have carpet in the room, remove it before installing new flooring.
Make sure the floor is clean, dry, and clear of any debris. Use a broom to sweep away any dirt or dust. Leave your tiles in the room where you intend to install them at least 24 hours in advance. This will give them enough time to acclimate to the room’s temperature so it can adhere to the floor properly.
2. Measure Your Space
The following steps use the center of your room as the starting point for installing your carpet tiles. However, if you have an irregularly shaped room, feel free to start installation from one corner of the room and work your way across the space. The goal is to avoid an arrangement that highlights too many differently sized carpet tiles.
Tip!
Mark any measurements on the underside of your carpet tile – they’ll be more visible this way.
Step 1: Find the Area of Your Room
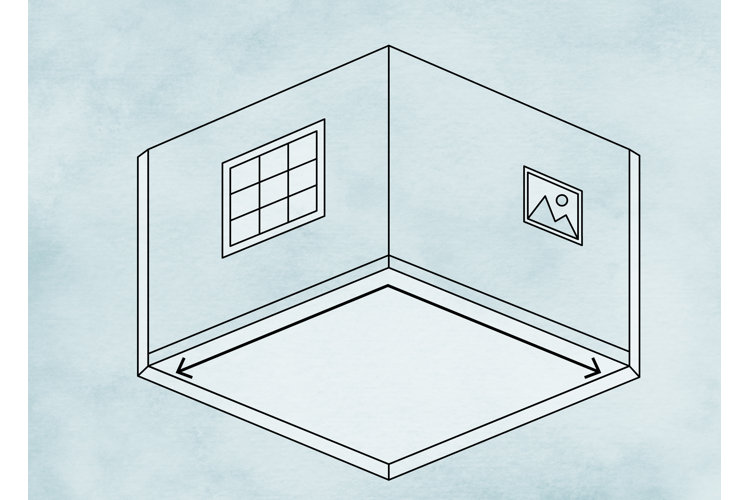
Use a tape measure to determine the length and width of your floor from end to end. Mark these dimensions on your notepad. Multiply the length by the width to find the area of your room in square footage and use that number to inform how many carpet tiles to purchase.
Step 2: Find Each Halfway Point
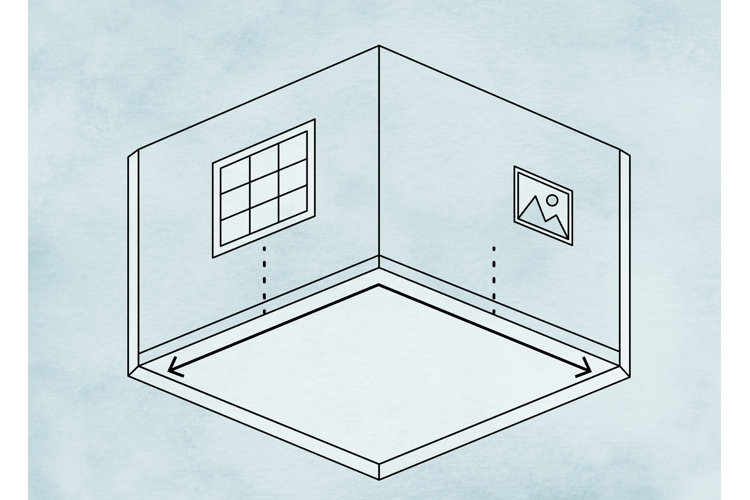
Divide your length and width measurements by two to determine the halfway point for each. Mark these halfway points on your floor with a marker.
Step 3: Mark the Room’s Center Point
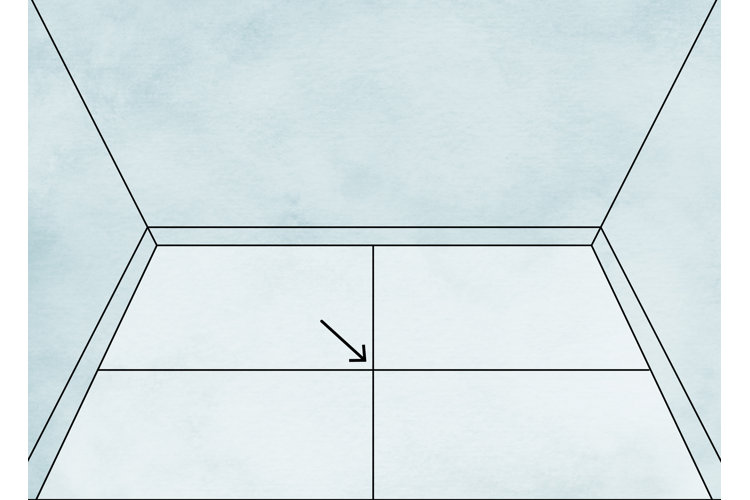
Starting from one halfway point, pull your chalk line directly across the floor until you reach the other edge of the room. Snap the line against the floor so it leaves a straight line of chalk. Now repeat on the other side so you have two chalk lines that make a cross. Mark the center point of the room with your marker.
3. Consider Carpet Tile Arrangements
The placement of carpet tiles will ensure a symmetrical and smooth look on your floor. The preferred arrangement is up to you, so have fun with how you lay them! You can even create a custom placement.
Step 1: Choose a Design
1/4 Turn:Great for carpet tiles with stripes, this arrangement has every other tile flipped ¼ turn to the side.Monolithic:This arrangement is a perfect grid with each tile facing the same direction.Ashlar Brick:This placement stagnates the columns of carpet tiles slightly, to avoid a gridlock look.Custom:* Arrange your carpet tiles however you please. Mix and match colors, styles, directions, and more. Make sure you map out where you’d like them before installation!
Step 2: Lay Out Your Tiles
Using the center of your floor as a starting point, begin placing the carpet tiles in your desired arrangement. We recommend arranging the first four tiles around the center point and working your way outward. Continue laying out the tiles until you reach the walls. It is likely that there will be some irregular space right before the wall where you will need to trim some tiles, so don’t worry!
Tip!
Look to see if the backside of your tiles include directional arrows. If these are present, make sure you are placing the tiles so that all of the arrows line up in the same direction.
4. Install the Carpet Tiles
Once you have the tiles arranged in place, you can begin installing. Learn the installation method your carpet tiles require.
Adhesive Tabs: These are small, sticky squares that help adhere the carpet tiles to the floor beneath. Since these tabs run on the smaller side, they are typically attached to the top corner of a carpet tile. That way, it can connect a total of four carpet tile corners to the floor.
Peel & Stick: Peel off the back of the carpet tiles and stick them to the floor.
Glue-Down: Purchase a carpet adhesive glue to apply to the subfloor. Using the snap chalk lines as starting points, roll the glue out evenly. Let it dry slightly until it is tacky to the touch. Press the carpet tiles firmly against the floor to secure them (one by one so you never step on the glue).
Interlocking: Connect the edges of your carpet tiles in an interlocking grid like a puzzle.
Loose-Lay: There is no adhesive here, simply place your carpet tiles freely on the floor.
5. Make Any Needed Cuts
Is there an awkward space between your carpet tile and the wall? It’s time to cut.
Step 1: Measure the Gap
Measure the space between the last complete carpet tile you’ve placed and the wall. Make note of this measurement in your notebook. This will be the width of carpeting that you need to fill the space.
Step 2: Mark Your Carpet Tile
Grab a new carpet tile and flip it upside down. Apply the gap measurement to the bottom of the tile and mark the point. You can also position a new carpet tile against the wall and mark the point where it begins to overlap with the next tile. Whatever method you choose, use a straight edge to extend the mark to each end of the carpet tile. This is the line you will be cutting.
Step 3: Cut Along the Line
Grab your safety gloves and utility knife. Cut off the overlapping area by following the line you marked. Now your carpet tiles can fit securely against the wall! Finish up with a thorough vacuum job to make sure the tiles are all snugly placed.
