4 Steps to a Personalized Gallery Wall
Make this trend all your own with this easy tutorial.
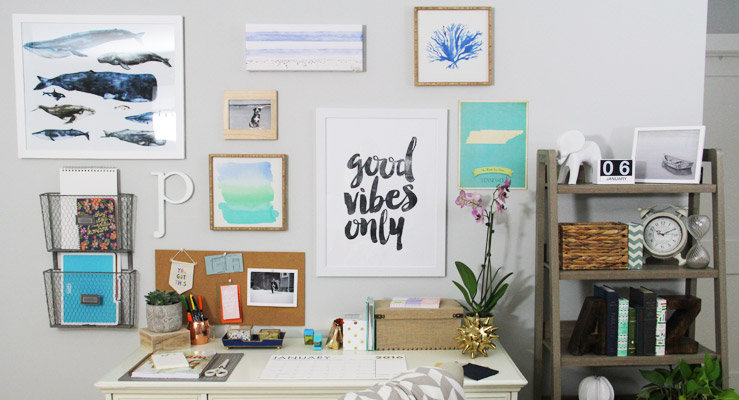
From choosing the right artwork to installation, this guide walks you through the steps for getting this stylish look.
What you'll need:
- A pencil or pen
- Butcher paper
- Painter's tape
- Scissors
- A large work space
1. Gather Wall Art and Décor


After picking the right wall for your gallery, begin gathering your artwork. Whether you're buying new art or incorporating items you already own, include pieces that have personal meaning to you, like a map of your home state or family photos. Three-dimensional accents like clocks, monogram letters, and mirrors add further depth.
Tip! For a cohesive look, keep a consistent colour palette. We chose art in shades of blue and green but used different framesto avoid looking too matchy-matchy.
2. Create Place Holders

Once you've finalized your selection, avoid creating unnecessary holes in your walls. Lay out items on butcher paper, trace each piece individually, and cut out the paper to create templates of your art.
3. Plan Out Your Arrangement
Using painter's tape, adhere your templates to the wall. For a well-balanced design, build outwards from the centre of the wall. Space larger items out and fill in the gaps with smaller pieces, like 4-by-6 photos or petite accents. To double-check your work, step back periodically and assess the arrangement from a distance.
4. Build Your Masterpiece
Once you have a balanced and cohesive configuration, replace the butcher paper with your artwork. Complete this process one piece of art at a time—leaving the neighbouring butcher paper ensures you won't lose the placement for each item.
Tip! Not sure about nailing into your walls, or frequently change your mind? Use Velcro picture hangers for a rental- (and indecisive-) friendly option.
