How to Replace a Bathroom Faucet
Become a plumber for a day.
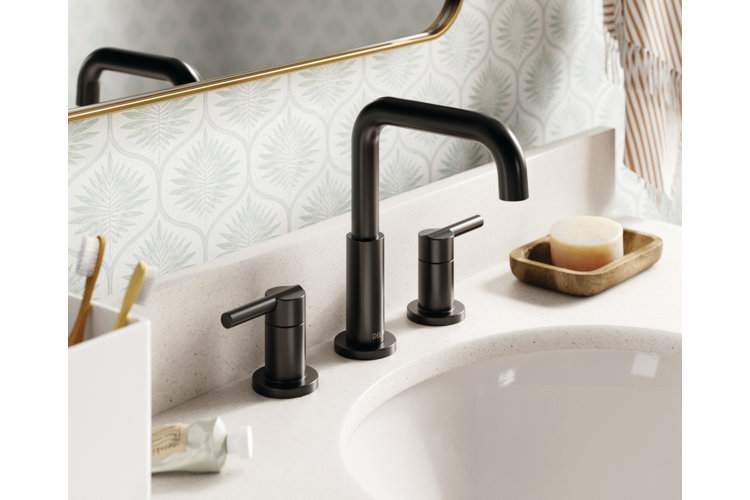
Upgrading your bathroom sink faucet is a great way to enhance the function and style of your space. In this guide, we go over how to replace and install a new bathroom faucet – no plumbing expertise required.
Skill Level: Intermediate
Time Requirements: 30 minutes to 1 hour
Number of People: 1
What You'll Need:
- Bathroom faucet & faucet hardware
- Large bowl or bucket
- Rags
- Adjustable wrench
- Penetrating oil (if applicable)
- Pliers
- Putty knife
- Plumber's putty (if applicable)
- Plumber's tape
- Silicone caulk
Parts of a Bathroom Sink & Faucet: Explained

Before you begin, it can be extremely helpful to familiarize yourself with each part of a bathroom sink and faucet so you know what to look for at each stage of the removal and installation process.
How to Remove an Old Bathroom Faucet
If you are installing a new faucet and don't need to remove an existing one first, you can skip to that section now.
1. Turn Off the Water Supply
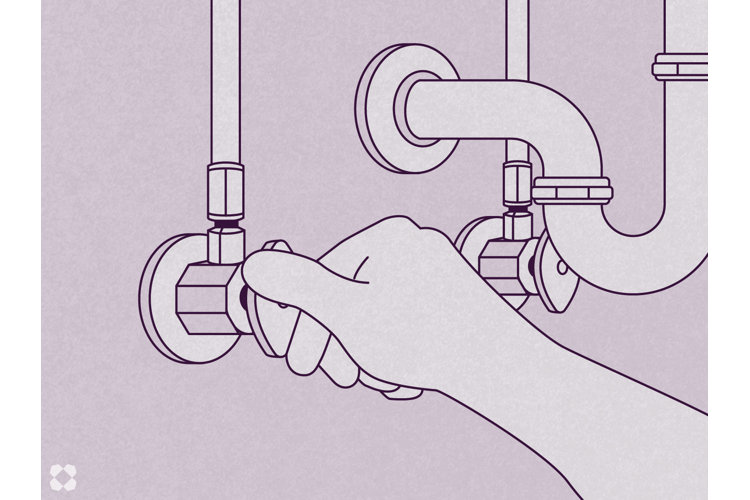
This first step is crucial to ensure you don’t flood your bathroom or damage your sink.
- Clear out the area directly beneath your sink and place a large bowl or bucket beneath the drain to catch any excess water. It can be helpful to keep rags nearby in case of spills or leaks.
- Next, use the shutoff valves beneath your sink to turn off the hot and cold water supply lines.
- Turn both of your faucet's handles to release any water remaining in the supply lines.
2. Disconnect the Hot & Cold Water Supply Lines
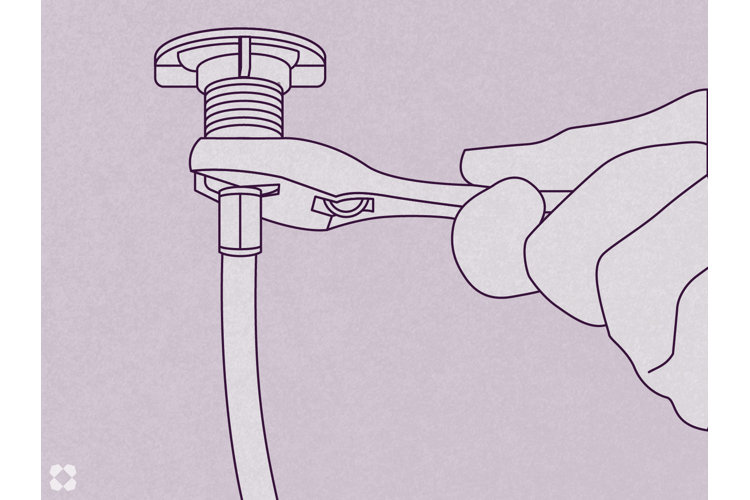
Keeping your bucket beneath you as you work, use your wrench to loosen the nuts holding the hot and cold water supply lines to the shutoff valves. The bucket should catch any water that might drip out.
3. (Optional) Disconnect the Water Supply Lines for the Faucet
If necessary, disconnect the faucet's water supply lines from the water supply. These are separate from the hot and cold water supply lines and connect directly to the faucet spout. This step just adds an extra level of security and ensures no water leaks. You should be able to use a wrench to loosen the nut(s) holding the supply lines to the water supply. The bucket will be helpful in catching water at this stage as well.
4. Disconnect the Faucet From the Sink
Next, disconnect the sink faucet from the sink and the pop-up drain assembly. To do this, locate the lift rod beneath your sink.
- Remove it from the pop-up drain assembly by sliding the spring clip off the pivot rod.
- Once the spring clip is freed from the pivot rod, you can loosen the clevis screw and slide the clevis strap down off of the lift rod.
- Then use your wrench to loosen and remove the mounting nut or nuts holding the faucet and faucet handles to the sink.
- If the nuts won’t slacken or are corroded, apply penetrating oil and let them sit for a few hours (or even overnight) to loosen.
5. (Optional) Disconnect & Remove the Pop-Up Drain Assembly
It's important to remember that many faucets come with a matching drain assembly (no need to source your own!), but you can skip this step if you're not replacing your sink's drain. We recommend reviewing the bathroom sink diagram at the beginning of the guide to help identify the parts mentioned in this step. .
- First, remove the now-loose pop-up stopper by pulling it out of the drain.
- Then, using pliers, loosen the slip nut that holds your sink's P trap to the drain's tailpiece.
- Then dislodge the tailpiece from the P trap.
- Now use a wrench to loosen the pivot nut on the pivot rod until you can remove the pivot rod from the tailpiece.
- With the pivot rod out of place, slide the tailpiece mount off the tailpiece.
- Finally, loosen the locknut holding the pop-up flange to the sink and remove it.
- You may need to use a putty knife to loosen the seal between the pop-up flange and the sink, but now you should be able to remove the pop-up drain assembly (including the flange and tailpiece).
6. Remove the Faucet From the Sink
Slide a putty knife under the faucet base to break the seal between the faucet and the sink. Then, gently lift up on the faucet and handles to free them from the sink. Use a damp cloth or rag to clean the sink where the faucet once was, and you're ready to install a new faucet!
How to Install a New Bathroom Faucet
This section outlines what to do once you've removed the old faucet, including how to prep and install the new faucet on your bathroom sink.
1. If Applicable, Assemble Your Faucet
Some faucets come assembled, but many do not. This step may involve attaching your faucet's handles and spout to the base, attaching faucet supply lines to the faucet spout, and more. Since all faucets are different, it's best to refer to your manufacturer's instructions for this step.
2. Caulk the Area Around Your Sink's Faucet Holes
This step ensures a level seal around the faucet. Pipe silicone caulk around the faucet holes (and faucet handle holes, if applicable).
3. Place the Gasket & Set the Faucet in Place
Slide your new faucet's base gasket over its supply line tubes so it's placed beneath the base of the faucet. If your faucet did not come with a base gasket, you can use a thin rope of plumber's putty in its place. Then lower the faucet into the sink by threading its tubes down through the holes in the sink. Place the faucet so the base is parallel to the back of the sink with the faucet spout facing forward.
4. Center the Faucet & Attach it to the Sink
Thread the faucet plate or bracket (if applicable), gaskets, and mounting nut(s) that came with your new faucet up onto the bottom of the faucet via the supply lines. Making sure the faucet is centered, hand-tighten the nuts to loosely secure the faucet to the sink. If you need to correct the faucet's angle, just loosen the nuts by hand, adjust the faucet, and then re-tighten. Once you're satisfied with its position, use a wrench to finish tightening the mounting nut(s).
5. Connect the Faucet Supply Lines
Apply plumber's tape to the threads on the faucet's supply lines to ensure a tight seal. Then align your faucet's flexible supply lines to the water supply and tighten the compression fittings by hand. Use an adjustable wrench to give the nut(s) one additional turn, being careful not to over-tighten. If necessary, connect each flexible water supply line to one side of the faucet's supply-line mount, located beneath the faucet spout on the underside of the sink.
6. Connect the Hot & Cold Water Supply Lines
Next, apply plumber's tape to the threads on your faucet handles' hot and cold water supply lines and water supply hoses. (The water supply hoses will be thicker than the faucet supply-line hoses.)
- Then attach the water supply hoses to each water supply line under each faucet handle using a wrench on the applicable nuts.
- Once this is complete, align the bottom of each water supply hose with the appropriate hot and cold water supply lines and affix them in place by using a wrench to tighten the applicable nuts.
7. (Optional) Install the Pop-Up Drain Assembly
Start by threading the flange gasket and washer onto the tailpiece until they are nestled directly beneath the flange. Then pipe a small ring of silicone caulk around your sink's drain hole (or apply a small ring of plumber's putty to the bottom of the flange washer) and insert the flange into the drain hole, making sure the side hole in the tailpiece is oriented toward the back of the sink.
Next, thread the locknut onto the tailpiece and tighten it to secure the flange in the drain. Use a damp rag to wipe away any excess caulk or putty that may have been pressed out from under the flange. Once completed, slide the tailpiece mount up onto the tailpiece so that its side opening is over the side hole in the tailpiece. Align the tailpiece with the P trap and use the slip nut to secure the two pipes together.
Now insert the pop-up stopper into the drain hole and slide the pivot rod into the side hole in the tailpiece so that the pivot rod is threaded through the bottom of the pop-up stopper. Tighten the pivot nut to secure the pivot rod in place.
8. Attach the Faucet to the Pop-Up Drain Assembly
- If it's not already in place, thread the lift rod down into its slot.
- Then slide the clevis strap an inch or two up onto the lift rod. Secure it in place on the lift rod by tightening the clevis screw into the hole on the back of the clevis strap.
- Slide the spring clip up onto the clevis strap.
- Pulling down on the lift rod so that the lift-rod handle is fully lowered as well as pulling up on the pop-up stopper so that it is fully raised, align the holes on the spring clip with the hole on the clevis strap that are closest to the pivot rod in its current position.
- Thread the pivot rod through those aligned holes. You can test the lift rod to ensure it works by lifting it – if installed correctly, the pop-up stopper should lower to seal the sink drain when the lift-rod handle is pulled up.
- If you inserted the pivot rod into the wrong hole on the clevis strap, simply remove it and adjust it to the correct position.
Tip!
Installing a new pop-up drain assembly as well as a new faucet? Our guide How to Install a Bathroom Sink covers this step in detail.
9. Turn the Water & Test Your Faucet
Once the caulk and putty have set, it's time to test it out. You must wait at least 24 hours to ensure all seals have cured before you turn the water supply on; otherwise, you could create leaks. Keep a bucket beneath your sink to capture any water.
For the best results, start by turning on the water supply by turning on the hot and cold water shutoff valves. Then test each faucet handle to ensure they work properly with no leaks. If you spot leaks, turn off the water, tighten the screws near the leakage areas, and see if that helps. If not, you might need to disassemble and apply more plumber's tape to the threads on your sink's pipes to ensure a tighter seal.
