Weekend Warrior Project: Ombre Dresser
Break out the paint and DIY new life into an unfinished (or just plain tired) dresser.
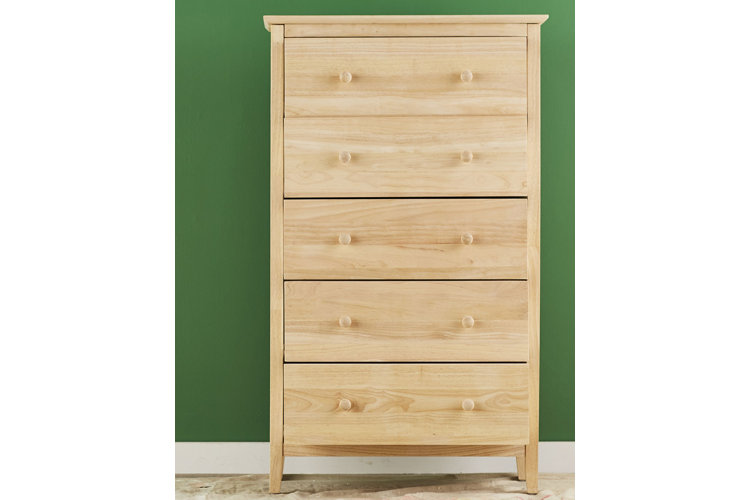

Turn a lackluster dresser into an inspiring point of bedroom pride in less than 48 hours—simply by going ombre. This fade-to-dark colour approach ignited a full-blown style trend for its ingenious way of blending hues that reads brilliant rather than loud. So let it pump up the personality of your dresser, be it unfinished or in dire need of a new look, and behold the cheery effect it has on your bedroom.
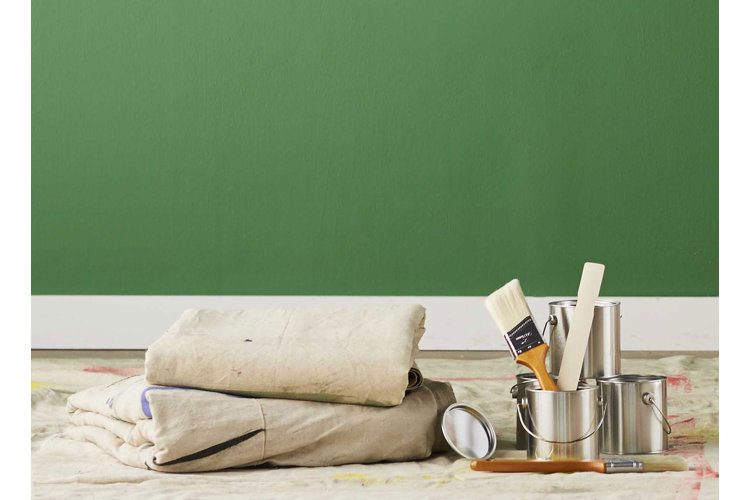
Materials:
- A dresser
- Two cans of paint, one white and one in the darkest colour you want
- Paint brushes and stirrers
- Disposable cups and a plastic spoon, for mixing colours
- Drop cloth or plastic garbage bags
- Sandpaper, optional but highly encouraged
Tip! Don't feel like mixing your own colours? Opt for an assortment of sample-sized cans instead.
Steps
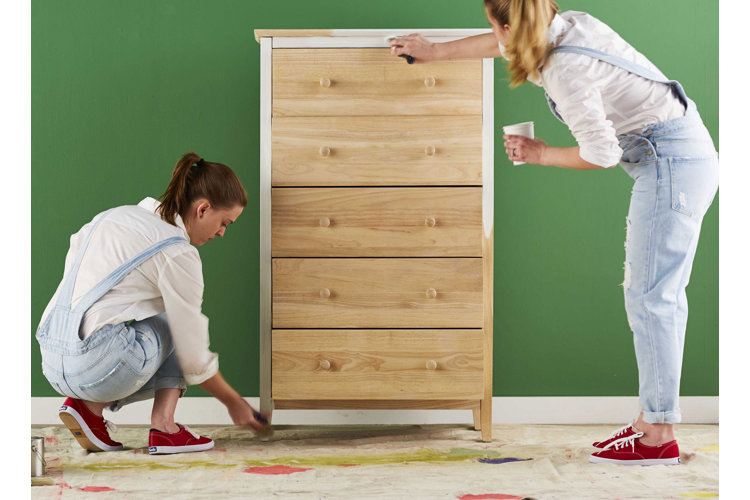
1. Prep: Lay down your tarp (or garbage bags) under the dresser, extending far enough out on all sides to cover your working area. For an enduring outcome, take the time to completely sand your dresser—it’s a step our editors never skip! Set your paint in one corner, open and stir.
2. Mix: Time to create your ombre scale. Pour the coloured paint into four containers (for a five-drawered dresser), as the bottom drawer will use the pure colour. Then create shades by adding progressively increasing amounts of white paint to each using a plastic spoon.
Tip! White paint goes a long way. Start small with just one spoonful of white, and fill your containers with a bit more paint than you think you'll need to cover the front of the drawer to avoid remixing.
3. Paint, Part 1: Dresser first, then drawers. Pour white paint into a disposable cup for hand-held replenishing and coat the sides, top, and front edges of your dresser.
4. Paint, Part 2: Once you’ve created the white backdrop, dive into the ombre drawers. Grab the lightest of your hues and start with the top drawer—pulling it out slightly so you can paint the edges without contaminating the white base. Work your way down, swapping out colours for the next darkest shade as you go.
Tip! For a perfectionist's finish, remove the drawers all together and set on the tarp, painting each separately and allowing to dry completely before reassembling.
5. Repeat: For a crisp, saturated finish, a second coat is well worth the effort. Be patient, and wait for all the paint to dry—at least 2-4 hours—before applying the next round.
Tip! Your knobs don't have to go ombre, too. Rather than paint the existing hardware, you can swap them out for a different finish that plays off your dresser's new look.
