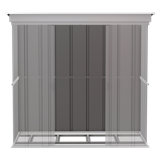
There’s a lot I want to say about this shed, but I’ll try to be as brief as I can while still being helpful.
1) Price-You need to realize that the cost of these sheds has been inflated as a direct consequence of the rise in lumber prices. They are now “worth more” in the eyes of the manufacturer. As the consumer, I can tell you that these are barely worth what they would typically run in the past decade. My parents paid a little over $300 for their basic 10x12 Arrow shed in 2014. The increase in cost is understandable, but not to this extent. My advice here is that you consider how badly you need a shed and how quickly you need it. I paid $770 for it and it’s now at over $1000. If you have the skillset, spend your money on wood and just build it yourself. It may take a little longer, but it will be much more durable. If you need a quick storage solution and don’t care about durability, go with this one. No matter what you decide, this shed isn’t worth a grand. Just know that.
2) Do not attempt to put this together yourself. It’s technically *possible, but it will take you MUCH longer and wear your patience MUCH thinner. You could also be seriously injured. The sheets of metal will cut your hand in half if it isn’t hardened and calloused over. The instructions aren’t hard to figure out. The helper is purely for an extra set of hands as they are sometimes much needed during the process.
3) Lay out each piece based on each part of the process (framing, roof, doors, etc.) and label it with stickers. Not all pieces are labeled properly and most are just indentions that are hard to see. Labeling and separating will save you time during assembly. Trust me.
4) Buy a box of 1-inch roofing screws. The tiny short screws it comes with work fine on every other part of the process, but they’ll test your sanity on the roof. They’re phillips and they strip easily. The roofing screws will be pre-fitted with their own washers and much easier to drive in. It also doesn’t hurt to have 2 drills fitted with a phillips head bit and the appropriate sized hex nut driver. Grab an awl and maybe a good set of manual nut drivers and screw drivers. Small added expenses if you don’t already have them, but worth it. You’ll also need at least 2 or 3 bottles of silicone depending on how well you want to caulk to prevent leaks. Honestly, you couldn’t overdo it even if you tried. It will leak without the silicone. Bottomline.
5) No matter your skillset and how square you get the shed, don’t count on anything lining up too awful well. This has more to do with quality control than your own assembly skills. Go with the flow and just make new holes where needed. The screws are self-tapping and the metal is paper thin. The screws will go right on in. You’ll know when it matters to use the pre-drilled holes versus when you can just make your own. In that case, use the awl I suggested you have on hand.
6) This is the most important advice I’ll give you. Follow the instructions faithfully and don’t just look at the illustrations. READ EACH STEP. The instructions are decent, but sneaky. It’s super easy to do things that will have to be undone because you weren’t supposed to do them yet and vice versa. Trust me. Speeding through the instructions just isn’t worth it. Give yourself a solid 3 days to put this thing together start to finish (including foundation) and take your time. The more help you have, the quicker you’ll get it.
Sorry for the long review, but the other reviews seemed to be a little lacking as far as helpful advice for the actual assembly process, so I wanted to elaborate on it. Also, there isn’t a ton of assembly help online for this particular model. I didn’t see any videos for it on Youtube and the other models go together a little differently than this one so… When it’s all said and done, I would only consider buying another one of these sheds if the cost was appropriate. Right now, they’re just too overpriced. As a working shed they’re not super functional, but just for storage, they’re more than adequate. The metal sheets bend easily and the roof can’t handle heavy snow or debris, but it’ll keep things dry that you just don’t have anywhere else to put. Plus, I’m 5’2” and have plenty of head space inside. I don’t have to duck to walk in. But even right now, it would pay for itself in about 2 years if you opted for it instead of paying a monthly fee for a public storage unit. MUCH better value in my opinion. Make the decision that’s best for you and your family and best of luck!!!