How to Install a Pot Filler: A Step-by-Step Guide
A must-have for luxurious kitchens.
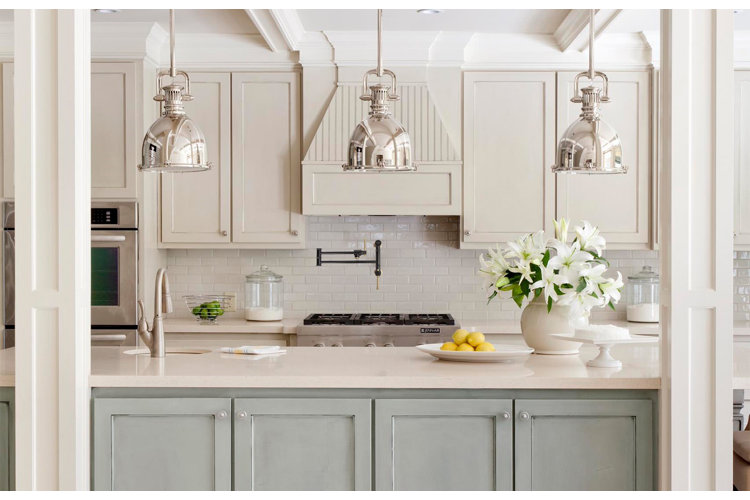
A pot filler is the ultimate sign of a luxurious kitchen. Also called a pasta arm, a pot filler is a one-arm faucet that sits over your stove so you can easily fill pots while cooking. Most standard kitchens don’t have them, so they are often seen in custom-designed kitchens. They take some extra work to install, but once you have one, it will be hard to imagine life without one. Ready to take the next step in creating your dream kitchen? Read on for our step-by-step guide on how to install a pot filler.
Tip!
Still not sure if a pot filler is right for your kitchen? Check out What Is a Pot Filler & Why You Might Want to Add One to Your Kitchen to learn more.
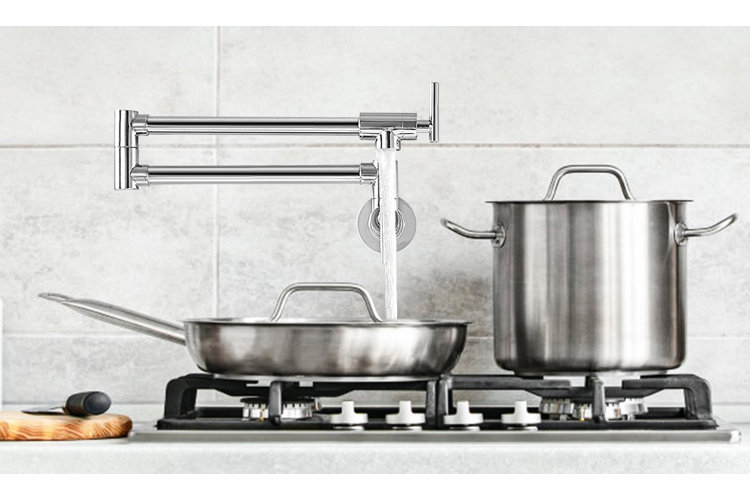
In this guide, we will give you step-by-step instructions on how to install a wall-mounted pot filler. Since you will have to run a water supply line to the space behind your stove, it will be easiest to do this by temporarily removing a section of your wall. Consider pairing this project with installing a tile backsplash since this is the perfect time to place the backer board and tile over your plumbing job. The time it will take to complete this project will vary depending on how much of the project you will be completing yourself, and if you are having help from a professional for the plumbing, wall installation, or if you will be installing a backsplash as well.
What You Will Need:
- Pot filler faucet
- Pipe wrench
- Plumber’s tape
- Pipe cutter or hacksaw
- Drill and drill bits
- Stud finder
- Screwdriver
- Adjustable wrench
- Supply lines
1. Plan Your Pot Filler Placement
You will first need to decide on your pot filler placement. You will want to consider both the horizontal and vertical placement when determining where to place a pot filler.
- Where Should You Place a Pot Filler?: Traditionally, pot fillers are placed on the wall behind your stove. Where you place it horizontally on your wall or backsplash is up to your preference and where you place the water connection. Typical horizontal placement is either on the wall directly in the center of the length of the stove top or a couple inches off center. Put some pots on your stove and test the pot filler’s reach to determine what looks and works best.
- How High Should a Pot Filler be?: The lowest part of the tap should be at least three inches above your tallest pot when placed on the stove. The easiest way to measure for your pot filler vertical placement is to put the tallest pot you own on the stove and measure three inches above this – or more if you prefer.
2. Install Water Supply Line
You will need to run a water supply line to the wall behind your stove to connect to the pot filler. If you don’t feel comfortable doing this yourself, you can hire a plumber to run a water supply line behind your stove and place the connection where you want to install the pot filler. If you plan to complete this task yourself, follow the below steps:
- Turn off Water & Gas Lines: If you decide to do this yourself, make sure to follow any local building codes and turn off water and gas lines before doing any work. This will be easiest to do before the wall, backer board, or tile backsplash is installed behind your stove. If you are removing or drilling into a wall behind your stove to install a water line, be careful not to hit any gas lines.
- Run Your Water Lines: Locate the closest water supply line. Use a pipe cutter to cut into the existing waterline and use a fitting like a tee to create a water supply line that branches off towards behind your stove. Secure the water supply line to where you will be installing the pot filler. You will want to mount the connection to a stud or install a 2 x 4 bracket to connect it to for added support.
- Install Hardware to Connect the Pot Filler: You will need to connect an elbow or a drop-ear connector to the end of the water supply line so you can connect your pot filler on the other side of the wall. You will need a nipple to connect the water supply line to the faucet through the wall. Nipples come in various lengths, including ½”, 1”, and 1 ½”. The length you will need to use depends on the thickness of your wall or backer board, and any tile or other backsplash material.
- Check for Leaks: Cover the nipple with plumbers tape and temporarily turn on the water to check for leaks in the line you have run. Tighten any connections or add plumbers tape before moving on and replacing the wall or backsplash. Make sure to turn the water back off for the remainder of the installation and remove the plumber’s tape from the nipple.
3. Mount Pot Filler to Wall
Once your finished wall is up, you will be able to mount your pot filler and connect it to the cold water supply. Your pot filler will come with manufacturer instructions as well. Be sure to follow any instructions specific to your pot filler to ensure optimal functionality and avoid leaks.
- Secure the Mounting Bracket: Drill holes in the wall or tile to install the mounting bracket where your pot filler faucet will go. If you are drilling into tile, use a tile drill bit and be careful not to crack the tile.
- Attach the Pot Filler Faucet: Apply plumber’s tape to the threads of the inlet of the pot filler and attach it to the mounting bracket and the water supply by screwing on the body of the faucet. The plumber’s tape will help create a watertight seal to prevent leaks. Take a step back to make sure the pot filler looks level, and then tighten the connections with an adjustable wrench once you are happy with how it looks.
4. Test Your Pot Filler
It’s time to turn on your water and test your beautiful new pot filler! Since there is no sink under the pot filler faucet, you will want to double-check for any leaks. Most pot fillers have two valves, if you notice a leak with either of them, it’s important to fix it or replace the entire faucet to prevent a large leak in your kitchen.
Tip!
Keep the kitchen updates going with these Kitchen Ideas to Upgrade Your Next Remodel.
