How to Install a Toilet
You can do it!
A new toilet can completely transform your bathroom. Whether you need to know how to install a toilet or how to replace a toilet, we're here to walk you through the process. From floor-mounted to wall-mounted models, our guide to installing a toilet has you covered.
Before You Begin
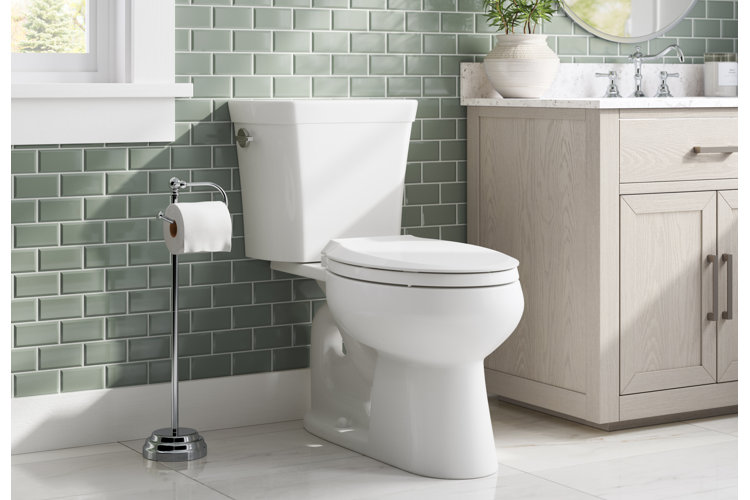
How to Install a Floor-Mounted Toilet
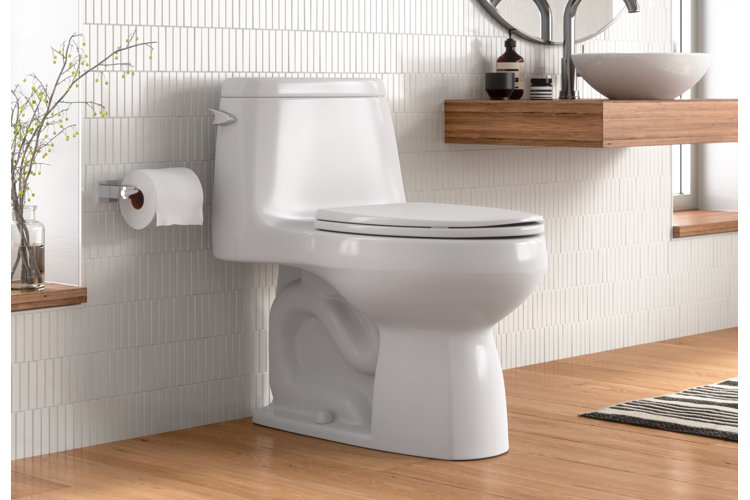
How to Install a Wall-Mounted Toilet
How to Replace a Wall-Mounted Toilet
Before You Begin
From finding the right size to getting familiar with the parts of a toilet, there are a few things to consider before you start installing a toilet.
Find the Right Toilet
Before installing a new toilet, one of the first steps is finding a new one. If you need help choosing the right toilet for your home, check out our Toilet Buying Guide to learn about the different types of toilets and helpful features that will upgrade your bathroom.
Parts of a Toilet
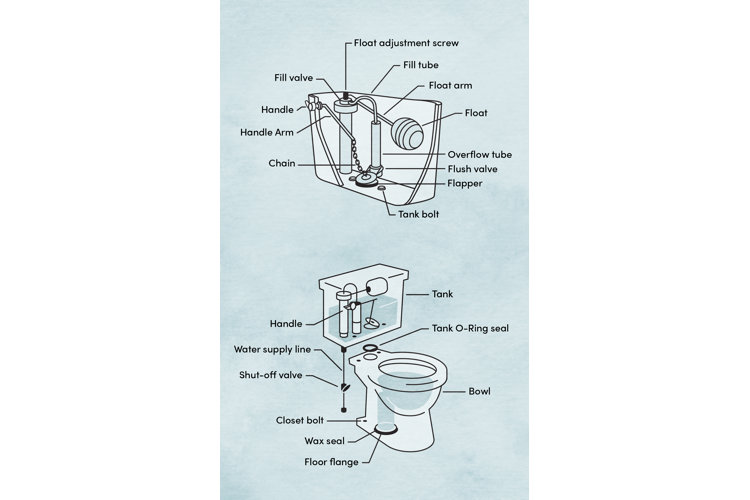
It's important to understand the different parts of a toilet to ensure you are removing and installing the right part. Check out our guide Parts of a Toilet to familiarize yourself with the different components you'll need for the installation.
Tip!
Please note that in some states you must be a licensed plumber to install new plumbing.
For floor-mounted toilets, use these step-by-step instructions for installing a new toilet.
What You Will Need
- Toilet gel (solidifies water)
- Bucket
- Rag
- Putty knife
- Regular screwdriver
- Adjustable wrench
- Sealant
- Tape measure
- New flange
- Wax ring
- Closet bolts
- Level
- Manufacturer instructions
- Silicone caulk
- A friend to help lift the toilet
Step 1: Remove Existing Toilet
Turn off the water supply by turning the valve clockwise. It is placed right behind or next to the toilet. Flush the toilet and hold the flapper up until the water is drained from the toilet tank. Then, place the toilet gel into the bowl to keep water from leaking as you remove the toilet. Wait a few minutes for the water to turn into gel.
Take off the closet flanges' protective caps, then use a wrench to remove the nuts and bolts. Do this on both sides of the toilet. Remove the water supply lines that lead to the toilet tank from the shut off valve. Put a bucket under the lines to catch excess water.
With the help of a friend, lift and remove the toilet.
Step 2: Replace the Toilet Flange
Plug the drain hole with a large rag or other large object to keep sewer gases from entering the room. Use a putty knife to scrape the old wax from the mounting flange on the floor. If your current flange is in good shape, you can simply put on a new wax ring. If it is broken, has chips, or cracks, you’ll need to learn how to replace the toilet flange with a new one. First, use a screwdriver to remove the old flange. Make sure you buy the right size flange to replace it by measuring the interior diameter of the exposed outflow pipe.
When installing a toilet flange, it must sit above the floor and not even with the floor or below it – as that will eventually cause a leak. If your current flange is not above the floor, use a closet flange spacer to raise it.
Once you have your new flange, put it into place and thread the bolts into the channels on the lip. They should be directly across from each other and the head of the bolt should be down inside the channel. With a screwdriver, screw the flange into place. Remove the rag from the pipe. Push the wax ring onto the bottom of the toilet and set the toilet in place.
Place the washers and nuts onto the exposed closet bolts and tighten. However, be sure not to over-tighten the screws, as this could actually crack the toilet. Then, pop the closet bolt covers back into place.
Step 4: Assemble Tank or Toilet Seat
Depending on the design of your toilet, mount the tank to the bowl and mount the toilet seat – if they are not connected already.
Attach and secure the supply line from the wall to the new tank. Make sure there are no crimps in the line – this will cause obstruction in the water flow.
Step 6: Check for Leaks
Turn on the water supply by turning the valve counterclockwise. The tank will begin to fill. While it is filling, check for leaks in the supply lines and connections. Then, flush the toilet and check for leaks again. Once you’re sure it is leak-free, apply a bead of silicone caulk around the base of the toilet.
How to Install a Wall-Mounted Toilet
If you are changing your toilet from a floor-mounted toilet to a wall-mounted toilet, we recommend having a professional install it, as you will have to remove and change plumbing lines. However, if you are starting from scratch, follow the directions below to learn how to install a wall-mounted toilet.
What You Will Need
- Pencil
- Level
- Screwdriver
- Drill
- Wrench
- In-wall toilet tank and frame system
- In-wall toilet dual-flush actuator cover kit
- Wall mounted toilet bowl
- Toilet seat
Step 1: Find the Location
Before installing the toilet, plan the location of where you want to place your toilet. Make sure you have enough space for the plumbing (water supply line and waste line). Find where the supply and waste plumbing will be fed through the wall. While you are picking a location, we recommend planning for at least 24" of space in front of a toilet. There should also be at least 30" of space around your toilet no matter where it is being placed in your bathroom.
Step 2: Assemble the Frame and Tank
Most toilets come with a frame that is installed in your wall. The toilet bowl and tank is then mounted to it. Assemble the frame, tank, and waste pipe elbow by following the manufacturer's instructions. Use a level to ensure the frame is straight on all sides.
Step 3: Position Frame
Place the frame in between the two wooden support beams, marking the mounting holes so you know where to drill the support bolts. Connect the frame and bolts.
Remember that standard bowls sit 15" – 17" off the ground. Chair height toilets sit at 17" – 19" off the ground.
Step 4: Connect Plumbing and Supply Lines
Run the supply lines, water, and waste plumbing up to the tank.
Step 5: Install the Flushing Actuator
Install and attach the flushing actuator into the top of the tank. Follow manufacturer's instructions to ensure you install the actuator correctly. When covering the wall in Step 8, make sure the flushing actuator still remains exposed.
Step 6: Finish the Wall
With the material of your choice, cover the tank inside the wall. Mount the toilet bowl to the wall and line up the toilet rough-in. Attach closet bolts to connect the toilet bowl to the wall. Apply caulk or another sealant to secure the bowl to the wall and minimize leakage.
How to Replace a Wall-Mounted Toilet
If you're looking to replace a wall-mounted toilet rather than start from scratch, the process can be just as easy as replacing a floor-mounted toilet. Keep reading to learn how to replace a wall-mounted toilet.
What You Will Need:
- Pencil
- Level
- Screwdriver
- Drill
- Wrench
- In-wall toilet tank and frame system
- In-wall toilet dual-flush actuator cover kit
- Wall-mounted toilet bowl
- Toilet seat
Step 1: Remove Existing Toilet
Before you can replace the existing one with a new one, you need to learn how to remove a wall-mounted toilet. Turn off the water supply valve and flush the toilet. Use a sponge or pump to remove any water left in the tank and bowl, or use toilet gel to solidify any of the excess water. Disconnect the water supply line.
Using a wrench, remove the nuts and washers that hold the tank and bowl together. Remove the tank from above the bowl, and then remove the nuts and washers from the four mounting bolts that attach the bowl to the wall. Gently remove the bowl from the mounting bolts.
Step 2: Prepare the New Toilet
Similar to the installation steps in the section above, assemble the new frame and tank before placing the assembled frame and tank between the existing support beams. Mark the new mounting holes on the frame with a pencil so that you know where to drill the new holes, or use the existing mounting bolts to attach the new toilet bowl.
Step 3: Reconnect the Plumbing and Supply Lines
After installing the toilet tank and frame in the step above, connect the supply lines, water, and waste plumbing to the new tank.
Step 4: Install the New Flushing Actuator
Connect the new tank to the existing flushing actuator, or replace the actuator with a new one using the instructions found in Step 5 in the section above.
Step 5: Mount the Toilet and Refinish the Wall
Attach the new toilet bowl to the wall using the mounting bolts, nuts, and washers. Make sure that the new bowl lines up with the toilet rough-in. Apply caulk or another type of sealant to secure the bowl tightly and prevent leakage. Turn on the water supply valve and flush to check for any leaks.
