How to Install Barn Doors for Beginners
Learn how to install barn doors in six simple steps.
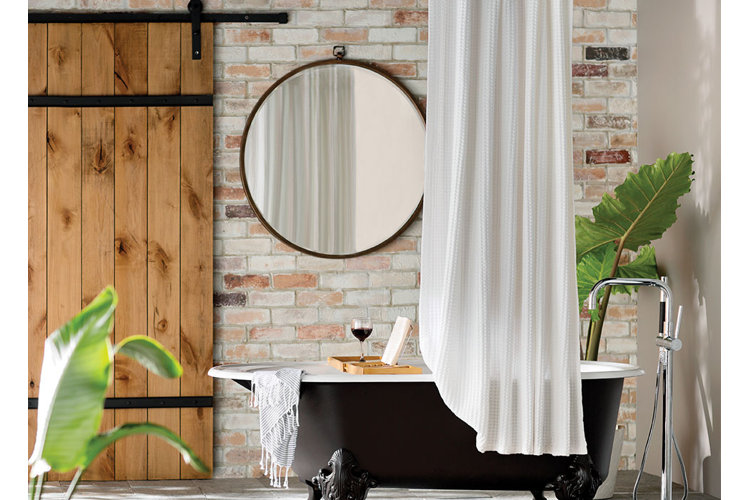
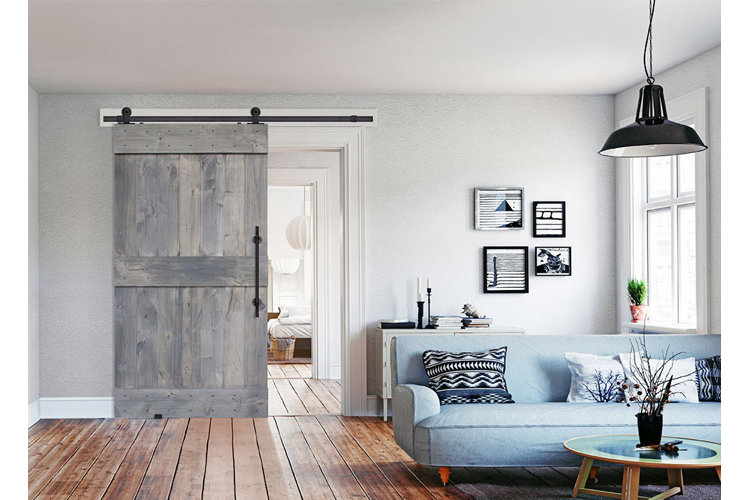
Barn doors are a stylish choice that can help enhance rustic aesthetics. Mounted on a track, these sliding doors can help add privacy to your open concept home. Adding these doors to your home may seem like a big project but you can simply do it yourself with this step-by-step guide on how to install barn doors.
Tip!
Before you get started make sure you choose a barn door that’s right for your space. Check out our helpful guides to help you choose the right one:
Buying Barn Doors: How to Choose the Right One
Measuring 101: How to Find the Right Barn Door Sizes
How to Hang a Barn Door
We’ve got you covered on this DIY project with these illustrated step-by-step instructions.
What You Will Need
- Pencil
- Drill
- Stud finder
- Level
- Step ladder
- Door hardware
- A friend to help you lift the door
Tip!
Before you begin your barn door installation, ensure that you have all of the necessary and proper barn door hardware. This includes the track, rollers, floor guides, and handle.
Place then mark the door hardware on your barn door. This includes the handles, rollers, and anti-jump disks, which are the small rubber blocks that keep the door in place if it jumps off the track. Since each door is different, be sure to follow your product’s specific manufacturer’s instructions when attaching these pieces of hardware. However, we have a few best practices to consider below:
- When marking the location of the rollers, make sure to place the track between the wheel of the roller and the top of the door to get an accurate placement.
- Leave some space between the door and the track so it slides easily.
- The center of the handles should be 36" from the bottom of the door.
- When marking the location of the interior handle, place it a few inches from the edge of the door. Since the barn door will overlap the doorway by a few inches, you want to make sure you can reach the handle once the door is shut.
Step 2: Find the Studs
Barn doors are heavy and use a track to move, so it’s best to attach the hardware to the studs and not just the drywall. Use a stud finder to find where the studs are above your doorway. Mark where the studs are in pencil. Line up the holes in your track to the studs in your wall. Drill pilot holes into the studs.
If the studs don't line up correctly with the track mounts, you will need to install a support beam (also called a mounting board or backer board) that runs the length of the track. Make sure the beam is wide enough to clear the trim above the door frame. Attach the support beam to the studs. You may want to paint your beam the same color as your walls or make it the same finish as your barn doors so it doesn’t stand out as much.
Step 3: Attach Your Track
Making sure the track holes line up with the stud holes, hold your track up against the wall until it’s lined up with your desired placement. Use a level to ensure the track is even and straight. Use a pencil to mark the track on the wall and the non-stud track mounting holes. Remove the track and drill the marked holes. Realign the track and the screws with the newly drilled holes and use a drill to connect these to the wall. Have a friend hold the track while you tighten these. Make sure the track is securely supported on the wall.
Step 4: Install Stoppers
Slide the stoppers on to each end of the metal track. Use the included hardware to tighten the screws.
Step 5: Attach Your Barn Door
Now that your track is attached to the wall and your rollers are attached to the door, you can finally hang your barn door. With the help of a friend, lift the door so that the rollers are slightly above the track. Slowly lower the rollers onto the track. Slide the door back and forth on the track to ensure it is securely aligned.
Step 6: Install the Floor Guides
To ensure your door glides easily, install the floor guide – a piece of hardware that keeps barn doors from swinging out of place. Some guides fit into a groove that is in the bottom of the door, while other guides go under and around the side of the door. Move the door so it hangs plumb (hanging straight), then place the guide according to manufacturer instructions. Mark the locations for the screws. Screw the guides into place.
