How to Tile a Bathroom Floor
A helpful step-by-step guide for DIYing this home improvement project.
One of the biggest selling features of any home is a master suite. Buyers pay special attention to details like lighting fixtures, window placement, and beautifully tiled floors.
Even if you’re not planning on selling your home any time soon, one way to update the look and feel of your master bathroom is to replace old or outdated linoleum or vinyl flooring with new tile—a project that's far easier than you may think. Read on for step-by-step instructions on how to tile a bathroom floor.
Project Level of Difficulty
3 out of 5
Estimated Time Frame
5-7 days
Materials
- 2-3 5-gallon buckets
- 15 cement boards, like HardieBacker
- Cement board screws
- 3 50-pound bags of thinset mortar
- Tile
- Tile spacers
- 3 25-pound bags of sanded grout
- Grout haze remover
- Tile sealer
Tools
- Hammer
- Rubber float
- Diamond blade wet saw
- Notched trowel
- Hammer drill
- Utility knife
- Margin trowel
- Safety goggles
- Respirator mask
- Knee pads
- Foam brush
- Microfiber cloths
- Gloves
- Measuring tape
- 24-inch level
- Wooden block
- Fibreglass tape
- 2-3 sponges
Step 1: Calculate Square Footage
Materials and tools: measuring tape
Measure the length and width of your room. Multiply the two numbers to get the total square footage. If your bathroom is made up of several areas—if the toilet, for example, is behind a separation wall—divide the space into smaller rectangles, measure those, and add them together.
To ensure you will have enough tile for your profile, be sure to add an extra 10-15 percent to your total when ordering the final amount.
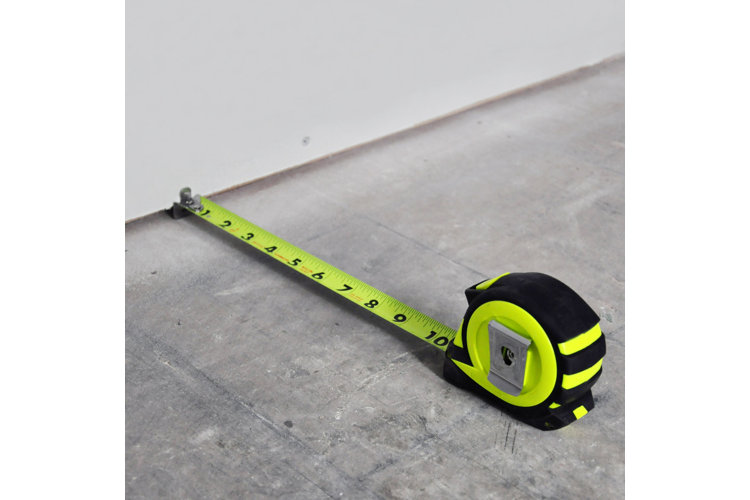
Photo: Foxy Oxie
Step 2: Order Samples
Materials and tools: tile samples
Test out a few options before buying by ordering samples. You’ll be able to get a better feel for the colour and sizing in person. Try leaving your samples in a group by a window to test the colour in multiple lighting situations. This will also give you an opportunity to perform a soak-test to check for quality control.
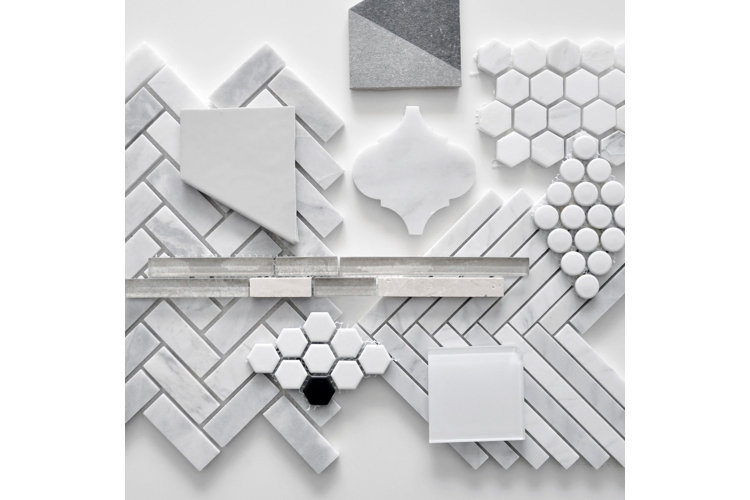
Photo: Foxy Oxie
Take advantage of Wayfair’s tile calculation tool found on all flooring product pages. If you input the square footage of your room, our tool provides the number of cartons you need to order.
Step 3: Choose Grout
Materials and tools: grout samples, and grout
When purchasing grout, try selecting a colour that matches your tile; this will help to reduce noticeable mistakes and irregular grout lines. Similar to ordering samples, you can ask to order a few grout colour swatches to determine which will work best with your tile before placing your final order.
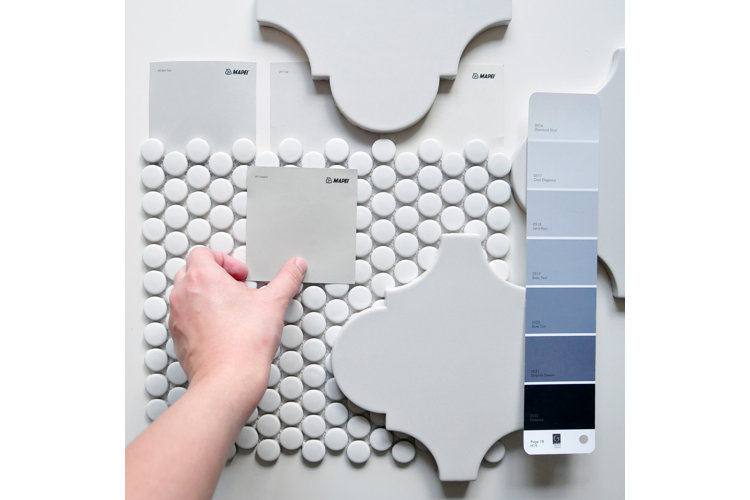
Photo: Foxy Oxie
You’ll also need to choose between sanded versus unsanded grout. Use unsanded grout if your joints are 1/8-inch or smaller. If your joints are larger than 1/8-inch, or you’re grouting the floor, then use sanded grout.
Step 4: Determine Cement Board Layout
Materials and tools: cement (HardieBacker) boards
Cement boards like HardieBacker are installed for several reasons: to ensure proper floor thickness for smooth room transitions, prevent mould in high-moisture areas, and reinforce floor strength. The recommended thickness is 1/4-inch—unless a 1/2-inch thickness is required for transitions between rooms or existing flooring.
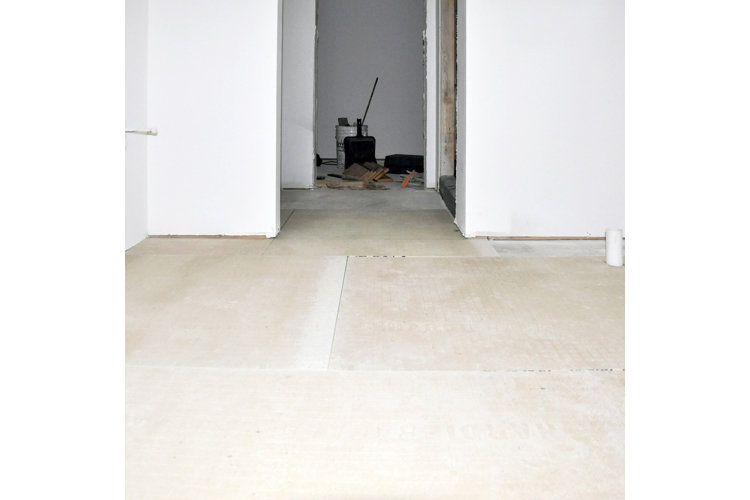
Photo: Foxy Oxie
Your goal is to cover the entire floor with the boards, staggering the edges so there isn’t a single place where all four corners of boards meet at one point.
Photo: Foxy Oxie
Step 5: Cut Cement Boards
Materials and tools: cement (HardieBacker) boards, pencil, measuring tape, level, utility knife, hammer, safety goggles, and respirator mask
Place the board evenly on the floor and measure the distance you need to cut and mark it. Be sure to check it with a level before cutting. Using a utility knife, score a groove along your cut line. Next, break apart the board along your line. Do not use a saw to cut the boards, as this will produce a lot of harmful dust crystalline silica, which can irritate your eyes and lungs.
Photo: Foxy Oxie
To accommodate bathroom fixtures, etch around the perimeter of the cutout and snap the HardieBacker board away from yourself with a hammer.
Photo: Foxy Oxie
Step 6: Prepare Thinset
Materials and tools: respirator mask, safety goggles, thinset, cement (HardieBacker) boards, bucket, mixing drill, and notched trowel
When you prepare the thinset, be sure to wear a respirator mask and safety goggles.
Now that you have an idea of what will go where, mix water and thinset in a 5-gallon bucket. For the correct ratio, you should follow the thinset manufacturer’s instructions. Keep in mind that you'll have approximately a 30-minute window to work with the mixture before it dries up. We recommend working in smaller batches.
Photo: Foxy Oxie
Run your mixing drill on low for 3 minutes to combine the water and thinset. The thinset should be thick enough so when removing your notched trowel, it doesn’t instantly fall back into the bucket.
Photo: Foxy Oxie
Let the thinset rest for 5 minutes, then mix for 2-3 minutes. The thinset should not have lumps.
Step 7: Apply Thinset between Subfloor and Cement Boards
Materials and tools: thinset, cement (HardieBacker) boards, notched trowel, and kneepads
Next, you’ll need to remove a few boards at a time and apply an even layer of thinset to the floor using the smooth side of the notched trowel. Apply more as needed, dragging the trowel in the same direction.
Photo: Foxy Oxie
Then, holding the notched side of the trowel at about a 45-degree angle, comb it atop the layer of thinset to create grooves.
Photo: Foxy Oxie
Rather than an adhesive, the thinset acts as a space filler, eliminating air bubbles and ensuring a smooth and even surface.
Step 8: Screw Down Cement Boards
Materials and tools: hammer drill, concrete board screws, measuring tape, pencil, and kneepads
Place your boards on top of the thinset, then using a hammer drill, attach the concrete boards to the floor with cement board screws, making sure to space the screws approximately 6-8 inches apart. If you’re using HardieBacker cement boards, then spacing out the screws will be easy because each square on the board is one inch.
Photo: Foxy Oxie
Position the screws no more than 1/2-inch to 2-inches from the outermost edge of each board, and leave a minimum of 1/8-inch gap between the outer perimeter of the boards and the walls.
Photo: Foxy Oxie
Step 9: Tape Cement Board Seams and Cover with Thinset
Materials and tools: fibreglass tape, notched trowel, thinset, and kneepads
After you’ve attached all the boards, tape over the joints using fibreglass tape. Start at one end of the room and simply roll the tape along the joint to the other end of the room, using your hand to press the tape firmly to the boards.
Photo: Foxy Oxie
Then, using a notched trowel, cover each length of tape with a thin layer of thinset, making sure to feather out the edges.
Photo: Foxy Oxie
Step 10: Determine Tile Layout
Materials and tools: tile, tile spacers, measuring tape, pencil, and kneepads
Take the time to lay bathroom tile exactly where you want it without adhering it to the floor just yet. Doing so will help you use as many whole tiles as possible and to plan out where you will need to make cuts. Plan out the installation so that cut tiles are placed at edges and corners, where they’ll be less noticeable and not subject to as much foot traffic.
If your tile has a unique shape, you’ll need to decide which direction to place it. For example, if you’re using arabesque tile, do you want the traditional lantern shape to be more prominent when a visitor first walks into the bathroom, or would you rather have it be more prominent from a different angle?
Photo: Foxy Oxie
Insert tile spacers as you continue dry-laying the bathroom tiles on the floor. The spacers help maintain an even and consistent grout line between tiles. To know what size of spacers to use, check the specific tile listing on Wayfair, which recommended a grout size of 1/8-inch.
Photo: Foxy Oxie
If your tile is square or rectangular, regular 4-corner spacers are fine, but if your tile has a unique shape, then you’ll need what are called “tombstone-style” spacers.
Photo: Foxy Oxie
Once you’re satisfied with the completed layout, remove the tiles and tile spacers. If you have multiple tiles that need to be cut, be sure you remember which one goes where—whether that means arranging them in the next room in the proper order, or stacking them in the order you’d use them.
Step 11: Cut Tile as Necessary
Materials and tools: tile, measuring tape, level, pencil, diamond blade wet saw, safety goggles, and respirator mask
When cutting tile, use a measuring tape, level, and pencil to mark the cut lines in the appropriate places.
Photo: Foxy Oxie
Then, using a diamond blade wet saw, carefully guide the tile along the line to make the cut. Be sure to wear safety goggles and a respirator mask.
Photo: Foxy Oxie
Make sure the space is completely clean before installing bathroom tile.
Step 12: Mix and Apply Thinset
Materials and tools: thinset, bucket, mixing drill, kneepads, and notched trowel
Once again, prepare thinset following the manufacturer’s instructions. Be sure to keep the speed of the mixing drill low or you can risk getting air bubbles, which decreases the strength of the bond between the thinset and tile.
Put on kneepads before beginning the installation.
Start at the corner farthest away from the main entry and work your way to the main entry, making sure you’ve planned the installation so you don’t step on any newly installed tiles as you proceed. This may require installing the bathroom tile over the course of several days.
Begin applying thinset using the smooth side of the notched trowel and spread an even layer of thinset over the floor. Working in an area of about 3 square feet makes the process more manageable and will prevent the thinset from drying out before you can get to it.
Photo: Foxy Oxie
Use the notched edge of the trowel to create ridges in the layer of thinset, and lay down the tile in the exact place from which you picked it up. Do take your time with it—especially in the beginning, as those first few tiles will serve as a guide for the rest of the installation.
Photo: Foxy Oxie
Step 13: Lay Bathroom Tile
Materials and tools: tile, hammer, wood block, tile spacers, level, paper towels, grout remover tool, and kneepads
Lay the bathroom tile where you’ve applied thinset, being extra meticulous with the first few tiles, as they will determine the straightness of the rest of the installation.
Photo: Foxy Oxie
Use a rubber mallet, or a hammer and a block of wood, to gently but firmly tap each tile into the thinset.
Photo: Foxy Oxie
Periodically use a level to check that the tile height is the same, and no one tile is sticking out higher than the others.
Photo: Foxy Oxie
Keep paper towels nearby, and if some of the thinset oozes up into the grout lines, clean it immediately. You can use a grout remover tool, or anything else of a similar nature, to remove the excess mixture from the grout lines. A screw works well and is especially useful around curvy grout lines. At least 2/3 of the grout space should be free for grout installation.
Photo: Foxy Oxie
Step 14: Remove Excess Thinset
Materials and tools: margin trowel, bucket, and kneepads
Scrape leftover thinset from the tiles with a margin trowel. Be sure not to wait too long, or it will have already cured and require more extreme measures to remove.
Photo: Foxy Oxie
Step 15: Grout Joints
Materials and tools: grout, bucket, mixing drill, margin trowel, rubber float, and kneepads
Before grouting, wipe down the tile with a damp sponge.
Grout will need to be prepared in smaller batches and used within the half hour it's made, similar to thinset. Following the manufactures instructions, combine the appropriate ratio of grout to water in a 5-gallon bucket. Put your mixing drill on the lowest setting and blend for 3-5 minutes. Let rest for an additional 5 minutes. Then mix for 1-2 minutes before applying.
Begin grouting in the corner farthest from the main doorway, making your way backwards to the entry. Remember to plan the grouting process so you’re not stepping on any newly grouted tile in order to leave the room.
Photo: Foxy Oxie
Typically, grouting in a diagonal direction is recommended for square or rectangular tile, but with an arabesque shape, a half-circle method works best and avoids pulling out too much of the freshly installed grout.
Photo: Foxy Oxie
To ensure all joints are grouted, use a margin trowel to scoop additional mixture onto floor and with a rubber float, carefully massage it into the grooves. Continue smoothing over the joints until all are completely filled with grout.
Photo: Foxy Oxie
Step 16: Remove Excess Grout
Materials and tools: sponge, clean cloth, haze remover, and kneepads
After letting the grout sit for 15-30 minutes, use a damp sponge to remove as much of the excess grout as possible. Be extra careful not to get the grout too wet or you risk weakening the bond.
Photo: Foxy Oxie
Let the tile rest for another 30 minutes, then use a microfiber cloth and lightly buff the tile. This will further wipe away the layer of film on the tile surface.
Photo: Foxy Oxie
Wait three full days to allow the grout to cure. If you still notice a slight haze on the tile, use a haze remover to get rid of any grainy texture. We recommend testing a small area first, as the haze remover can sometimes remove glaze from the tile. Do not walk on the floor for at least 24 hours after using the haze remover.
You may notice that the grout colour lightened slightly as the grout cured—this is completely normal and expected.
Photo: Foxy Oxie
Step 17: Apply Sealer
Materials and tools: sealer, sealer applicator, and kneepads
Ensure your tile is clean and dry before applying sealer. Plan your sealer application so that you start in a corner furthest from the main entry and work your way backwards to the exit. Don’t forget to put on kneepads.
Dip the sealer applicator into the sealer, and generously apply to the tile and grout.
Photo: Foxy Oxie
The grout will turn slightly darker as you apply sealer, which helps you see where you’ve already applied the sealer.
Photo: Foxy Oxie
Let the sealer soak into the tile and grout for at least 15 minutes.
Step 18: Remove Excess Sealer
Materials and tools: clean cloth, and kneepads
After 15 minutes, use a clean cloth to remove excess sealer from the tiles. The sealer will need 24-48 hours to cure completely.
Photo: Foxy Oxie
