How to Tile a Shower
Tackle this tile DIY with step-by-step instructions.
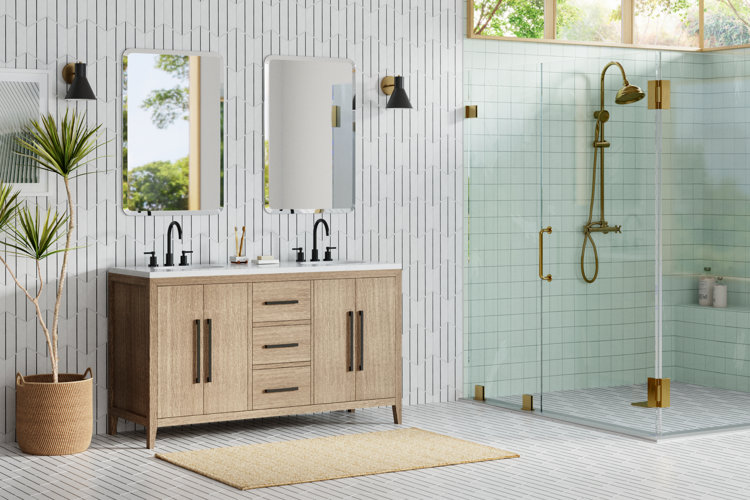
Tile can bring stylish texture, pattern, and color to showers, so knowing how to tile a shower yourself can come in handy for a budget-friendly bathroom reno. Our guide walks you through each step of tiling a shower so that you can take on this DIY with confidence.
Tip!
Waterproofing is a key part of this project, so tiling a shower is best left to experienced DIY-ers and professionals. Inadequate waterproofing of the shower walls or the shower pan can lead to water leakage and damage.
Before You Begin
How to Prep the Shower for New Tile
How to Tile a Shower
Before You Begin
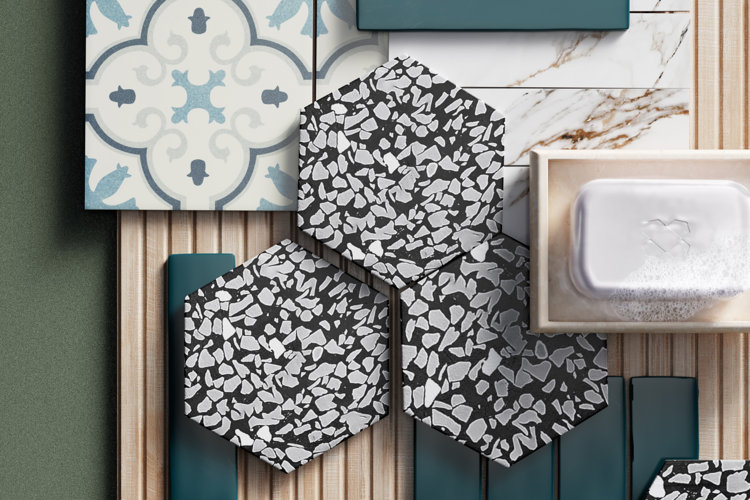
Before you can start tiling a shower, you'll need to gather your materials and make time in your schedule to tackle this DIY. This project can take multiple days because you'll need to let the grout dry fully and cure before you can risk getting the tile wet or using the shower. You should also consult local building codes to see if there are any specific requirements.
Choose Wall Tile
When choosing tile for shower walls, you'll want to choose a tile that is waterproof. Porcelain tiles have a very low porosity, which makes them great for wet areas like showers. Glass or glazed ceramic tiles can be used for shower walls. These tile materials are also easy to wipe clean.
Tip!
Read our guide to find more wall tile options: What's the Best Tile for Shower Walls?
Pick Floor Tile
In addition to being waterproof, shower floor tile should also provide an adequate amount of grip so that you won't slip when it's wet or covered in soap. Tiles are rated by "coefficient of friction" (COF or DCOF) as a standardized measurement of slip-resistance, with higher numbers being more slip-resistant. Shower floor tiles should have a DCOF of at least 0.42.
Consider the Shower Pan
A shower pan sits between the subfloor and the floor of the shower, providing a key barrier that keeps your shower waterproof. You can choose from a pre-built shower pan that is easier and faster to install, or you can build a tiled shower pan that offers you more stylistic freedom and blends seamlessly into your tiled shower design.
Tip!
Read our guide What Is a Shower Pan & Do I Need One? to learn more.
Determine Your Tile Layout
You'll also need to figure out how the tile will be arranged and how much you'll need. Some tiles (like subway tiles) can be arranged horizontally, vertically, staggered, or lined up in a chevron pattern. Creating a clear plan can help you calculate exactly how much tile will be needed.
To find how much tile you'll need to tile a shower, multiply the height and width of each side of the shower. Repeat this step for the shower floor if you plan on tiling the shower pan. Check the dimensions for your desired tile in the product description. Small tiles often come in pre-arranged sheets, which can make it easier to install. You can use the area measurement of your shower and the size of your tiles to determine how much tile you'll need. Add an additional 10% to account for mistakes or future repairs.
How to Prep the Shower for New Tile
What You'll Need
Equipment & Tools:
- Canvas drop cloth
- Heavy-duty work gloves
- Hammer
- Chisel
- Pry bar
- Shop vac
- Staple gun
- Scissors
- Tape measure
- Breathing and eye protection
- Jigsaw or circular saw
- Box cutter
- Drill
- Putty knife
- Paint roller or paintbrush
Materials:
- Plastic vapor barrier (a plastic sheet that provides a waterproofing layer)
- Staples
- Cement backer board (prefabricated cement-based boards used to create a solid base for tile)
- Screws
- Caulk
- Seam tape
- Thinset mortar
- Waterproofing membrane paint
Step 1: Remove the Existing Tile
If you're renovating your bathroom and are retiling your shower, you'll need to start by removing the existing tile. Start by removing any shower fixtures and faucets. Try to cover the shower pan with a drop cloth or towel to prevent any damage.
Wear heavy-duty work gloves and use a hammer, chisel, or pry bar to remove the tiles and backer board. Work in small sections to reduce the risk of injury or damage. Use a shop vac to vacuum up any dust and debris.
Step 2: Inspect the Shower Structure
After removing the tile and the cement backer board, it's time to check out what was behind it. You'll most likely find wood framing that was sealed by a plastic vapor (unless the cement backer board was covered in a waterproof membrane paint). Make sure the wood framing of the shower is secure and reinforced in the corners. If you find drywall, you'll need to remove it and replace it with cement backer board to prevent any excess moisture and mold (which you'll do later in Step 4).
If you see any signs of mold, stop the project immediately. Call a professional to remove the mold.
Step 3: Add the Vapor Barrier
Just above the top of the shower pan, unroll the plastic vapor barrier along the three interior sides of the shower and secure it to the studs with a staple gun. Trim the excess on both sides of the shower for a neat edge.
Step 4: Install Cement Backer Boards
Use a tape measure to measure the dimensions of the shower walls and cut the cement backer boards to size with a jigsaw or circular saw, making sure to use a mask and safety glasses as you cut. Smooth the cut edge. Cut out holes for any shower fixtures using a saw or box cutter.
On top of the vapor barrier, install the cement backer boards 1/8" above the shower pan or between boards to prevent squeaking if they rub together. Use a drill to secure the boards to the studs. Use silicone caulk between all of the seams, including where the edge of two boards meet and between the boards and the top of the shower pan.
Step 5: Finish the Wall Prep
Apply seam tape to the seams and use a putty knife to add a very thin layer of thinset mortar on top of the tape. Use a paint roller or paintbrush to apply two coats of waterproofing membrane paint to the cement backer boards, letting it dry fully after each coat. Fill in any additional small gaps with another thin layer of caulk.
How to Tile a Shower
What You'll Need:
Equipment & Tools:
- Tape measure
- Level
- Bucket
- V-notched trowel
- Drill with paint-mixing attachment
- Grout float
- Sponge
- Canvas drop cloth
- Pencil
- 1/8" tile spacers (small plastic T- or X-shaped objects used to keep tiles evenly spaced)
- Tile cutter
- Tile nipper
Materials
- Thinset mortar
- Shower tile
- Two-by-four (optional)
- Silicone caulk
Step 1: Tile the Shower Pan
If you're using a pre-built shower pan or have a shower-and-bath combo, you can skip this step.
If you're using a tile-over shower pan, mix the thinset mortar with water in a bucket according to the package's instructions. The ideal consistency will resemble peanut butter. Spread a small amount of mortar in a corner of the shower pan with the smooth side of the trowel, and then run over the mortar with the notched side. Place the floor tiles on the mortar, using the grout float to press the tile into the mortar. Use a damp sponge to remove any excess mortar on top of the tiles. Grout the tile and let the grout cure for 24 to 72 hours according to the manufacturer's direction for the specific grout. You should wait until this grout is fully cured before you start tiling the shower.
Tip!
Need help grouting tile? Read our guide How to Grout Tile in 12 Simple Steps for tips.
Step 2: Create a Starting Point
Planning the tile pattern can help you create an even, uniform look. It's best to start at the second-to-bottom row since shower pans aren't always level. Use a level and pencil to draw a straight line where the bottom of this initial row would be. You can use a pencil to mark the lines on the wall or nail a straight two-by-four board below the horizontal line to use as a guide that'll keep your tile level as you work. Then, measure and mark the center point of each wall along the horizontal line so that you can start tiling from the middle and work outward.
Step 3: Apply Mortar
Lay a canvas drop cloth on the shower floor. Mix thinset mortar in a bucket according to the package's instructions. As stated above, the ideal consistency will resemble peanut butter. In small sections, spread the mortar on the wall with the smooth side of a trowel. Then, using the notched side, comb over the mortar to create a textured surface.
Step 5: Lay First Row of Tiles
Start in the middle where you marked the center. Take your first tile and spread a bit of mortar on the back using the notched side of the trowel (skip this if you're using a small tile since it won't require the extra support). Press the tile into the mortar on the wall with gentle but firm pressure. Add a tile spacer and move onto either side until you complete this row. Once you reach a corner or edge, you might need to measure and cut the tile with tile cutters or tile nippers to fit.
Let this first row dry overnight so that it can dry and cure, making it a strong anchor for subsequent rows.
Step 6: Complete the Tile
After letting your first completed row dry, you can start tiling the second row above using the same technique. Use tile cutters or tile nippers to cut tiles to fit around shower fixtures and into corners. Use a level to check regularly to ensure that your tile is level.
Remove the straight board from the bottom of the tile and cut tiles to fit the remaining bottom row. Make sure to leave a 1/4" expansion gap to account for any fluctuations.
Step 7: Let Dry & Remove Spacers
Let the tiles set and cure for 24 hours. Remove any tile spacers and use a damp sponge to clean off any dried mortar from the front of the tiles.
Step 8: Grout the Tile
Mix grout in a bucket using a drill with a paint-mixing attachment. Let it sit for 5 to 10 minutes to activate the chemical bonds. Apply the grout with a rubber grout float and work in small sections, pressing grout into each joint (which is the space between tiles). Use a damp sponge to wipe excess grout from the front of the tiles, but be careful not to wipe grout out from the lines between the tiles.
Repeat until all of the joints are filled. Do not grout interior corners of the shower, exterior edges, or the gap between the bottom row and the shower pan. You'll use silicone caulk to fill these gaps later.
Note: Do not rinse tile sponges or grouting tools in the sink because the grout can harden and cause plumbing issues.
Step 9: Wipe Away the Grout Haze
After the grout has set for about 30 minutes, you might notice a faint haze over the surface of the tiles. Use a damp microfiber towel to wipe away the haze.
Step 10: Seal the Grout
Most grouts take 2 or 3 days to fully cure. Though the grout may feel dry, it's important to let it fully cure to allow the grout to set on a molecular level. Getting the grout wet before it's cured can lead to shifted tiles or leakage issues.
After the grout is fully cured, apply a tile/grout sealant to further prevent moisture from seeping into the grout. Use silicone caulk to seal the interior corners, exterior edges, and the space between the shower pan and the bottom row of tiles.
Step 11: Replace Shower Fixtures
Once everything is cured and sealed, you can replace any shower fixtures you had to remove for this project. Though you can reuse shower fixtures, you might want a different finish or style to match your fresh set of tiles.
Tip!
Looking for shower tile inspiration? Read our guides:
12 Modern Shower Tile Ideas
11 Dazzling Shower Tile Ideas for Your Shower Renovation
