How to Apply Peel-and-Stick Wallpaper: Your No-Fuss Guide
Wallpapering has never been easier.
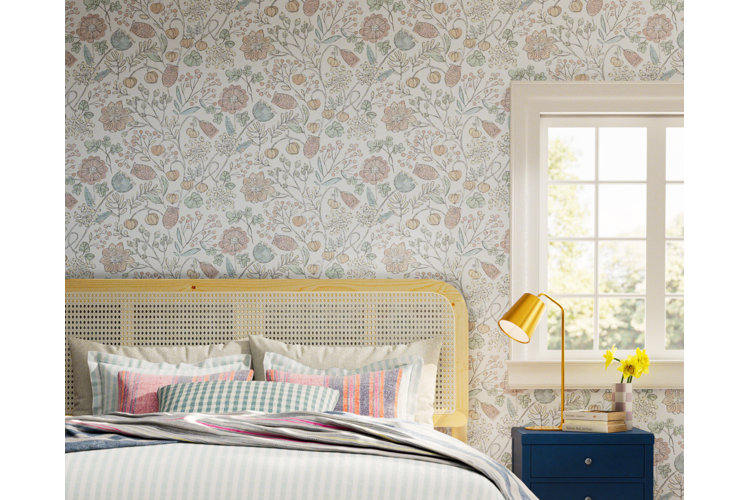
Peel-and-stick wallpaper is a versatile wall covering that can be easily applied thanks to its self-adhesive backing. With this guide you can find step-by-step instructions on exactly how to apply peel-and-stick wallpaper, along with some handy tips and tricks to make for a hassle-free DIY.
Skill Level: Beginner
Time Requirements: 2–4 hours
Number of People: 2–3
What You'll Need:
- Peel-and-stick wallpaper
- Tape measure
- Pencil
- Screwdriver (to remove flat plates and outlet covers)
- Cloth/sponge
- Mild wall cleaner
- Ladder
- Utility knife
- Straight edge tool or plumb bob (weighted string) and a level (unless your straight edge tool has a built-in level).
- Plastic smoothing tool
Tip!
Although the adhesive backing is designed to stick to surfaces with very little effort, most peel-and-stick wallpaper is better suited for walls with smooth textures like satin, eggshell, or semi-gloss finishes.
Step 1: Calculate Wallpaper Amount
First, measure your room to ensure you purchase the correct amount of wallpaper needed. Use your tape measure to calculate the height and depth of the room to determine how many rolls you will need for your project.
- Make sure to order a little extra to account for any mistakes, tricky areas, and to ensure you can match patterns if necessary.
- Read How Much Wallpaper Do I Need?: How to Measure for Wallpaper to get additional tips on this step.
Step 2: Prepare the Surface & the Room
Once your wallpaper arrives, use a mild cleaner and a sponge or cloth to wipe the walls clean, and remove any dust or dirt. Try to wait at least 24 hours for them to fully dry before applying peel-and-stick wallpaper. This step is super important to ensure the wallpaper adheres properly.
- Next, turn off the power and use your screwdriver to remove any faceplates and outlet covers.
- Clear out any furniture that may get in the way or move them to the center of the room so you have better access to the walls.
Tip!
If your walls have just been painted, wait at least three days before applying peel-and-stick wallpaper.
Step 3: Mark Your Wall
Now it's time to get measuring! You'll need to mark each wall to help line up the wallpaper and ensure it hangs straight.
- Start by measuring and recording the width of your peel-and-stick wallpaper roll.
- Next, use a ladder and either a straight edge tool or a 2' or 4' level to mark the measurement on your wall just beneath the ceiling. We recommend starting on one of the outer edges of the wall or at the corner where two walls meet before measuring inwards.
- With the first mark completed, use a straight edge tool (preferably with a built-in level) or a level by itself and line it up vertically with the mark. Adjust the angle of the level until the bubbles are in the center and then use your pencil to draw a straight line downwards. Repeat this process until you reach the floor.
- Alternatively, you can use a plumb bob (pictured above) which consists of a string and a weighted base. You'll likely need another person to go up on the ladder and hold it where the mark is. Wait until it stops swaying, and then use the string as a guide for your pencil.
- Once the line is drawn, go in with a level to confirm it's a straight line.
- Repeat this process on each wall where you plant to install peel-and-stick wallpaper.
Step 4: Cut & Begin Hanging the Wallpaper From the Top
To make your life a little easier, measure and cut strips of the peel-and-stick wallpaper to the height of the wall and add an inch or two for overhang. To do this, have someone hold the wallpaper up to the top of the wall and gently let the roll unravel until it meets the floor. You can cut it with a utility knife then and there or wait until you've adhered it to the wall:
- Peel away around 12 inches of the wallpaper's backing and at the highest point of the wall, align the stick-on wallpaper with the marked line you made earlier.
- Create a slight overhang at the ceiling to prevent any unevenness or gaps.
- Press down and slowly start to peel away the backing as you flatten the wallpaper to remove any air bubbles as you move down. A plastic smoother will help make this process easier.
- Be careful not to pull down on the self-adhesive wallpaper as this may cause it to stretch and even tear.
- Continue all the way down until you reach the baseboard or floor, and trim away any excess paper with a utility knife for an even finish.
Step 5: Match Any Patterns & Repeat
Once your first piece of peel-and-stick wallpaper is applied, you will have a reference point to move forward from. Before you apply the next pieces though, make sure to line up any patterns to ensure a seamless look.
- Slightly overlap the second piece of wallpaper over the first by around 1/4 inch and run the smoothing tool along this seam to make it as flat as possible.
- Trim and repeat.
Step 6: Cut & Trim Edges
You'll likely encounter at least one window, doorway, and/or outlet during the installation process. To tackle these locations, begin by overlapping the wallpaper over the edge.
- Use your utility knife to cut along the edges and remove any excess wallpaper and smooth it down on all sides.
- If you are cutting the wallpaper around an outlet, ensure the electricity is off to prevent any accidents.
- It is OK if there are some rough edges around an outlet hole as the plate will cover any imperfections that may remain.
Step 7: Finish Up
Once you are done applying the wallpaper, you can go back to any remaining air bubbles and use your utility knife to poke a small hole in them. This will release the air and allow you to fully smooth the peel-and-stick wallpaper.
- Return any outlet covers or faceplates and switch the power back on.
Alternative Ways to Install Peel-and-Stick Wallpaper
You don't necessarily have to start at the very ends of the wall to install the wallpaper. Here some additional methods:
Middle: You can begin this task from the middle of the wall and move outward. This is ideal for heavily patterned wallpaper as it will allow you to maintain the symmetry. If you start at the center of the wall, make sure to draw guidelines on both sides of the wallpaper to ensure you install it accurately.
Horizontal: For an interesting twist you can install your wallpaper horizontally instead of vertically. Follow the same basic steps of measuring and lining up, but you will require a second person to hold the other side of the strip as you stick it down to keep it from peeling off as you work.
Tips for Applying Peel-and-Stick Wallpaper
Here are a few additional tips to make the installation process a breeze:
- Save your wallpaper scraps as you work just in case you need them to fill any tight spaces.
- If you install your wallpaper in a damp location such as the bathroom, make sure to choose one that is moisture-resistant to prevent any water damage.
- You don't have to use peel-and-stick wallpaper along the entire wall. You can also apply it as a backsplash or along the borders of the wall and still achieve an updated look.
Tip!
Check out the video below for a visual overview of the peel-and-stick wallpaper application process:
