How to Install a Garbage Disposal
Simple steps for an easy installation.
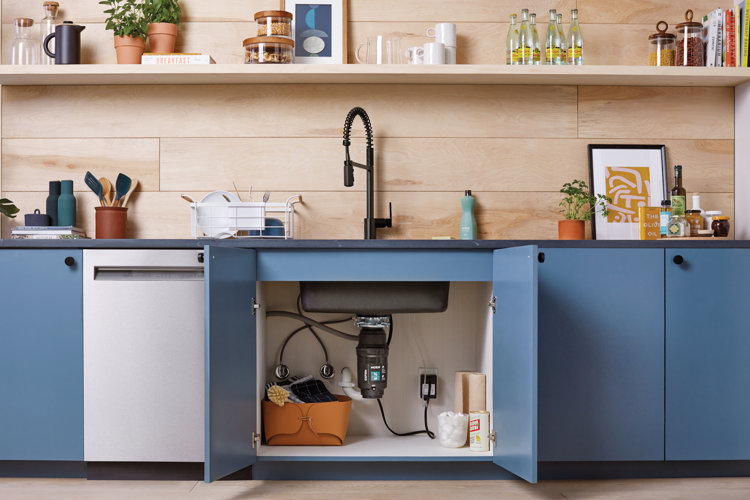
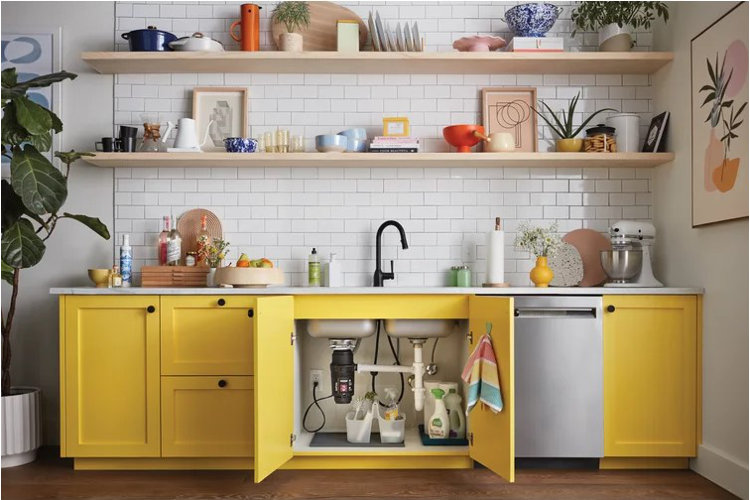
A garbage disposal is a convenient addition to your kitchen. These handy appliances are installed beneath the sink and are ideal for getting rid of food waste as you’re doing the dishes. Whether you're replacing your garbage disposal or simply installing a new one, our guide covers all you need to know about installing a garbage disposal. Keep reading to learn how to install a garbage disposal.
Before You Begin
Find the Right Garbage Disposal
When browsing for a new garbage disposal, there are some important factors to consider. Garbage disposals come in a variety of models that operate differently. Check out our guide How to Choose a Garbage Disposal for Your Sink to learn more about the available types and features.
Gather Your Tools & Materials
Make sure you have everything you need for a smooth installation.
What You Will Need:
- 1-Quart bucket
- Hammer
- Putty knife
- Screwdriver
- New garbage disposal
- Plumber's putty
- Rag
Removing a Garbage Disposal
If you're replacing a garbage disposal, you'll need to remove the existing one first.
Step 1: Turn Off the Power
Before removing the old garbage disposal, make sure the power is disconnected. Unplug the existing garbage disposal and then go to the circuit breaker to turn off the power that connects to the garbage disposal.
Step 2: Detach From Connecting Lines
Place a bucket beneath the spot where the garbage disposal connects to the waste line to catch any wastewater. Detach the dishwasher hose if your disposal is connected to the dishwasher, and then disconnect the waste line.
Step 3: Remove the Old Garbage Disposal
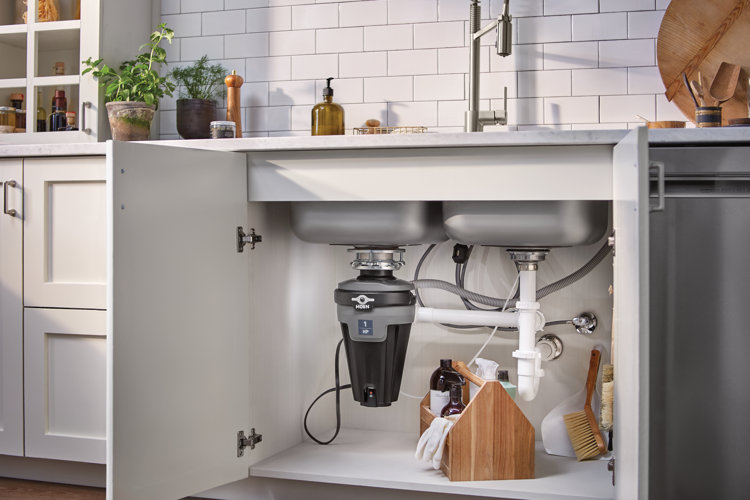
Remove the old disposal by unscrewing the mounting ring at the top of the unit. Depending on the model, you can unscrew the disposal using a screwdriver or rotated counterclockwise to loosen the disposal from the mounting ring. After unscrewing the disposal, it'll come free and unattached. Garbage disposal can weigh up to 15 lbs., so make sure to hold the base of the disposal to maintain a supportive grip.
Step 4: Remove the Mounting Assembly
Remove the rubber snap ring around the mounting bracket and then remove the mounting bracket, which should slide off or unscrew. Take out the drain assembly and the rubber gasket. Push up the flange (the metal ring that surrounds the opening of the sink drain). If the flange is hard to remove, use a hammer to gently tap it from its place. Pull the flange out of the sink from above. Scrape away any leftover putty and clean the area to prep for installing your replacement disposal.
Installing a Garbage Disposal
Now that you've removed the old garbage disposal, you're ready to start installing the new one.
Step 1: Install the Drain Fittings
To hold the new disposal in place, you'll need to put together the mounting assembly made of the sink flange and the mounting ring. Roll a small amount of plumber's putty into a snake that is about ½" thick and 10" long. Wrap the snake around the underside of the new flange. From the top of the sink, firmly press the flange into the opening of the sink. Place something heavy on top of the flange to keep it in place while the putty hardens.
Step 2: Attach the Mounting Ring
Beneath the sink, add the backup ring, the new rubber gasket, and the mounting ring to the bottom of the flange. Add a rubber snap ring to keep the mounting ring secured to the bottom of the flange.
Step 3: Tighten the Mounting Ring
Use a screwdriver to secure the mounting ring. Alternate sides while screwing to ensure the mounting ring is tightened evenly. Be careful to not overtighten; tightening the mounting ring too tightly could cause too much of the putty to ooze out and prevent a proper seal. Use a putty knife or rag to clear away any excess putty.
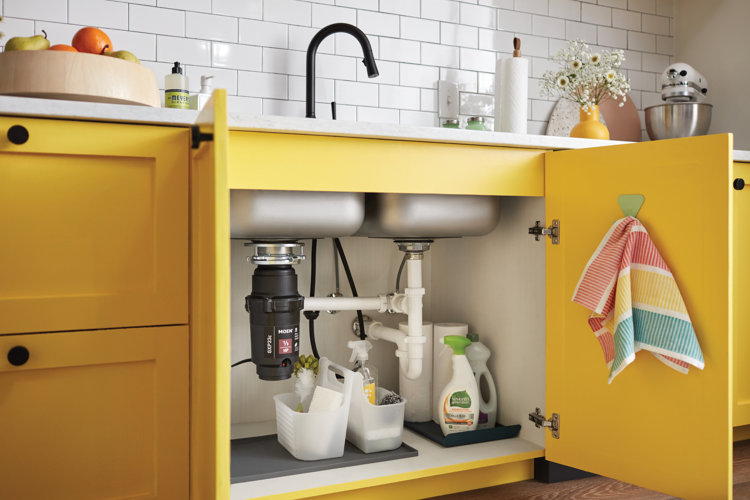
Step 4: Mount the New Disposal
Place the disposal on the mounting ring. Turn it clockwise until the disposal clicks into place and is securely attached. Make sure the disposal's outlet is facing toward the drain pipe.
Step 5: Connect the Drain Lines
Reconnect the discharge pipe to the disposal. Depending on the size of your new disposal, you may need to choose a longer pipe or trim the one you have. Connect the disposal to the dishwasher line if your disposal uses one.
Step 6: Test the New Disposal
Turn on the sink and let the water run through the disposal. Check for any leaks, and if you find any leaks, tighten any of the connections that might be loose. Plug in the disposal and switch the power back on. Test the disposal by running the water and dropping in food scraps.
