How to Make Compost the Right Way
Learn how to make compost at home.
If you have an affinity for gardening or simply love getting your hands in the dirt, you'll know the importance of giving your plants the right nutrients for their development. Of course, you can always go out and buy your own plant food and fertilizer, but there is a special sort of accomplishment that comes from creating homemade compost. Besides – it's hard to get any more organic and chemical-free than something you've made at home with your own hands. So come with us and we will teach you how to make compost to give your greenery the love and nourishment it needs.
What Is Compost?
You've heard the term many times before, but the question is – what exactly is compost? In short – composting is the practice of placing organic materials (food scraps and other natural waste) in a container so they can break down and decompose into the form of soil known as compost, that can then be used as a nutrient-rich food for your plants.
Bacteria and other microbes feed on the organic matter using carbon and nitrogen to grow and reproduce. Smaller organisms like snails, earthworms, and other insects feed on plant matter in the soil, breaking it down and turning it into compost.
Compost helps to improve the soil's structure and water-retention capacity, while feeding your plants and reducing waste. The great thing is that composting is quite an easy practice that can be as passive as you choose. Below are all the necessary steps to help you learn how to make compost at home.
Why Should You Compost at Home?
Apart from giving your plants a beneficial substance that will aid their growth – whether indoors or outside, composting is also a simple way to give kitchen waste, yard clippings, and even paper remnants, a second purpose and keep them out of landfills. This in turn helps to reduce the production of greenhouse gasses that is created as the food decays.
In creating homemade compost, not only will it help you manage your waste in a more sustainable manner while providing the high-quality fuel needed to encourage the growth of healthy plants (thus preventing soil erosion), but you will also save money by reducing your need to purchase plant food as well as pay for waste disposal.
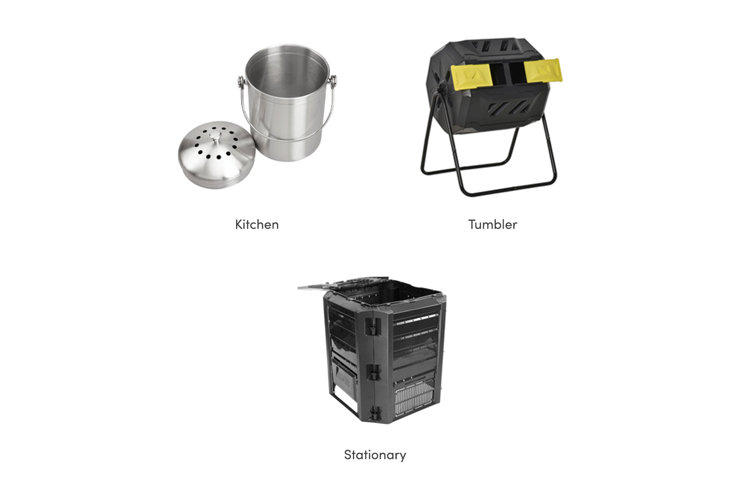
Before you begin your compositing journey, you will first need to consider how and where you intend to create your compost – this will help you choose the right bin for your needs. There are three types of compost bins to choose from.
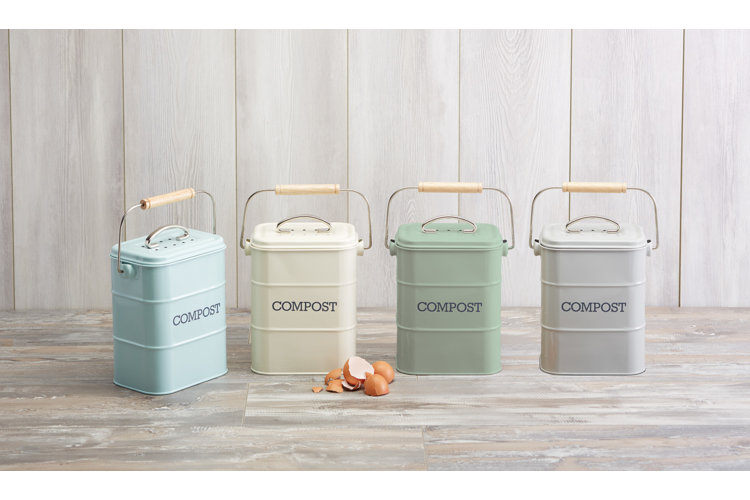
Kitchen & Counter: Not all compositing needs to occur outdoors. If you have limited space, no backyard, or only require small scale amounts of compost, a kitchen composter will do the trick. These small streamlined designs are odor-free (due to air-tight lids) and allow you to collect kitchen scraps with ease.
Tumbler: Moving to the outdoors, but still in a closed container, tumbler composters typically comprise a cylinder that is mounted on a raised frame. You simply add your organic waste and use the attached crank to rotate the contents every so often.
Stationary: These composters sit directly on the ground and have a lid that opens up to allow you to place your waste inside. Some versions have an open bottom that sits directly on the ground – allowing for existing organisms in the dirt to enter the compost pile and accelerate the process, while others come as sealed containers with a hinged door at the bottom to give you access to the finished product, preventing the attraction of pests.
Depending on the type of composter you use, the process of composting varies. Here are the steps for each of them.
How to Make Compost in the Kitchen
There are two types of kitchen composters that can be used in different ways.
Electric: The first and more simple way is to create countertop compost with an electronic model. You place your scraps into the small device and switch it on at night so it can process. These are ideal for people who live in apartments, don't generate a lot of waste, or are looking to create small compost batches.
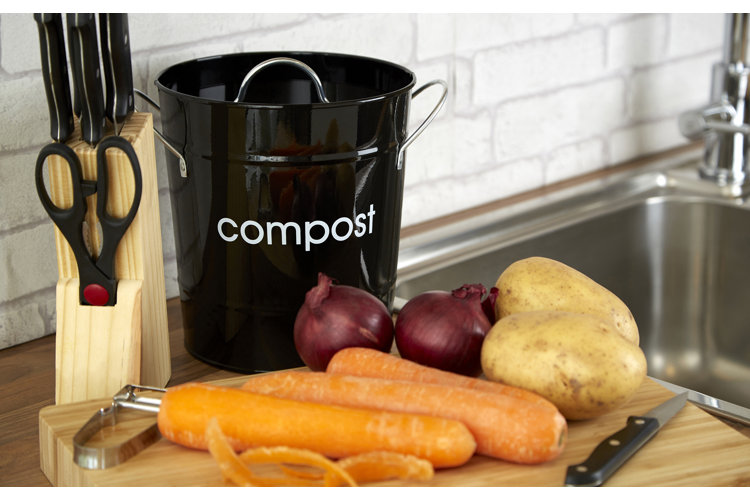
Storage: The second type is more used as a receptacle for your scraps. These buckets are filled up with your waste until full and then taken to your outdoor compost heap. They typically feature air-tight lids (some even have charcoal filters) to prevent any smells and sturdy handles for easy carrying – making it so that you don't need to take your remains out every single time you eat.
How to Compost in a Stationary Composter
Step 1: Start With Green Materials
To begin your compost pile, start with your green materials, which include kitchen scraps like eggshells, fruit cores, vegetable peels, and coffee grounds, as well as leaves, grass cuttings, and weeds. These are all high in nitrogen, which is one of the three components required to successfully make compost. It's a good idea to place down a layer of twigs and mulch first for air circulation and drainage.
Step 2: Next Add Brown Materials
Now you need to add brown materials such as paper, sawdust, straw, and small branches. They are filled with carbon, the second vital element in composting. Your mix should be at about a 50/50 ratio with both the green and brown elements balanced. Make sure to shred any paper to allow oxygen to easily circulate through the pile.
Step 3: Now for Water
The final integral key ingredient to make compost is water. Moisture is what helps the contents break down, so it is vital to maintain the correct consistency. Too dry and it will take months before anything occurs, too wet and it can begin to kill off the good bacteria and rot.
- Your compost pile needs to be damp but not dripping. To achieve this, you need to add about a bucket of water once a week.
- If your bin is in full sun, it may require more water and vice versa in the shade – so it's best to place the bin in a spot that gets part shade and part sun.
- You will know it is breaking down correctly when the pile begins to get hot in the middle.
Step 4: Turn the Pile
Using a pitchfork or a shovel, rotate the contents by moving the outer portion of the pile toward the center and continue shuffling the material until you have exposed the still-decomposing material underneath. Do this about every two to four weeks as it will ensure even decomposition and provide oxygen for the organisms therein, additionally it will prevent the contents from becoming matted down.
Step 5: Check Your Ratios
Keep an eye on the consistency of your pile throughout this process. If you find the internal temperature is too low, add more greens and turn the compost to introduce more oxygen. If it is too wet or smells bad, increase your browns to absorb some of the moisture.
Step 6: Let It Cure
Overall, this process takes between three to five months to completely break down the contents and make a batch of compost. Once there are no more visible food scraps or garden waste, and the pile has stopped heating up, it is time to cure for at least four weeks.
- You can either stop adding materials to your pile or relocate the oldest compost to a separate area where it can cure.
- After curing, the pile should shrink down to around 1/3 of its original size.
- You should be left with compost that smells like fresh soil, looks dark, and feels loose.
- Sift or screen your finished compost to filter out any materials that haven't broken down (you can use 1/4 inch hardware cloth to make your own screen).
- Return any whole materials to your new pile.
Tip!
To encourage faster decomposition, you can use a blender to break down the waste material into a slurry to be added to your composter. Just avoid blending anything that could damage the blades.
How to Make Compost in a Tumbler
All the steps to making compost in a tumbler are virtually the same as those for a stationary bin. The only difference is that once you have added your greens, browns, and water, you need to use the crank to give it a few turns each week. Continue to follow the rest of the steps until you have usable compost.
Tip!
While you can begin your compost pile any time of the year, decomposition will be slower during the cold winter months.
Use a Worm Farm
Vermicomposting entails the use of worms to quickly produce compost. As the worms eat the scraps, they release nutrient-dense castings that are rich in nitrogen. They also help aerate the soil while accelerating the process in their small contained environment (worm bins). Before you begin, you might want to learn more about vermiculture to ensure you are doing everything correctly.
Composting helps to reduce food waste, but it is imperative to know what can and can't be composted. Adding incorrect items can destroy the good bacteria or even carry harmful diseases or chemicals.
- Fruit and vegetable scraps (even moldy pieces) – pits, rids, cores, scraps, and skins
- Eggshells (rinsed and crushed)
- Coffee grounds
- Loose-leaf tea and tea bags
- Corn husks
- Grass and plant clippings
- Shredded newspaper
- Straw
- Dry leaves
- Flowers from bouquets
- Sawdust from untreated wood
Do not add the following:
- Dairy products such as milk, cheese, butter, and yogurt
- Meat scraps
- Condiments, dressing, or sauces
- Cooked leftovers
- Fats, oils, or grease
- Treated woods
- Processed foods
- Charcoal ash
- Invasive weeds
- Unhealthy or diseased plant material
- Pet waste
What to Do With Your Compost
Once you have your own natural soil treatment, it is time to feed your garden.
- Add compost to your flower beds, bulbs, fruit trees, potted plants, or your lawn.
- Add a three to six inch layer to the soil surface in place of mulch
- Make an enriched potting soil with equal measures compost, topsoil, and vermiculite.
- Make compost tea by allowing the completed compost to steep in water (five parts water to one part compost by volume) for several days before draining it off to use as liquid fertilizer.
Knowing how to make compost is not difficult at all, so now you can get started on creating your very own nutrient-dense plant food using all this information.
You Might Also Like:
