Planning a Chicken Coop: Everything You Need to Know
Make your hens feel at home.
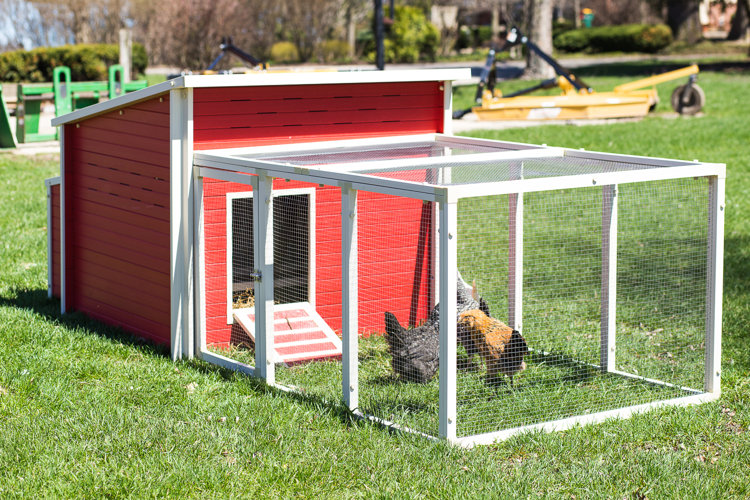
There are a few essential steps to complete when planning a chicken coop, whether you aim to DIY your own or opt for a pre-built model. This includes finding the best spot for your coop, selecting an optimal coop size for your flock, and providing the right living conditions to keep your flock safe, happy, and healthy. Keep reading to ensure you create an optimal environment for chickens to live and produce eggs.
What Is a Chicken Coop?
A chicken coop is a safe, walled-in enclosure for hens to sleep, nest, hatch eggs, and shelter in from weather or predators. Chicken runs are often attached to chicken coops, so flocks can move about outside while still remaining within a safe, enclosed space.
How to Prepare Chicken Coops for a Flock
Before you can bring chickens into your backyard, you first need to find the right location, select a coop design, and prep the space for their arrival. Follow these steps to make sure you have everything you need to set up a chicken coop.
Step 1. Start With the Right Spot
Step 2. Take Measurements to Determine Sizing Needs
Step 3. Decide on the Best Materials
Step 4. Select a Coop Design and Features
Step 5. Set Up Your Chicken Coop and Run
Step 6. Add Important Accessories
Step 7. Welcome Your Flock and Stay Flexible
Step 1. Start With the Right Spot
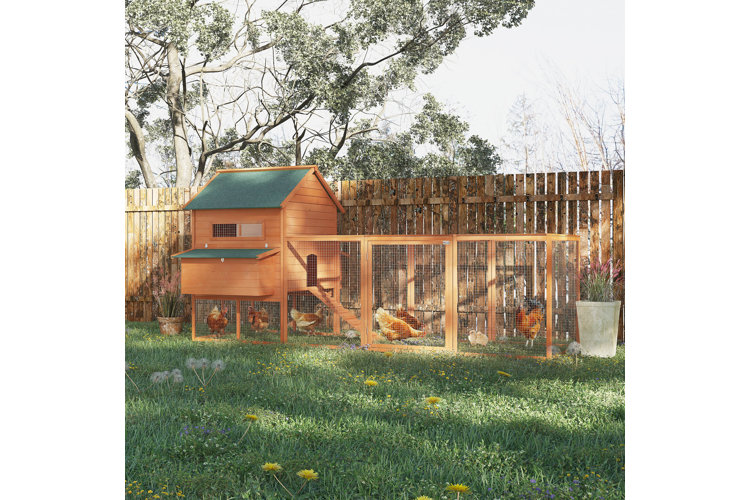
When planning a chicken coop, it's important to consider the conditions of your outdoor space before deciding on the type or size of chicken coop you want. By choosing a spot first, you help ensure that you go on to choose the right chicken coop for the space you have. Here are some key considerations when determining the best spot to put a chicken coop:
Partial Shade: Chickens thrive in environments that are part sun, part shade because it helps them get an optimal amount of natural light without overheating.
Flat, Solid Ground: Keep your chickens safe from predators by ensuring the coop and chicken run rests on flat ground. It also helps if you have concrete or another solid surface that will prevent predators from burrowing in. Choosing a flat spot also helps keep your chicken coop level and sturdy. Likewise, always try to place your coop on higher ground if you have a sloped backyard. This helps prevent flooding or water-build-up in the coop after rain.
Ground Materials: No need to tear up your grass! As long as your grass is unfertilized, you can leave it in chicken runs or throughout your yard for free-range chickens. Chickens enjoy grass because of all the bugs they have to snack on – and they can organically fertilize your yard for you! Win-win. In addition to grass, chickens also like dusty spots (as this is how they take baths and clean themselves). You can find special dust bath powder online or at pet stores. Pour this in a designated spot within the run enclosure for your flock to enjoy. If you don't have grass or want to limit mud build-up, you can spread chicken-safe wood chips on the ground of the chicken run enclosure.
Tip!
Give yourself more flexibility with the placement of your chicken coop by opting for a semi-permanent or tractor design. More on these in step four.
Step 2. Take Measurements to Determine Sizing Needs
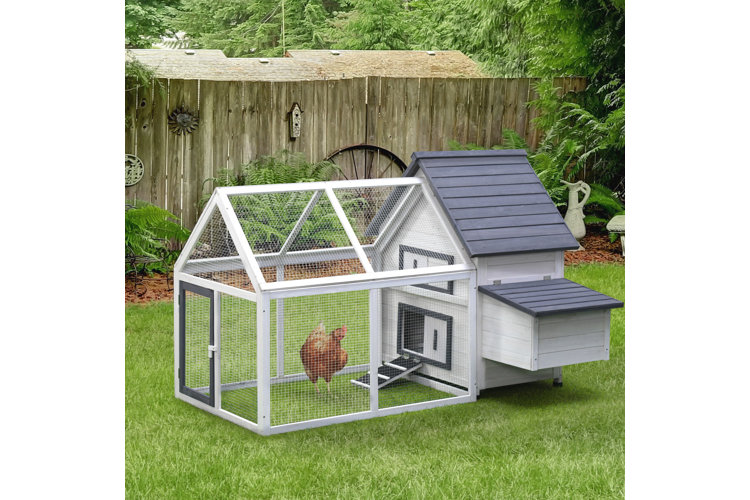
With a spot picked out, it's time to measure. This way you can accurately determine the best dimensions for a chicken coop and run in your outdoor space. Use a tape measure to determine the length and width of the spot. Also make sure to measure the height from the ground up to determine clearance for overhanging tree branches and other potential obstacles. Aside from measurements, there are a few other important considerations when it comes to determining the best coop size:
- Chicken Spacing: As a general rule of thumb, each chicken you plan to house needs at least 4 sq. ft of space within the coop house and about 8 to 10 sq. ft. per chicken for run enclosures – unless you plan to let them roam freely in your yard. This keeps chickens happy and prevents them from fighting with each other.
- Chicken Size: The breed of chicken also impacts the size coop you need or the number of chickens you can house in the space. For example, small chicken breeds like Pekin Bantam and Naked Necks won't require as much space per bird as larger breeds like Brahmas or Cochins.
- Flock Size: You can also determine the right size options based on the number of chickens you plan to have. Browse by flock size as a way to compare chicken coop sizes, or you can input your measurements into the "overall dimensions" filter to the left-hand side of the product page.
Chicken Coops by Flock Size:
Chicken Runs by Flock Size:
Whether you want to build a chicken coop from scratch or assemble a pre-made option, the materials you choose have an impact on a number of factors including heat retention, ventilation, weather-proofing, and protection from predators. Review these chicken coop materials to determine which ones you want for your own:
Solid Wood: Solid wood comes straight from trees and has the durability to prove it. Chicken coops and runs made with solid wood are more breathable, which make solid wood a great choice for natural ventilation during hotter months. However, you need to make sure solid wood coops and runs have water-, weather- or rot-proof coatings before placing them outside. Some products come with coatings already applied, but you may need to apply your own. Make sure you use a coating that's safe for chickens if you decide to add your own.
Manufactured Wood: Manufactured wood is made using wood shavings, saw-dust, and faux wood materials. This makes it a more inexpensive option for chicken coops and runs when compared to solid wood. Depending on its composition, manufactured wood products can provide a similar amount of durability.
Metal: Metal is a great option for chicken coops and chicken runs for a number of reasons. For one, it prevents pests or predators from getting in, thanks to its impermeable surface. Being made of metal also makes it super easy to clean. Metal structures keep water out and don't run the risk of rotting like wood structures. Above everything else, chicken coops made with metal help insulate heat and keep your chickens cozy during the winter. Make sure to check for rust-proof coatings when browsing your options to prolong the life of your chicken coop/run.
Plastic: Coops and runs can also be made of plastic. Like metal, this material keeps out pests, is easy to clean, and keeps water out to keep chickens happy and healthy. Plastic roofs typically pair with metal frames for added support. However, there are some chicken coops designed solely using plastic materials.
Composite: The coop and run above features a composite frame. Composite options include frames with plastic, wood, metal, or different combinations of materials, so you can enjoy the benefits of durable materials while remaining within budget.
There are so many design variations to choose from when planning a chicken coop. Chicken coops and runs come in a variety of fun and practical layouts so you can have the best of aesthetics and functionality all in one. When it comes to chicken coops, there are a few options to keep in mind:
- Standard Chicken Coops: Standard chicken coops are permanent structures. They typically include a ventilated, walled enclosure with nesting boxes and perches/roosts for chickens to sleep on. They also usually have one or more doors and ramps for chickens to enter and exit elevated coops. Some chicken coops come with a compatible chicken run too.
- Semi-Permanent Coops: Semi-permanent chicken coop types usually have the same features of standard chicken coops, but you can disassemble them and move them easily.
- Chicken Tractors: Chicken tractors consist of a permanent coop or a coop/run combo that has one or more sets of wheels on the bottom of the frame. This allows you to move the coop whenever or wherever you want.
- Chicken Runs: As mentioned above, chicken runs are enclosures you can attach to coops or use by themselves. They typically have a wood or metal frame covered in wire mesh on all sides except the bottom. This allows chickens to graze in the grass while staying protected.
Aside from the types of chicken coops available, there are a few other design features to consider.
- Number of Levels: When picking out a chicken coop design, you usually have the option between a one-level or a two-level configuration. One-level chicken coops have a ground-level coop with an adjacent chicken run. In contrast, two-level chicken coops typically have a chicken run beneath, and a coop stacked on top. A ramp connects the two spaces. This is a great space-saving option for small backyards where a chicken run is still a must! Multi-level coops also add another layer of protection for your chickens.
- Ventilation: Worried about whether your chicken coop will provide enough ventilation to keep your chickens happy and healthy? Ventilated chicken coops include well-designed windows, openings, and frame materials that allow air to pass through while keeping predators out. Browse by chicken coops with built-in ventilation to ensure the best results. You can also search for chicken coops with hinged/removable roofs to allow fresh air in and allow for easy cleaning access.
- Walk-In: Walk-in chicken coops include large fenced-in enclosures and entrances around the main coop, so you can enter and exit your chicken's enclosure to refill feeders, collect eggs, or clean with ease.
- Mesh-Cover Included: Wire mesh, also called "hardware cloth", is super strong and durable, which makes it an optimal choice for coop window coverings and enclosure fencing. This is not the same as chicken wire – it is actually seen as the more predator-proof option due to its tight woven pattern.
Tip!
Get in-depth information about coop types, sizes, materials, and more available on Wayfair by referencing our guide on The Best Chicken Coops to Keep Your Hens Plucky.
Step 5. Set Up Your Chicken Coop and Run
So you ordered a chicken coop, or the materials to make one, and the day has finally arrived to put it all together. There are a few essentials to make sure you assemble a sturdy, well-built chicken coop and chicken run. Follow these guidelines for success when it comes time to set up your chicken coop.
1. Get the Ground Ready.
You should lay the groundwork for the structure to make the installation process a breeze, whether you decide to build your own or go with a pre-built option. Be sure to reference the model's installation instructions for specific starting details.
- If you aren't using grass for the chicken run, remove it from the area and replace it with unfinished wood chips or straw.
- Make cleaning the area a breeze by laying down a rubber mat first. This will also help prevent mud.
- No matter which floor material you choose for outdoor enclosures, we recommend adding a layer of wire mesh first.
- You may also find it helpful to add wire mesh in the ground around the perimeter of the designated spot, almost like an extension of the wire mesh enclosure above ground. These practices can help prevent predators from successfully burrowing up into the chicken run.
- Use this time to also cut back shrubs and other foliage where predators could hide.
2. Assemble the Chicken Coop and Chicken Run.
Reference the building plans for DIY coops or the manufacturer's instructions for pre-built models for the best results.
- Many pre-built chicken coop and chicken run models only require you to attach the walls to one another using included tools, while others may require you to build the frame separately before adding the walls and the roof.
- Make sure the chicken coop interior has the proper ventilation windows to keep the space cool and healthy for your chickens.
- If your coop design rests on the ground, consider raising it up a few inches by using blocks under each of the four corners and the center of the coop. This ensures no rain water can flood the interior space and cause moisture damage.
- Once you've assembled the walls and roof, check for potential cracks or openings between the panels. Caulk any gaps you find to help seal the space and keep it insulated. This keeps out pests and rain so your chickens can have a comfortable place to rest and lay eggs.
Tip!
Make the installation process stress-free by checking the "Expert Assembly" option on the product page. When your coop/run is delivered, you can schedule a service appointment and a trained professional will come build and install it in your yard for you!
Step 6. Add Important Accessories
An important part of planning a chicken coop is the accessories! These items will help your chickens feel more at-home. Purchase and position these accessories before the arrival of your chickens to make sure they feel at home as soon as they waddle in. Here are some key accessories to consider and where they should go in your chicken enclosure:
- Nesting Boxes & Pads: If your chicken coop doesn't have built-in nesting boxes, you need to add them to the interior of the coop or within a safe enclosure space. Each nesting box should be 12" x 12" x 12" for chickens to nest comfortably. Up to four chickens can nest in one box unless the breed you want has high egg production. You can use nesting pads in each box by themselves or in addition to nesting material (like straw) to prevent egg-cracking incidents and to increase the comfort of your hens.
- Roosting Bars & Ladders: Most chicken coops come with roosting bars for chickens to sleep on within the coop itself. However, you can also add stand-alone roosting bars and ladders to the chicken run enclosure for your chickens to enjoy during the day. Look for roosting bars that are at least 2" to 4" wide as chickens prefer to sleep flat-footed. Most farmers prefer roosting bars with a width of 4" for more flexibility.
- Feeders & Waterers: Chicken feeders and waterers come in a variety of designs and sizes to accommodate your flock size and coop layout. Some options mount to the exterior of chicken runs to make refilling a breeze. Small access points go through the wire mesh (you may need to attach this portion from inside the enclosure) and have automatic feeding mechanisms so food or water dispenses into a scoop-like opening for chickens to drink or peck at.
- Additional Chicken Fencing: You can add more chicken fencing around the enclosure for more protection from predators. You can also create an open chicken enclosure for chickens to graze in throughout the day (make sure their wings are clipped before you let them out into the open).
- Heating & Lighting: Help keep your flock cozy and help them maintain their egg production in super cold climates with outdoor heating pads. These attach to enclosure walls or inside the coop and are safe to use around nesting materials. Being water-resistant instead of water-proof, these products are best used inside the coop. Heating pads plug into outdoor outlets. In addition to heat, interior coop lights can also help hens continue to lay eggs even when there isn't a lot of sunlight.
- Chicken Egg Incubators: You will need a chicken egg incubator if you plan to raise chickens for meat or additional egg production. These plug-in devices hold, turn, and keep eggs warm to promote hatching chicklings. After harvesting eggs from the coop, bring them indoors and place them in the incubator. Soon, you'll have more chickens!
- Egg Cartons/Baskets: Be sure to have a few reusable egg cartons or baskets ready to collect each day's egg harvest and to store them once indoors.
Expect to make adjustments once you introduce your flock to their new home. You may realize you need more nesting boxes to keep up/support the egg production of your hens, or you may need to move nesting boxes to a different spot in the coop if hens are laying eggs in different spots. In these situations, this is because they feel more comfortable and protected laying eggs there. If your chickens are acting up around each other, you may need to add a larger enclosure space for them to spread out. Overall, making adjustments will help increase the happiness and well-being of your flock.
Tip!
Have more questions? Check out our FAQ About Raising Backyard Chickens for additional tips and guidance.
Get browsing for your backyard chicken coop, now!
