Your Guide to the Best Food Vacuum Sealer
Seal the deal on a new vacuum sealer!
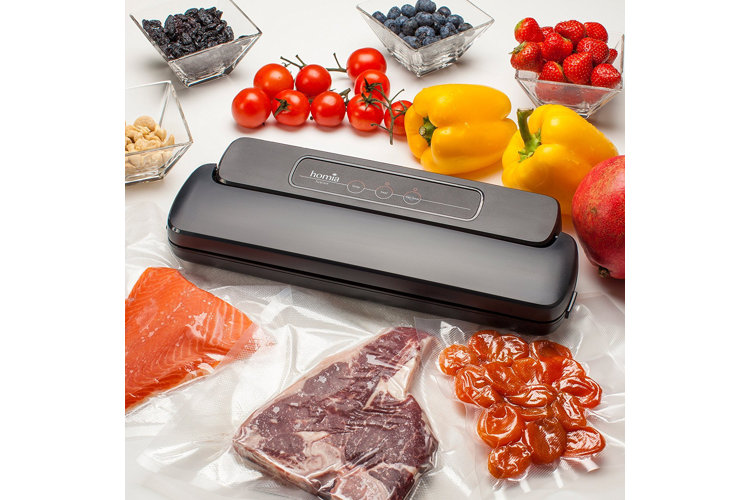
A food vacuum sealer is one of those incredible appliances that you don't realize you need until you have it. Once you get the hang of using a vacuum sealer, you'll never want to put it away! These multipurpose appliances can be used for marinating and sous-vide cooking and are absolutely indispensable for safely and effectively storing foods of all kinds. In this guide, learn how to choose the best food vacuum sealer. At the end of this guide, we'll also teach you how to use a vacuum sealer!
In This Guide
What Is a Food Vacuum Sealer?
Why Choose a Food Vacuum Sealer?
How to Use a Vacuum Sealer
Vacuum Sealer Cleanliness & Safety Tips
Additional Vacuum Sealer Features & Accessories
What Is a Food Vacuum Sealer?
A food vacuum sealer is an electric countertop device that seals food items in an airtight plastic pouch for effective storage. These devices, once unwieldy and expensive, are now compact, affordable, and easy to use. They have a set of buttons or controls on the top and a long slit into which the open end of a food pouch can fit. Adjustable clamps (usually controlled by a small lever on the side) hold the pouch in place while a built-in vacuum sucks all the excess air out. After removing the air, the vacuum sealer applies an airtight seal to the pouch.
Why Choose a Food Vacuum Sealer?
The case for buying a food vacuum sealer is a strong one, especially if you're looking to improve the shelf life of foods (particularly expensive cuts of meat) and cut down on food waste.
It improves the longevity of stored foods.
Air – namely oxygen and water molecules – is the number one enemy of foods stored anywhere in your home. It causes foods to go bad, get stale, and develop freezer burn. Vacuum sealers are some of the best food savers out there because they remove as much air as possible from contact with the food, which greatly increases its storage life.
It will help you cut down on food waste and save you money.
The ability to effectively store foods long term allows you to buy in bulk without fear that you'll end up tossing most of your purchase. Vacuum sealing is also useful if you tend to forget about your stored foods. Plus it'll save you money – you'll have much less to throw out when you go through your freezer.
It is multipurpose.
Vacuum sealers aren't one-trick ponies! The best food vacuum sealers can be used to marinate meats or reseal bags of chips. Some can apply airtight seals to jars. Vacuum sealers are also essential when cooking with a sous vide.
Tip!
The vacuum sealer is the indispensable partner to the sous vide. Learn all about sous vides (and the role vacuum sealers play in the partnership) by reading our guide, What Is a Sous Vide?
How to Use a Vacuum Sealer
With the right know-how, vacuum sealers are very easy to operate. Follow these steps to master how to use a vacuum sealer.
Step 1: Prepare the food for sealing.
If you're working with large pieces of meat or produce, it's a good idea to cut them into pieces that will easily slide into the vacuum sealer bags or pouches. If the food item is too bulky, the bag will most likely seal unevenly or be left with air-filled wrinkles.
Step 2: Prepare the vacuum sealer pouches.
If you're working with a vacuum sealer roll, you'll need to cut off a piece that will fit the food item you want to seal. This isn't an exact science – try to cut a piece that leaves 1" – 2" of excess on three sides of the food and at least 3" of excess toward one open end. If you have pre-sized vacuum sealer bags, you can skip this step.
Step 3: Seal one end of the pouch.
Because the piece of vacuum sealer roll you just cut will be open on both ends like a tube, you'll need to close one side before you can place any food inside. Open your vacuum sealer and gently feed the one open end of the plastic strip 1/2" – 1" into the clamp. Tighten the clamp (usually you can do this with a small lever on the side of the device) and press the "Seal" button. Then release the pouch from the clamp. If you have vacuum sealer bags that are already closed on one end, skip this step.
Step 4: Fill the pouch and reposition in the machine.
If you're working with a damp food item that you aren't marinating, try to dab away excess liquid with a paper towel. Place the food in the pouch. Gently reposition any loose pieces so they are relatively flat and spaced apart in the pouch rather than stacked. Try to keep all the food towards the middle of the pouch. Then feed the open end of the pouch into the vacuum sealer and clamp it in place as you did in step 3.
Step 5: Apply any settings and press "Start."
Apply any preferred settings (including starting a timer for automatic shutoff) before pressing "Start." When you press the start button, the machine will do its job – it will suck all excess air out of the pouch and apply an airtight seal. If your device has an automatic shutoff, you won't need to stop it manually. If it doesn't, stop the machine when you're comfortable with the tightness of the seal – be careful not to crush delicate foods or overwork the machine.
Vacuum Sealer Cleanliness & Safety Tips
During vacuum sealing, liquids may sometimes be drawn into the machine, which can damage it. Try to remove as much liquid as possible from damp food items. Freeze wet products like soup or sauce before sealing. If you're trying to marinate a food item, fit folded paper towels in the top of the pouch (but not below the seal line, so it doesn't get trapped in the sealed pouch).
Even the best vacuum sealers can heat up while they work. Leave 20 seconds between sealings to prevent the device from overheating.
Don't overfill the vacuum sealer bags.
Empty the drip tray and wipe the device clean between uses.
Though many vacuum sealer bags boast that they're dishwasher-safe, it's best to dispose of them after using them for raw fish or meat.
Follow any manufacturer's instructions that are specific to your sealer!
Additional Vacuum Sealer Features & Accessories
Bag Cutter: Vacuum sealers without built-in bag cutters require you to manually cut sealed packs off of the roll. Save yourself the trouble by choosing a vacuum sealer that does the job for you.
Roll Storage: Many vacuum sealers come with compartments that allow you to store your vacuum sealer rolls within the device. This is helpful for keeping all your vacuum sealer parts together and intact.
Jar & Canister Compatibility: Food stored in jars and canisters can benefit from vacuum seals as well! Many vacuum sealers have accessory ports that allow you to attach jars and canisters (with the proper accessories) for airtight sealing.
Automatic Shutoff: Never worry about over- or under-sealing by choosing a device with an automatic shutoff.
Removable Drip Tray: Vacuum sealers equipped with drip trays can save your countertops from expelled liquid messes. Simply remove the trays for easy emptying and cleaning.
Bags, Rolls & Accessories: Vacuum sealers aren't too useful without their pouches. Stock up to ensure you'll be able to use your vacuum sealer for all your food storage needs.
