Before & After: Refreshing Spring Porch Ideas
Create the ultimate relaxation experience.
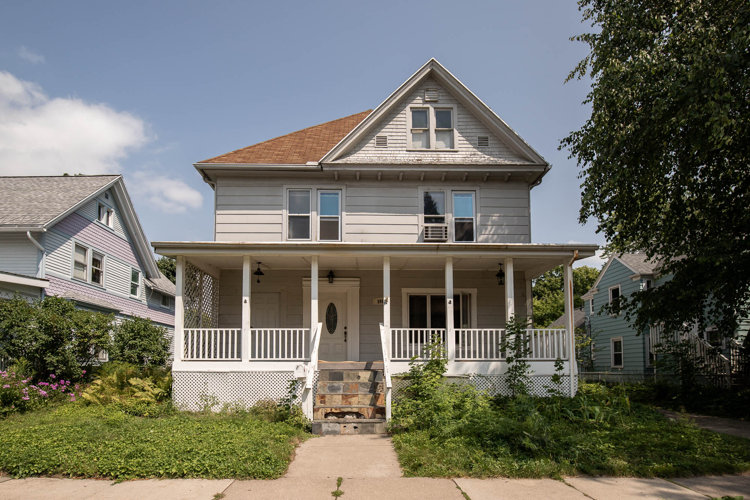
The front porch of a home is the first impression to all visitors. Making sure the front porch is welcoming is not only a great way to enjoy your home; by improving your curb appeal you are also increasing the value of your home. A large project like this can feel overwhelming, but with these easy-to-follow tips, a beautiful front porch is attainable on a reasonable budget. Relaxing on a brand-new front porch will be worth all the hard work.
Let’s take a look at this makeover of a 165-year-old porch in a downtown historic district.
This historic home was in rough shape after being a rental for over 10 years, and the new owners purchased this home with the hopes of restoring it to its former glory. In its original state, the front porch flooring had buckled and warped because it was installed improperly. The homeowners completely removed everything to fix all issues.
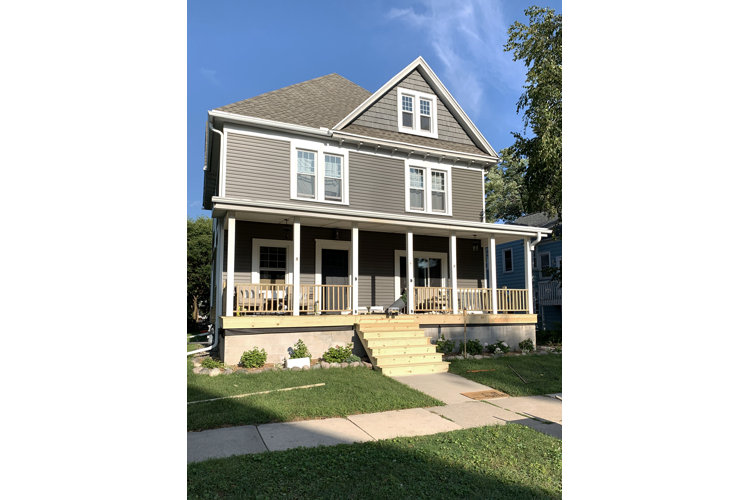
Cost Breakdown
Here is an approximate cost breakdown for this project:
- Decking & Materials: $1,800
- Railing: $600
- Paint: $100
- Solid Deck Sealer: $200
- Total: $2,700
Before You Start
Tackling a project of this size needs to be properly planned, especially because it is located outdoors. Here are the things you need to consider before getting started.
- Weather
- Building Permits & City Regulations
- Creating a Plan
Planning for weather and any other obstacles a certain geographical location might present is essential. Different cities have different rules when it comes to exterior renovations, so checking with your city is necessary to make sure you have all required documents in place before getting started. There are also certain building requirements you may be unaware of when it comes to railing and stairs.
Creating a plan is the single most important thing when it comes to renovations, especially with projects that must adhere to a specific schedule due to weather (or other challenges). All supplies should be purchased ahead of time to cut down on trips to the store so you can stay on schedule. This is also when you will need to measure and determine how much of everything you will need. Taking longer in this phase always makes the next phase go quicker.
Supplies Used for This Porch Makeover
- Pressure-Treated Decking Boards
- Pressure-Treated 1” x 4 Boards
- Pressure-Treated 1” x 10 Boards
- Deck Screws
- Roof Paper
- Wood Railing
Once a plan is in place, it’s time to remove all the old materials. Make sure you keep track of any loose screws; you don’t want to leave those in the yard. When working on a large project, it may be cost-effective to rent a dumpster. Check with local companies to verify the cost.
Step 2: Prep Work
After the demo is complete, it’s time to make sure the porch is properly prepared to install the new decking. For this particular project, the owners have a basement under their porch, so a roof had to be built to prevent the previous issue of buckling. Plywood was laid on top of the rafters with the proper pitch (based on building codes) and covered with felt roof underlayment. Be sure to layer the underlayment starting farthest away from the home and layer it back toward the home. That way if water runs down, it cannot get underneath.
Once the porch was waterproofed, it was time to lay the decking. To avoid the warping that this home had previously experienced, it was necessary to do one more step before installing deck boards. Treated 1” x 4” boards were installed to run vertically to allow the deck boards to be lifted off of the plywood subfloor, allowing the air to circulate through the boards. All boards were secured with deck screws, and boards were properly spaced to allow the wood room for expansion during the warmer months.
Across the front of the porch, sleepers were also installed for the frieze board to be attached to rather than attaching it directly to the foundation. This allows any water that ends up on the subfloor to drain under the decking without damaging the wood on the front. front.
After all the sleepers are in place, you can install the deck boards across the top. It’s easiest to install all the deck boards with a slight overhang and then trim them down at the end to ensure nice even edges, making sure to vary the seams.
Railing can easily be replaced and installed for an updated look. These homeowners went with a standard wood railing available at most home improvement stores. Make sure that the height of the railing meets all city codes.
Step 5: Add Protection
Pressure-treated lumber is typically quite wet from the treatment. Before painting, staining, or sealing, you need to let the wood fully dry out. This process can take a few weeks to several months depending on where the home is located. These homeowners ended up needing to wait until the next summer to allow the wood proper dry time and to meet the temperature requirements for applying a sealer.
Once the wood was dried out, the homeowners used a solid waterproof coating on the boards for added durability and exterior paint on the railings and columns. Solid products tend to last longer than transparent finishes, so this is something to consider depending on the weather.
After all the hard work replacing the decking and getting everything sealed, it’s time to enjoy a brand-new front porch!
Ashley is the voice behind the Design & DIY Blog Cherished Bliss. She has been blogging for over 10 years where she loves to inspire people to turn their house into a home with realistic DIY Projects and affordable design ideas. She has been recognized by multiple media outlets including Better Homes and Gardens, Country Woman, and Good Housekeeping. Follow along with her designs on Instagram, Pinterest, and Facebook.
