How to Install Cabinet Hardware
It's easy!
Installing new cabinet hardware is an easy and cost-effective way to instantly spruce up a room. Read our guide to learn how to install cabinet hardware – whether you are starting from scratch or replacing old hardware.
Before You Begin
Before you learn how to install cabinet hardware, it is important to have the right size pulls for your cabinets or drawers. Read our "How to Measure Drawer Pulls" guide to make sure you have the right size pull. If you aren't sure what style you want, check out our "How to Choose Cabinet Hardware" guide.
How to Install Cabinet Hardware
Starting from Scratch
What You Will Need
Measuring tape
Pencil
Level
Drill
Screwdriver
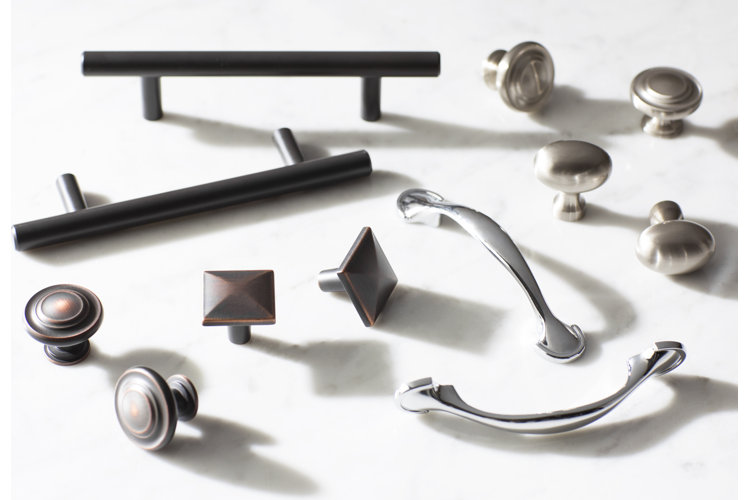
Knobs or pulls
Screws (usually included with purchase of knobs or pulls)
Installation guide kit
Step 1: Understand Cabinet Hardware Placement
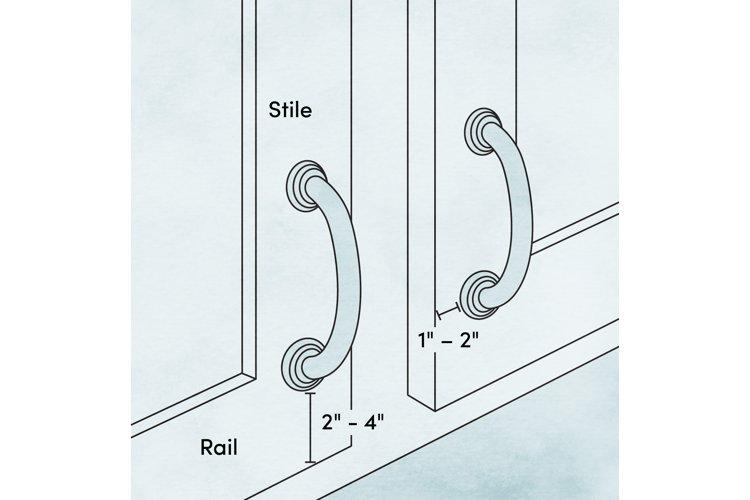
When it comes to cabinet hardware placement, we recommend lining up the knob or pull with the top of the rail while also centering it on the stile.
If your cabinets do not have a stile, we recommend placing your new hardware between 2" – 4" from the corner edge of your cabinet door and 1" – 2" from the inside edge of the cabinet door. If you are installing a knob, use these measurements to mark and place the installation hole. If you are installing a pull, use these measurements to mark and place the installation hole that will be closest to the edge of the door. If you are placing the pull on cabinets that sit above a countertop, measure from the bottom corner edge up 2" – 4". If you are placing the pulls on cabinets that sit below a countertop, measure from the top corner edge down 2" – 4". Use a level to verify it is straight.
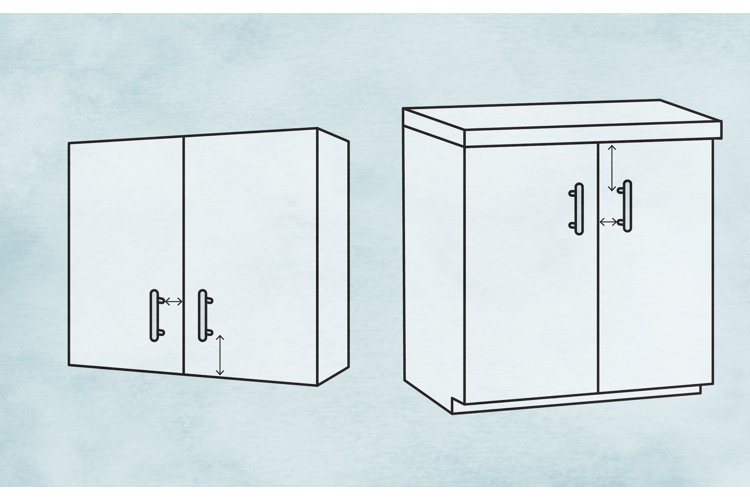
Step 2: Understand Drawer Hardware Placement
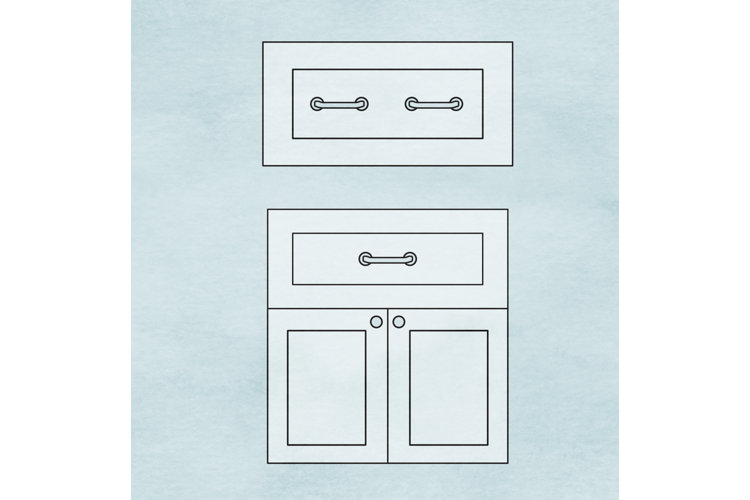
Center the knob or pull on the drawer's face (both vertically and horizontally). If you are installing a pull handle, use a level to verify it is straight. If you have wide drawers, consider installing two knobs – one at the ⅓ point and one at the ⅔ point.
You can also use a guide kit to help ensure you are placing it in the right spot.
Tip!
For stacked drawers, we recommend installing the knob or pull on the lowest drawer a little higher than the centerline to make it easier to open. To make it aesthetically pleasing, keep the distance between each knob or pull the same.
Step 3: Mark and Make Drill Holes
While making the measurements from step 1 and 2, mark in pencil where the knob or pull screw holes will be. Once the locations of your knob or pull is set, use your drill to make holes.
Step 4: Mount Hardware
Line up your knob or pull and thread the screw through the back of the cabinet or drawer's hole(s). Tighten it into place with a screwdriver.
Replacing Old Hardware
Since the holes are pre-drilled, replacing old hardware is easy!
What You Will Need
Screwdriver
Knobs or pulls
Screws (usually included with purchase of knobs or pulls)
Step 1: Remove Old Hardware
Use a screwdriver to unscrew the current screw(s), keeping the knob or pull in place.
Step 2: Mount New Hardware
Line up the new cabinet pull or knob to the hole in the cabinet, and insert and tighten the screw(s) from the back. Use a screwdriver to ensure it is secure.
Step 3: Cover Up Unused Holes
If your new hardware doesn't cover up old, unused holes, add a backplate to cover them.
Tip!
If you’re painting your cabinets, remove the old hardware first. Install the new cabinet pulls after you’re fully done painting.
