Update Your Kitchen With Do-It-Yourself Painted Kitchen Cabinets
Looking to update your old kitchen cabinets? The following steps will inspire your cabinet makeover while staying on budget
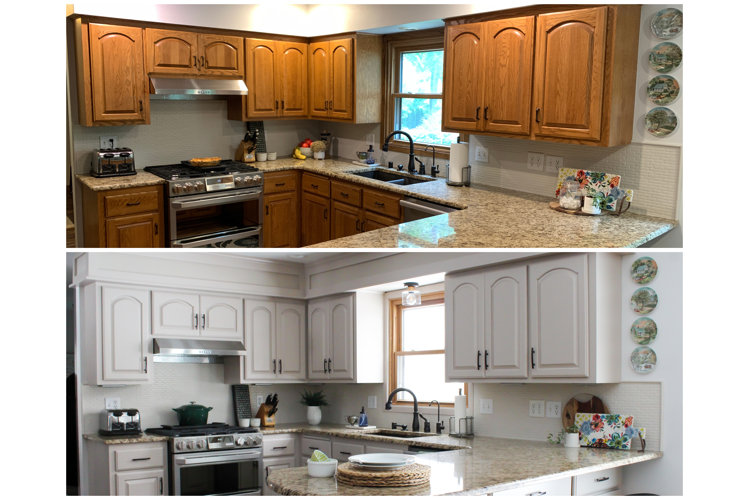
If you want to update your kitchen on a budget, a DIY cabinet makeover could be the perfect solution.
Painting kitchen cabinets is an easy project that involves only a few budget-friendly steps. With proper planning and the right materials, you can achieve a professional-looking paint job that gives your kitchen a brand-new look at a fraction of the price of a full kitchen remodel.
Kitchen Cabinet Painting Cost Breakdown
The average cost of professional kitchen cabinet painting is between $1,200 and $7,000, depending on the size of your space and where you live. On the other hand, the average price of new kitchen cabinets is $4,000 – $14,000. This means you can save thousands of dollars by painting your kitchen cabinets yourself!
Some general expenses you may incur for this project are:
- Primer and paint: $150 – $250
- Spray gun: $150
- Sander: $40 – $60
- Preparation and painting materials: $100 – $200
Steps for Do-It-Yourself Kitchen Cabinet Painting
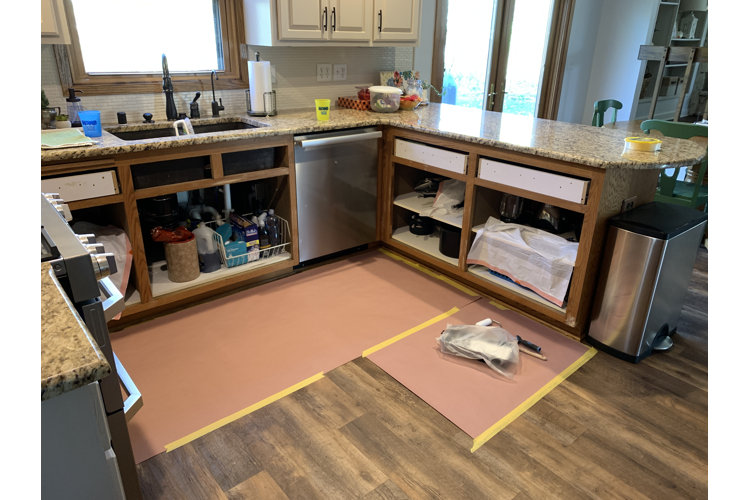
Before starting, make sure to have a clean painting area that allows cabinet doors to dry without being damaged by heat, humidity, water, or people/animals. Also, protect surfaces like appliances, backsplashes, countertops, and floors with painters tape, drop cloths, and/or rosin paper.
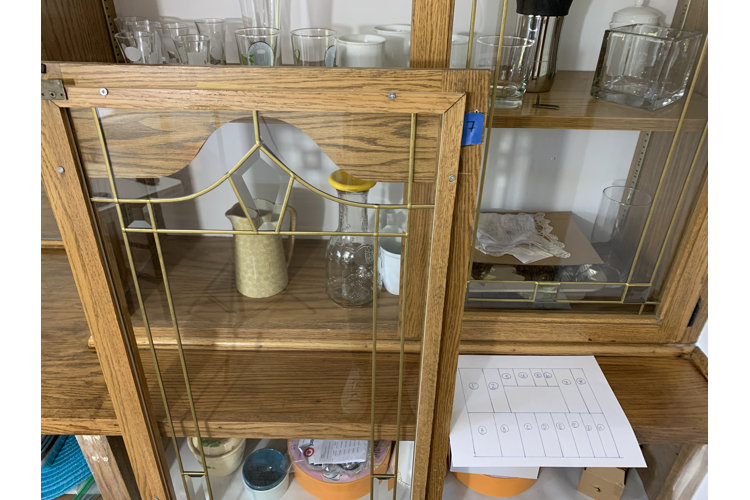
Finally, draw a diagram of your kitchen, and assign each cabinet door and drawer a number on the diagram. This system will help you keep track of what goes where as your cabinet makeover project proceeds.
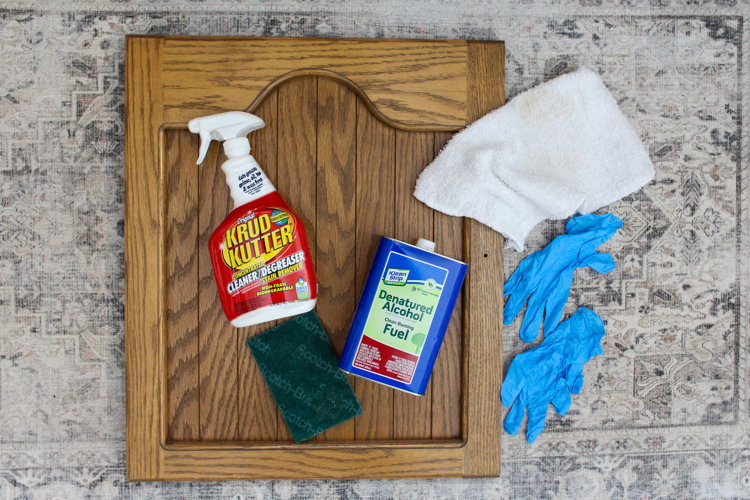
Cleaning
Remove kitchen cabinet doors and drawer fronts from the cabinet boxes. Take off the hardware and hinges, and write the door or drawer numbers from the diagram where the hinges go. Then cover those with painter’s tape to protect them from.
Thoroughly clean every surface to be painted with a degreaser cleaning product. If the cabinets are extremely greasy, follow up with a 50/50 mix of water and denatured alcohol – make sure to do so in a ventilated area while wearing gloves.
Repair
Once dry, use an acrylic wood filler to fill any dents, dings, or old hardware holes if needed. At this point, you can also use a wood grain filler to create a smooth finish by filling any pores. Finally, caulk gaps between the molding and ceiling and/or between the cabinet boxes and walls if necessary.
Sanding
Prepare everything for primer by sanding with 100–150 grit sandpaper. If painting wood cabinets, rough up the surface to help the primer stick better. You do not need to sand bare wood. If painting laminate cabinets, do not sand! Instead, remove the laminate coating.
Once finished, remove loose dust with a vacuum, and follow up with tack cloth to get any remaining particles.
Priming
After all of the important prep work, it’s time to prime.
The type of primer you’ll use depends, in part, on what your cabinets are made of:
Wood Cabinets:
- The safest bet for wood cabinets is an oil-based or shellac-based primer. These primers ensure that tannins will not bleed through the paint, which can discolor your hard work. The negatives of these primers are that they have a strong odor and are more difficult to clean up.
- Alternatively, use a water-based primer to avoid odor and to clean up issues. Choose one that’s recommended to work with the cabinet paint you purchased. If you experience tannin bleedthrough, cover trouble spots with an oil-based or shellac-based primer prior to painting.
Laminate Cabinets: choose an adhesion primer that’s formulated for hard-to-paint surfaces like laminate.
For doors and drawers, prime the backs first and then the fronts. One coat of primer should suffice.
Painting
Once dry, lightly sand everything with 220-grit sandpaper to ensure the smoothest surface for painting, and remove all dust. Paint the cabinet boxes using the sprayer or roller.
Then paint the doors and drawers by painting the backs first and then the fronts. Let everything dry, and then see if any areas need to be lightly sanded to remove imperfections.
Apply a second coat of paint in the same manner as the first, and let it dry.
Put It Back Together & Accessorize
To put things back together, remove the painter’s tape on the doors and drawers to reveal each number, and then use the numbered diagram to rehang the doors and drawers in their proper places. Carefully attach any hardware. Once you’ve admired your hard work, make the look even fresher with new decor and accessories!
Bre Eggert is the voice behind Average but Inspired, a DIY blog that strives to inspire others – no matter their skill level – to take action in their homes to create spaces they love. Her work has been featured on sites that include BobVila.com, House Beautiful, and Apartment Therapy. When not revamping her 1970s-style home, she enjoys watching reality TV and crafting.
