How to Sew By Hand: Your Step-By-Step Guide
Learn how to sew by hand.
Hand sewing is a useful skill that allows you to perform a myriad of tasks – from repairing garments and customizing clothing to sewing buttons back on – all so you don't have to pay someone to do them for you. Learning how to sew by hand will put you on the right path to learning more complex stitches, and, if you wish, toward using a sewing machine.
Tip!
Once you are ready to purchase your sewing machine, read Your Guide to the Types of Sewing Machines, and How to Use a Sewing Machine: A Beginner's Guide to learn how to use it.
What Do You Need for Hand-Sewing?
Hand-sewing is an affordable and quick way to get you on your seaming journey. The great thing is that once you know how to do the basic stitch, you can easily build from there and learn to do an array of stitches that are useful for things like embroidery, blanket making, and then some. Even sewing with a machine will require a little hand work every now and again.
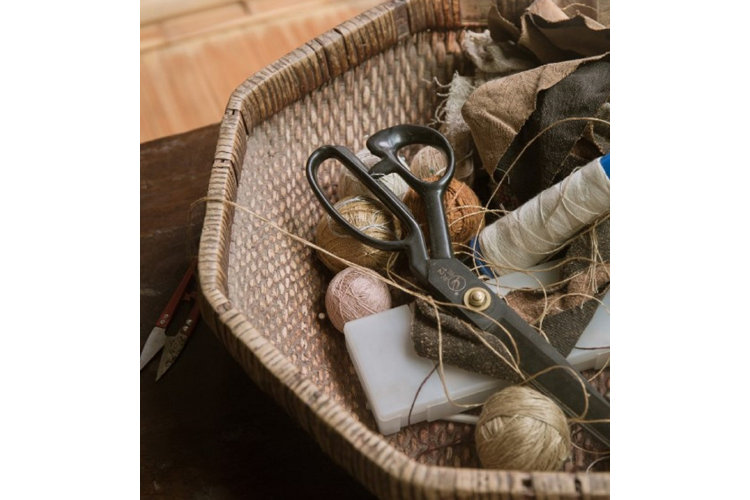
Before you can begin sewing by hand, you will need your tools, the most important of which are the needles.
Hand Sewing Needles
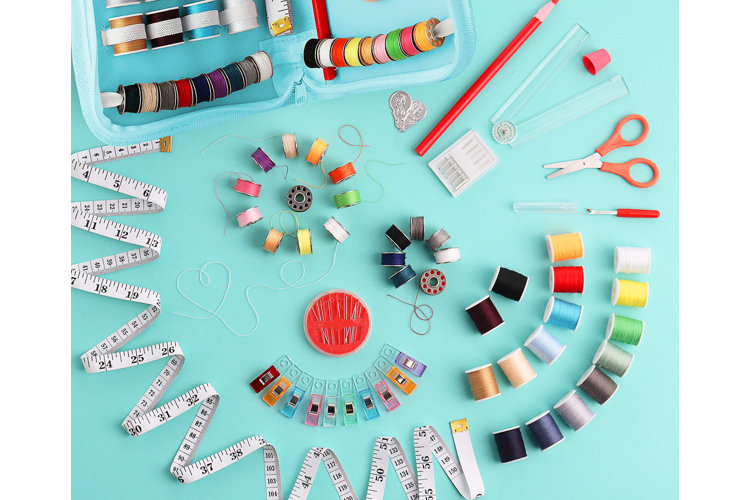
To start, you need the right tools. While it's possible to buy a set of needles on their own, you would do better with a sewing kit because they typically come with a range of beginner tools including the needles, thread, scissors, and a tape measure.
These kits usually provide a few needles in different sizes and thicknesses. The needle you pick is dependent on the type of fabric you are working with.
- Standard fabrics like cotton will need regular needles (size 5 through 10).
- Very fine or fragile fabrics like silk which need delicate needles (sizes 11 and 12).
- Thicker fabrics like denim and leather will need more sturdy needles (size 2, 3, or 4) because fine needles will just bend and break or struggle to penetrate the fabric.
Once you have selected the appropriate needle, you can move onto the other tools you will need.
Other Tools:
- Thread
- Scissors (it's a good idea to keep a separate pair used only for cutting fabric and nothing else to ensure they remain sharp.)
- Fabric/garment (scraps are good to start practicing on.)
- Pins
These tools are all perfect for performing a simple repair, but if you plan to further your sewing skills, there are a few additional nice-to-haves.
- Measuring tape
- Ruler
- Seam ripper (to undo any mistakes.)
- Iron (to press hems in place.)
- Thimble (used more in embroidery to keep from pricking yourself.)
Now that you have your tools and garment on hand, you are ready to learn a basic running stitch. This can be used for repairs, hems, and sewing patches on.
Step 1: Select & Cut Your Thread
Unless you want your thread to be visible, try to match it to the color of the fabric you are repairing/working with.
- Cut around 20–25 inches of thread (no longer, otherwise it will get knotted while you work).
- For a button, cut around 24 inches.
- Using your sharp scissors, cut the end of the thread off at a 45 degree angle (this will give you a fine tip that will more easily pass through the eye of the needle).
Step 2: Thread the Needle
Pick the appropriately sized needle for your task. Then with the needle in one hand and thread in the other, line up the thread with the hole and push it through the eye.
- To make it a little easier, you can lick the end of the thread to make it stiffer.
- Continue pulling around 3 to 5 inches in the same direction as the longer end of the thread.
- It is also possible to purchase a needle threader to make this task easier (some kits even come with one).
Step 3: Knot the Thread End
You can either make a knot at the end of the longer side of the thread or use both sides together (to make the stitch sturdier but also more bulky). This is to ensure the thread remains in the fabric and doesn't pull as you sew.
- Create this knot by placing the end of the thread of your pointer finger and holding it there with your thumb.
- Wrap the thread around your pointer finger a few times and use your thumb to slide the thread loops towards the finger tip. The loops will wrap around each other as they move to the end of your finger.
- Slide the loose knot to the end of the thread and then tug on it to tighten (repeat if needed).
- It helps to lick your fingers when performing this task.
Step 4: Prepare Your Fabric/Garment
There are a few ways to prep your fabric depending on what you are going to sew
Seam: When you sew two pieces of fabric together (the part you sew is the seam). A running stitch is best used here. The fabric is usually placed with right sides together (meaning the patterned or top sides are facing each other and the undersides are facing outward).
Hem: When you fold the bottom edge of a garment up and underneath so there is no raw edge at the bottom of the fabric (this is typically pinned in place and ironed flat).
Basting: When you are sewing two pieces together temporarily before moving to the sewing machine for a final stitch (these stitches are longer so they can easily be removed at a later stage).
Running Stitch: Short short stitches that create a straight dashed line along the fabric.
Seam Allowance: The distance between the raw fabric edge and the area you are sewing (typically 1/2 inch).
Step 5: Start Sewing
Hold the needle in your dominant hand and fabric in the other. Starting from the back side, push the needle through both pieces of fabric near the top of the seam at your starting point (remember your seam allowance).
- As you pull the needle and thread through from the back side up, make sure the knot catches and the thread is taut.
- Create your first stitch by pulling the thread forward 1/2 inch (one stitch length).
- Then push the needle back down through the fabric.
- Go forward another stitch and bring up the needle from the back to the front.
- Repeat this by going one stitch length forward and back down into the fabric, one stitch forward, and up again.
- Try to keep your stitches equally spaced for a neat look.
- * Pull each stitch taut as you go (not overly tight though as this may cause the fabric to pucker).
- Repeat over and over until you get to the end of your seam.
- It is possible you will need to cut a new thread if you run out during your project (simply repeat step one if this happens).
Step 6: Finish Up
When you get to the end of your sewing, turn the fabric over to the back side. Run the needle behind the back of an existing stitch.
- Rather than pulling it all the way through, leave a small loop of thread at the bottom.
- Come back and pull the needle through that loop, making it as snug as possible without bunching the fabric.
- Make a knot.
- Cut off any excess thread.
- If you sewed a hem, the finished stitching will be visible from the front side of the fabric and should look like a long line of dashes.
Tip!
If you find yourself running out of thread with plenty of stitching left to do, make sure to leave enough thread to tie off a knot and cut the thread. Then you can start over again from where you left off.
Additional Stitches You Can Learn
Once you have the hang of your running stitch, there are a few others you can learn as you progress.
1. Back Stitch: This is a basic stitch in hand embroidery. It's used to create stitches that double back on themselves to create a continuous line with no break between (makes them appear like one single solid line).
2. Ladder Stitch: Also known as a slip stitch, it is used to create mostly invisible seams. It is great for hems.
3. Blanket Stitch: A decorative finish on the ends that are supposed to be visible. It is often used in hand embroidery or to finish the ends of quilts or pillows (you'll want to choose an attractive or even contrasting thread).
4. Whip Stitch: A simple seaming technique that comprises a line of short diagonal stitches that are invisible on the right side of the fabrics.It is also great for joining two fabrics of a hem together in a durable seam.
5. Catch Stitch: This creates a zig-zag pattern that is invisible on the right side of the fabric. It is great for securing items and seaming overlapping pieces of fabric.
Now that you know how to sew by hand, you have an invaluable skill that will never go to waste.
You Might Also Like:
