How to Store Food to Preserve Freshness & Flavor
Keep things organized and hygienic with the right food storage methods.
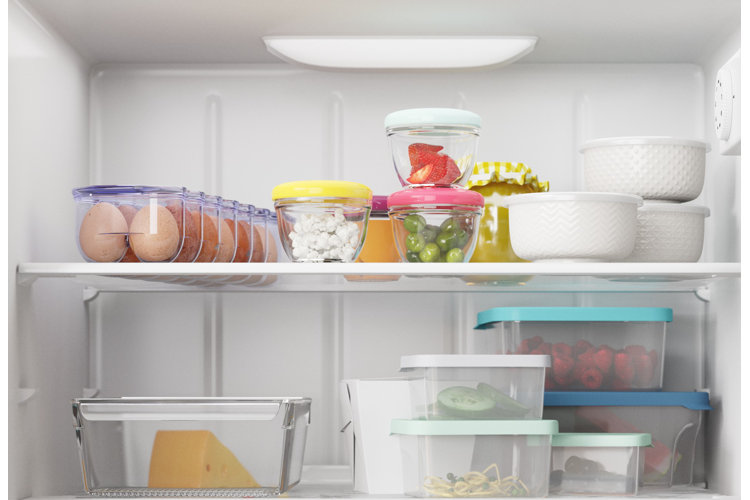
How you choose to store food ultimately impacts its shelf-life, hygienic quality, and flavor, helping you save money and stay organized so no food goes to waste. Keep reading to learn the importance of proper food storage or jump ahead to determine the best practices for how to store food when it's in the fridge, freezer, or pantry.
How to Store Food in the Fridge
How to Store Food in the Freezer
How to Store Dry Food
How to Store Canned Food
Why Is It Important to Learn How to Store Food?
Before you call it a day and toss an aluminum-foil-wrapped chicken breast in the fridge, consider the benefits of practicing good food storage:
- Encourages Good Food Hygiene: Familiarizing yourself with food storage practices can help you sharpen your knowledge of basic food hygiene and can keep you and your family healthy. This means learning how to store food in a way that prevents cross-contamination and a build-up of harmful bacteria that could cause food-borne illnesses like Salmonella, E. coli, or Listeria. That's why it's super important to store items like raw and cooked meat in separate areas (more on this in the next section). The same goes for households where one or more persons have a food allergy. You need to keep allergy-causing foods in airtight containers away from food that the allergic person(s) in question usually eat. This prevents accidental cross-contamination and allergic reactions.
- Helps Save You Money:Following food storage tips can ultimately help you save money on your grocery bill because you learn how to properly organize and store food to preserve it for the long-term (whether through refrigerating, freezing, canning, or dry food storing). Not to mention, well-organized food storage can help save you money because it makes it easier to check what you have in the fridge or pantry and prevents you from buying duplicates of the same items when you don't need them.
- Keeps Food Organized & Visible: The right food storage methods will help you find specific food items or leftovers quickly so you don't forget about them. Think clear storage containers, designated spots for leftovers, or labeled storage bins. Organized food pantries, fridges, and freezers will keep you from accidentally purchasing more of an item that you already have on hand.
- Preserves Flavor, Freshness, & Nutrients: Smart food storage allows you to keep food fresh, flavorful, and nutritious for longer so you can reap all the benefits of your food. For example, freezing fresh fruit and vegetables right away can help lock in nutrients that would otherwise go to waste after a week or more in the refrigerator. Proper storage containers help preserve perishable foods in the refrigerator because they limit exposure to bacteria. Similarly, the right food storage containers can keep dry goods from becoming rancid.
How to Store Food In the Fridge
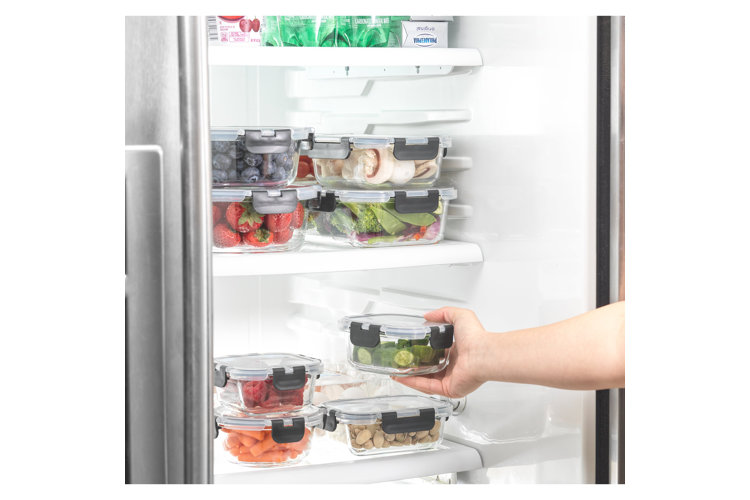
The refrigerator is an essential appliance for food storage that helps preserve perishable food (eggs, dairy products, fruits, vegetables, meat, leftovers, opened canned goods, and opened condiments). However, there is a right way to store food in your fridge. Follow these steps to learn how to store food in the refrigerator.
1. Check Your Fridge's Temperature
To properly store food in a refrigerator, the interior temperature needs to be at or below 40°F at all times. However, 35°F–38°F is considered the sweet spot for refrigeration. Your food will start to freeze at 32°F, and anything above 40°F could cause bacteria to grow.
2. Put Perishables In the Fridge Right Away
As soon as you get home from the grocery store, you should put your perishable items in the fridge. Perishable items include fruits, vegetables, meat, poultry, fish, eggs, and dairy products. After two hours outside of the fridge, refrigerated foods may become susceptible to bacterial growth. This will ultimately contribute to a shorter shelf life for your food and can potentially cause food-borne illnesses. Similarly, if you bring out perishable items for a dinnertime buffet or cookout, make sure they aren't at room temperature for more than two hours.
Reference storage instructions on product packaging if you are unsure of their storage needs. Some perishables like potatoes, onions, and garlic prefer to be stored in cool, dark spots, while tomatoes, apples, citrus fruits, and bananas are better stored at room temperature in fruit baskets.
Tip!
Learn how to store specific fruits or veggies and other perishable items with the help of these guides:
For Veggies:
How to Store Vegetables
How to Store Potatoes For a Long Shelf Life
How to Store Onions
For Fruit:
How to Store Fruit With Ease
For Herbs:
How to Store Herbs for Long-Lasting Freshness
3. Keep Raw Meat at the Bottom of the Fridge
If there is one thing to remember about food safety fridge storage, it should be this! Keeping raw meat separate from cooked meat and other perishables is of the utmost importance when it comes to storing food in the fridge. This is because raw meat may contain illness-causing bacteria, microorganisms, and other potentially harmful pathogens that could leak or spill onto surrounding produce. Storing raw meat on the bottom level of your refrigerator will prevent this, while also keeping it colder and preventing bacteria build-up because the cold air in a fridge tends to collect or sink to the bottom. Similarly, you should not keep cooked meat anywhere near raw meat to prevent cross-contamination. We recommend putting cooked meat at the top of your fridge to keep them separate (this includes sliced deli meats).
4. Understand What to Put in a Crisper Drawer vs. a Fresh Drawer
Crisper drawers are designed to preserve fruits and vegetables by fluctuating humidity levels. Some are designed to accommodate both fruits and vegetables, while others are specifically labeled for one or the other. These drawers keep fruits and vegetables fresh and flavorful for you to enjoy. Fresh drawers are designed to store raw meat, fish, or poultry at cooler temperatures to preserve food and prevent bacterial growth. Refrigerators usually include a pair of crisper drawers and fresh drawers located on the bottom levels of the fridge. Crisper drawers are usually above fresh drawers and may even be labeled for "fruits and vegetables", while fresh drawers are located on the very bottom level.
5. When In Doubt, Keep Items In Their Store-Bought Containers
Sometimes, the best way to store food in the fridge is to simply leave them in their store packaging. Just be sure to watch for holes or tears in packaging. Plastic produce bags can keep store-bought vegetables fresh and protected for longer. Berries like raspberries, strawberries, and blueberries can actually benefit from the colander-like plastic tubs they come in at the store because they prefer lower-humidity and well-circulated air. Raw meat packages are already tightly wrapped or sealed to prevent cross-contamination with other meat products when at the store, so they work just as well for you at home.
6. Refrain From Washing Fruits or Vegetables Before You're Ready to Use Them
The quickest way to encourage the growth of mold spores and bacteria is by washing your fruits and vegetables before you're ready to use them. When the produce is cool and dry, it can stay fresh and preserved. As soon as you add moisture to the mix, it will start to deteriorate or rot. The best thing to do is to wash fruits or vegetables on an "as needed" basis. Grab a handful of blueberries or strawberries from the refrigerated container, wash them, and eat them on the spot. Wrap fruits and vegetables in paper towels if you are determined to wash them right away. This will help soak up the moisture.
7. Use Clear, Covered Storage Containers
Whether you're storing cooked meat, sliced vegetables, fruit salads, or leftovers, you can't go wrong with clear storage containers that have sealable lids. Clear glass or plastic containers allow you to see your food selections and help remind you of what you have to eat (limiting food waste). Sealable lids help lock in freshness, prevent cross-contamination, and create stackable storage solutions for your fridge.
Tip!
Keep items organized and visible by storing packaged refrigerated items, bottled drinks, or miscellaneous fruits in fridge bins.
8. Reserve the Door Shelves for Condiments & Drinks
The door shelves on your fridge may seem like a convenient spot for milk, eggs, and produce. However, these fridge storage spots are the most exposed to warmer temperatures. Every time you open the fridge doors to look for a snack or fetch an ingredient, the shelves are exposed to the internal temperatures of your home. That's why it's important to place items that don't need as much cooling on the door shelves. This includes condiments like mustard, ketchup, mayonnaise, relish, salad dressings, peanut butter, and jam and drinks like chilled water, soda, or fruit juice.
9. Label Leftovers With the Dates You Cooked Them
It's all too easy to toss leftovers in the fridge and forget about them – or forget when you made them. Label containers of leftovers with the date you made them to help you gauge whether or not they're safe or worth eating. The general rule of thumb is you should throw away your leftovers after the three or four day mark.
10. Place Older Items Toward the Front of the Fridge
As tempting as it is to shove all of the newer produce right into the fridge when you come home from the grocery store, it pushes older items to the back of the fridge. Next thing you know there's a mystery smell coming from practically-untouched leftovers somewhere in your fridge. Prevent this by taking the time to store newer produce toward the back of the fridge and positioning the two-day-old salad and leftovers front and center. You can do the same with fruits, vegetables, packets of meat, and cheese/deli meats to ensure you finish the older (but still fresh food) before moving onto the new items in your fridge.
11. Don't Overcrowd Your Fridge
When storing food in a refrigerator, it's important to keep from overcrowding it with food. Limited fridge space means less cool air can circulate, causing your fridge to expend more energy to maintain a cool temperature. Devote some time each week to clean your fridge and remove any expired produce to keep the space open and cool.
Freezers store food at exactly 32°F or below to thoroughly freeze food items and prevent bacterial growth. You can store frozen food from three to12 months depending on the type of food. After the allotted time, it could get freezer burn, which affects the food's flavor. Here are the best practices for freezer food storage to keep food good for the long term.
1. Check Your Freezer's Temperature
As mentioned, freezer food safety storage temperatures should be at or below 32°F. This is the ideal temperature setting to freeze and keep food frozen at all times. Contrary to what you might think, freezer burn is actually caused by fluctuating warmer temperatures that are above 32°F. That's why it's important to keep the freezer closed as much as possible and to not overcrowd it.
2. Allow Food to Fully Cool Before Putting It in the Freezer
You might be able to get away with placing warm leftovers or cooked meat in the fridge before it fully cools, but the same rule doesn't apply to freezing food. If you plan to freeze soups, grilled meat, potato wedges, steamed vegetables, or any cooked item, you'll need to allow it to fully cool before placing it in the freezer. If a warm item goes in the freezer, this can cause temperature fluctuations in the freezer, mild defrosting of surrounding foods (hello bacteria!), and creating freezer burn on the warm item as well as surrounding frozen food.
Tip!
Speed up the cooling process by placing cooling items in the refrigerator for a bit.
3. Freeze Everything In Manageable Portions
Not only does freezing food in manageable portions make it easier to cool down cooked food before it goes in the freezer, but it also makes it more manageable for you when it comes to storage and defrosting. This could apply to portions of frozen soup, potatoes and vegetables, fruit for smoothies, or a couple chicken breasts that you can quickly remove from the freezer, thaw, and enjoy without having to reheat the entire batch. This also helps limit your food waste as you only thaw what you need for a meal or recipe. Smaller freezing portions will also allow you to store more in your freezer at a time because you don't have to make room for long plastic trays of meats, large crates of fruit, or pot-fulls of soup.
Tip!
Place items you want to freeze in a freezer bag and lay it flat on a small sheet pan. Spread or shake the contents of the bag so that it evenly covers the pan. Allow items to freeze completely. This creates thin and stackable frozen food storage that makes it easier to make the most of your space.
4. Package Everything In Sealable & Freezer-Friendly Containers
When storing food in the freezer, your main concerns are freezer burn, which can occur when frozen items aren't properly sealed or when exposed to warmer temperatures, and potential spillage that occurs before an item has time to properly freeze. This is especially important when freezing liquids or raw meat. The right containers can prevent freezer burn and keep food securely inside as it freezes. Vacuum-sealed freezer bags keep food airtight and preserved while also being space-friendly. Freezer-safe plastic and glass containers are also appropriate as long as they have sealable, airtight lids. Airtight lids will help lock in freshness and prevent freezer burn from getting through to your food. These will also help keep the contents from accidentally spilling.
Tip!
Check out Your Guide to the Best Food Vacuum Sealer to learn more about this smart freezer storage method.
5. Label Each Container With a Name & Date Frozen
Unless you're keeping items in their store bought containers (like frozen fruit or vegetable bags), you'll need to label and date your frozen food. This way, you can easily tell what you have and how long it's been in the freezer.
6. Store Your Food in the Correct Order
Whether you have a chest freezer or an upright freezer, it's important to store your frozen goods in the right spots for adequate freezing and food safety. Start by placing frozen meat, poultry, and seafood on the very bottom of a chest freezer or the bottom shelf of an upright freezer. This prevents meat juices from accidentally spilling onto other frozen food (since it's at the bottom). Then, stack frozen cooked meat on top of the raw meat (just make sure both are adequately sealed). You may want to further separate raw meat from cooked meat with metal storage baskets if you're using a chest freezer. On the next shelf (or layer for chest freezers), you'll want to put frozen fruit, bread, and vegetables.
Place ice cream, frozen dinners, or other ready to go-to items in an accessible spot. This could be the top layer of the chest freezer or the central shelf on an upright freezer. Not only will this make it super quick and easy to grab your go-to frozen dinner or dessert, but it will also limit the amount of time the freezer door stays open, preventing temperature fluctuations.
7. Do Not Refreeze Food After It Has Been Thawed
Once you've thawed frozen food or recooked it, you shouldn't refreeze it. This is because the food could have been exposed to bacteria during the thawing process and it could have lost moisture and flavor that makes it unpleasant to eat again.
Tip!
Now that you know how to store food properly in a freezer, check out The Ultimate Guide to Freezer Organization to keep all of your frozen goods organized and visible.
How to Store Dry Food
Dry food has to battle humidity, moisture, bacterial growth, and run-ins with rodents, pets, or pests. Therefore, you need to keep your dry food safe and secure to keep it healthy and fresh. Follow these steps to learn how to store food long-term in pantries, cupboards, or storage spaces.
1. Store Food in Cool, Dry, & Dark Spaces
Dry food stores best in dry, dark spaces that aren't exposed to harsh temperatures (hot or cold) or moisture-prone areas. Dry food needs to be stored at temperatures between 50°F and 70°F to keep it fresh and moisture-free. Food pantries are a smart option for storing dry food because they're designed to provide a dark, dry storage space that's free from harsh sunlight, moisture, or outside temperatures.
2. Invest In Airtight & Clear Storage Containers
If there is one thing you do, it should be to invest in airtight, clear storage containers. Airtight containers are designed to keep out moisture and bacteria while keeping food inside fresh and dry. Opt for clear storage containers to make it easier to identify individual food packages/brands in the container before you decide to open and break the airtight seal.
Tip!
Check out the 9 Best Food Storage Containers to discover a variety of savvy storage methods.
3. Keep Dry Food Elevated Off the Floor
Store dried food containers at least 6" to 12" off the floor to keep it safe. Not only does this keep dry food safe from pests and rodents, but it also protects dry food from temperature fluctuations (especially important for basement storage) and potential water damage in the event of a water leak due to excessive rain or a burst pipe.
4. Label Dry Food Containers With Names & Expiration Dates
This step is especially important if you plan to pour rice, cereal, dried pasta, or flour into airtight mason jars because it will make it easier to tell the difference between similar items and help you determine if an item is still good to eat.
Tip!
Check out our guide on How to Store Coffee & Keep It Fresh Longer so you can preserve it longer and save money on ground coffee and beans.
How to Store Canned Food
Canning is a great way to store perishable food longer without freezing items. Review these steps to determine the best methods for storing canned goods.
1. Store Canned Goods in a Cool, Dry, & Dark Space
Just like dry food, canned food prefers food storage temperatures between 50°F and 70°F and anywhere that's cool, dry, and dark. Spaces that are too humid or cold can cause the can to rust or freeze or could spark the growth of bacteria, which spoils the food over time.
2. Label Each Can & Its Expiration Date
This might not be necessary if you're organizing store-bought cans, as these come with premade labels and expiration dates. However, if you're doing your own canning, it's important to label cans with the name of the food/product and the prospective expiration date. This will ultimately give you peace of mind and make retrieving canned items easier.
Tip!
New to canning your own food? Learn How to Can With Our Complete Canning Guide.
3. Place Newer Canned Food Toward the Back
Keep yourself accountable by practicing smart food storage habits. Whenever you buy new canned goods (or finish canning your own homemade creations), make it a habit to put them toward the back of the storage shelves. Place cans with the closest expiration date front and center so it's convenient to pluck them off the shelf when needed.
4. Store Opened Canned Goods In the Fridge for Up to Four Days
Always wash the can lid before you unseal canned goods. This will rid the top of dust, bacteria, or bug or rodent droppings and prevent them from falling into the can when you open it. If you don't end up using the entire can of food, you can still store it for up to four days in the fridge. At the four-day mark, you either need to eat the rest of the contents or toss them. To store canned goods in the fridge, you can either keep it in the can if it has a self-sealing lid, or remove the contents and put them in an airtight container.
Tip!
Take action and get your fridge in order with our guide: 30 Minutes to an Organized Fridge.
You Might Also Like:
Start achieving your goals for food storage safety.
