A Beginner’s Guide to Using a Smoker
Cook the best BBQ on the block.
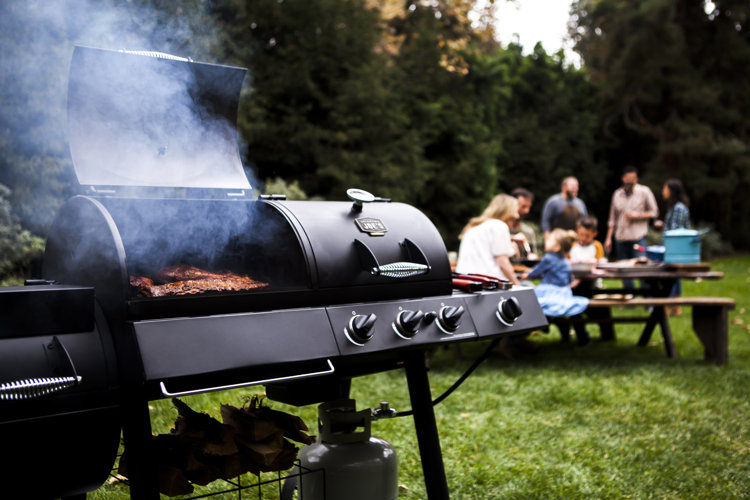
Ready to elevate your BBQ game? Learn how to cook mouth-watering meats with our detailed guide on using a smoker.
What Is a Smoker Grill
Common Smoker Configurations
Smoker Fuel Types
Smoker Sizes
Heating Your Smoker
Adding Flavor to Your Smoker
Timing Your Smoker
Cook Time
Cleaning Your Smoker
What Is a Smoker Grill
A smoker grill, commonly called a smoker, is an outdoor cooking appliance that infuses meats with rich, smokey flavor for an unparalleled taste. Unlike normal grills, which cook food quickly at high temperatures of up to 500°F or higher, smokers operate at a low temperature (usually 200°F or less) and have a lid that stays closed to "smoke" meat over a long period of time (from hours to days) to achieve delicious, tender meat. You typically want a smoker if you plan to cook large cuts of meat like lamb shanks, brisket, smoked salmon, or pork ribs.
Common Smoker Configurations
Choose the type that works best for you.
Read below to learn about the types of smoker grills available and which one you have — or want to have!
Vertical
These upright smokers are compact and hold multiple shelves, with heat radiating upwards. Here are some more facts and benefits of vertical smokers:
- Small Space-Friendly: Vertical smokers work well in small outdoor spaces because they take up vertical space instead of being too wide. This makes them ideal for quaint patios and makes them easy to store during colder months.
- Energy Efficient: These types of smoker grills typically don't use up as much fuel as other types because of their design. The vertical smoking shaft traps in heat as it rises from the fuel material at the bottom and its compact frame means better heat retention for efficient cook times.
- Budget-Friendly: Vertical smokers are a must if you're looking for a budget-friendly smoker. The simplicity of their design, and compact nature means they usually cost less compared to offset models.
These dome-shaped smokers are well insulated, absorbing and radiating heat like a brick oven. Determine if a Kamodo grill might work best for you by reviewing these benefits:
- Heat Efficiency: A kamado grill's dome-shaped lid traps in heat and encourages heat and steam to swirl around the meat instead of going straight up and out of the vent. Most Kamado grill domes consist of ceramic materials which also retain heat well. This means quicker cook times and more time spent enjoying your meal.
- Moisture Retention: You can control the top vent portion on a kamado grill to ensure the smokey-goodness properly infuses with the meat instead of filtering out and leaving dry air — too much dry air prevents the meat from coming out tender and delicious. So if you want to keep on top of the moisture content, go kamado.
- Versatility: Kamado grills do smoke meats, but they can also work as insulated ovens (hello roast chicken or homemade wood fire pizza), or you can use them like conventional grills when you keep the lid open. This makes the Kamado grill a must if you want all the barbecuing options wrapped into one outdoor appliance.
These barrel-shaped cooking chambers require more attention but produce a great smoky flavor. Get more details on the benefits of this configuration, below:
- Larger Capacities: If you want to smoke large slabs of meat or a rack of ribs, an offset smoker may be the best choice. Its horizontal smoking chamber allows you to maximize the amount of food you smoke at a time. If you have frequent gatherings with more than 10 people, look to offset models.
- Great Temperature Maintenance: Offset smokers have a small dual chamber beside the smoking chamber which allows you to add more wood chips, charcoal, or other fuel materials without having to open the smoking compartment. This prevents any loss of smoke, moisture, and heat that's oh so important to the smoking process.
- Multifunctional: You can usually operate offset smokers as grills by opening the smoker compartment and placing charcoals or wood chips beneath the smoker-turned grill rack. This way you can have the best of both without having two separate appliances.
Smoker Fuel Types
Which fuel source does your smoker require?
Electric: Plug your smoker into an outlet and press the on/off switch.
Charcoal: Fill the smoker’s firebox (a separate area for coals) with charcoal pieces. Light them so they are ashy around the edges.
Propane: Connect your smoker to a propane tank and release the gas by turning the valve.
Natural Gas: Hook your smoker up to a natural gas line and make sure it is running properly.
Wood: Light a bed of charcoals and then add split logs onto the pile.
Tip!
Follow your manufacturer’s instructions on how to season your smoker before first time use. It will likely require you to spray the interior of your smoker with a cooking oil and letting it cook for 45 minutes.
Smoker Sizes
Find out which smoker size has the capacity to fulfill your barbecue needs:
Note: We measured the size and capacity of smokers in terms of how many whole chickens weighing 5 lbs. they can smoke simultaneously.
Small: Small smokers typically have enough room for one 5 lb. chicken and come in vertical or offset configurations, so you can choose the one that best fits your small patio or yard space.
Medium: The average medium-size smoker has space for one or two 5 lb. chickens at a time. Choose between vertical, kamado, or offset configurations when you go with a medium-size smoker.
Large: Have room for two or three 5 lb. chickens or another meat equivalent of your choice when you opt for a large smoker for your barbecue. You can find large smokers in offset or vertical configurations, or sometimes as a set of three separate smokers – so you can play around with different flavors for three cuts of meat.
Extra-Large: Extra-large smokers can typically fit three or more 5 lb. chickens at a time, making them the optimal choice for large gatherings. Choose from vertical or offset configurations when you go with an extra-large smoker.
Wide: Wide smokers typically have 16" or longer of grilling space, which makes them the ideal choice for anyone fond of smoking long racks of ribs or other long cuts of meat. These types of smokers come in offset or vertical configurations.
Tall: Tall smokers have a height of 12" or more and typically have enough space to smoke a large turkey or meat of an equivalent size (wide configurations also work). You can usually find tall smokers in vertical configurations, but some offset smokers come with a vertical chamber as well.
Heating Your Smoker
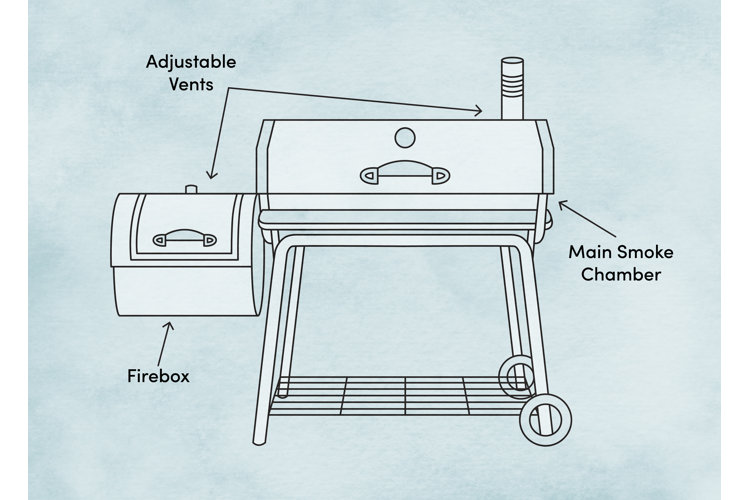
The key to using a smoker properly is cooking the food for a long period of time at an undisturbed temperature, which is recommended to be between 225–250°F. In order to maintain this, there are two manipulatable vents. The lower vent, when opened, increases the temperature inside your smoker by letting oxygen directly into the flames. The upper vent lowers the temperature by releasing heat when opened. Using these two, the smoking chamber can reach and hold your desired temperature. Once your smoker reaches the desired temperature, add the meat.
Adding Flavor to Your Smoker
Add flavor to your food with water and wood. Your smoker likely has a specific area to hold one or both of these.
Water: If your smoker comes with a pan or tray to add water, then you have a wet smoker. If there is no water pan present, you have a dry smoker that will rely solely on wood flavoring methods. The water pan adds flavor and moisture while acting as a barrier between the heat source and your meat. For extra oomph, add a sprinkle of tasty herbs like garlic or rosemary to the water pan.
Wood: There may be a designated pan or tray for wood chunks or chips (this can be present in both dry and wet smokers). For wood chips, soak a few handfuls in water for 30 minutes. Then drain the water and place them in the tray. If you want a longer and smokier flavor, try wood chunks. These are on the larger side, and can be bought in packages ranging from 5–10 pounds.They do not need to be soaked and can be placed directly in the smoker. The more wood you use, the smokier your meat will be.
No designated space for the wood? You can use chip boxes. Chip boxes are steel containers that hold wood chips – a much smaller and less smokey option than wood chunks. These can be purchased in pint-sized containers. You can also wrap water soaked chips in aluminum foil, poke holes in the foil with a fork, then place it in the grill by the heat source.
Timing Your Smoker
For every pound of meat, expect a cook time of 1–1½ hours, maintaining the temperature between 225–250°F. Do your best to keep the lid closed, or otherwise it will add to your smoking time. Some smokers come with an opening for a meat thermometer, so that you can check the meat while keeping the lid shut. If you must open the chamber to check the meat, only do so every half hour to hour. Add more coals to the firebox if the temperature drops dramatically. Also replenish the wood chips and water stores, adding new chips every hour, and ensuring there are always 2 inches of water in the pan.
Tip!
Always use oven mitts and tongs when adding more wood chips, water, or moving the meat around.
Wood Types
Each wood creates a different smoky taste.
- Hickory: classic smoke flavor.
- Apple: fruity and light.
- Pecan: nutty and mild.
- Maple: sweet.
- Cherry: sweet and mild.
- Mesquite: extremely smoky.
A fan of the wood flavoring but don’t have the time to dedicate required for smoking? Try a Wood Pellet Grill instead – they offer the same delicious tastes of but with the speed of a gas grill.
Cook Time
These are a general guideline to follow and actual cook time will depend on internal temperature.
Cleaning Your Smoker
What You Will Need
Grill brush
Degreaser spray
Sponge
Liquid dish soap
Step 1: Unplug or turn off your smoker and let it cool completely. Remove the water pan and wood chip box if necessary.
Step 2: Spray your smoker’s racks with a degreaser. Use a grill brush to remove any food residue that has collected in your smoker.
Step 3: Use a sponge with soapy water to make the interior of your smoker shine like new.
Step 4: Wipe the inside with a rag to dry, and leave the lid open to ensure that any extra moisture has completely evaporated.
Tip!
Using a smoker is all about patience, so make sure to set aside a day for that perfect BBQ.