How to Arrange Wall Art
Let’s get visual!
Proper wall art placement is essential to the balance of your room and the visual effect of the art. In this guide, you’ll learn how to arrange wall art to maximize your wall space and show off your style.
1. Center a Single Piece

You can’t go wrong with hanging a single, oversized statement piece of artwork on your empty wall. Center the wall art over the largest fixture in the room – above the headboard, over the fireplace mantel, or behind a sofa – for intentional placement that will balance the space.
Tip!
Read our Wall Art Size & Placement Guide for more tips to help you determine the right size and position for your wall art.
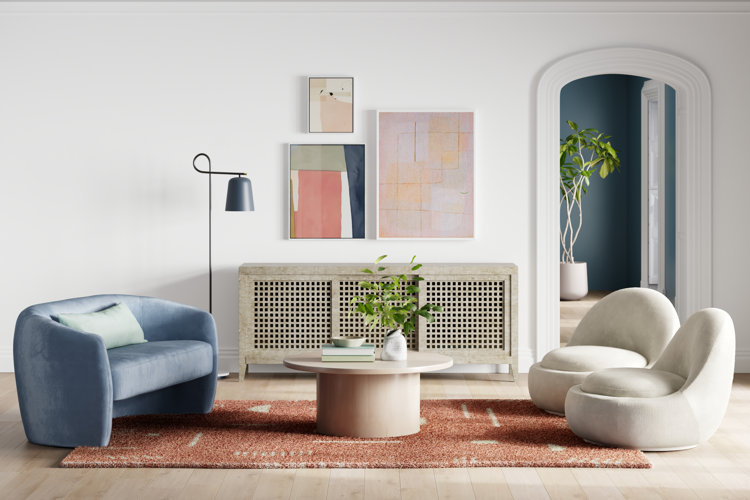
2. Try a Vertical Pair
Stack a matching pair of artwork to fill in tall, narrow space on your walls. Two square prints can take up the same wall space as a portrait-format frame but add more visual interest and dimension than a single piece would.
Designing a diagonal layout with your artwork can help take up more wall space with fewer frames. When placing your artwork in a diagonal arrangement, aim to position the bottom edge of the top frame within 1" – 2" of the center of the lower frame. This will ensure that your art placement feels intentional and your wall space is well-balanced.
Opt for a trio of wall art that can be neatly displayed in a row to give your walls a clean, modern appearance. These horizontal displays are great for the area over a console table, dresser, or loveseat. A set of artwork that blends from frame to frame can be placed 1" – 2" apart for a more continuous look.
Choose a matching set of wall art and arrange them in a neat grid to add structure to large empty walls. Square frames are especially easy to arrange in a grid format. Depending on the sizes of the frames, keep between 2" – 4" of space between each piece for a balanced look.
To style multiple frames of different sizes, consider aligning them along the bottom edge to create a linear display – using a level to ensure a straight line. Use frames with different styles and thicknesses to give it a more dimensional look. This layout works well over long pieces of furniture, like along your headboard or over the back of a sofa.
Consider arranging your artwork as a gallery wall to add personalization to your walls. Choose pieces of art with similar styles and colors for a curated feel. Generally, try to keep between 2" – 4" of space between each piece to give it a cohesive look without appearing overcrowded.
Tip!
For more tips on building a custom wall art arrangement, check out our guide How to Make a Gallery Wall.
8. Make a Controlled Gallery Wall
If you love the idea of a gallery wall but want something a little more polished, consider aligning the top and bottom of edges of the various pieces in your arrangement. This allows room to play with different layouts and sized frames while keeping the width of the display uniform for an organized look.
If you’re arranging multiple pieces of wall art together, it’s important to make the layout feel intentional and well-balanced. Place your largest frames in the center of your art display and use smaller pieces for the surrounding areas to visually balance your wall space.
To give your wall art arrangement a dimensional look, layer some smaller pieces in front of a large print, using a picture ledge for support. Arranging your artwork on a wall shelf also allows you to switch around your layout with ease.
