How to Install Kitchen Cabinets
DIY your way to kitchen storage with confidence.
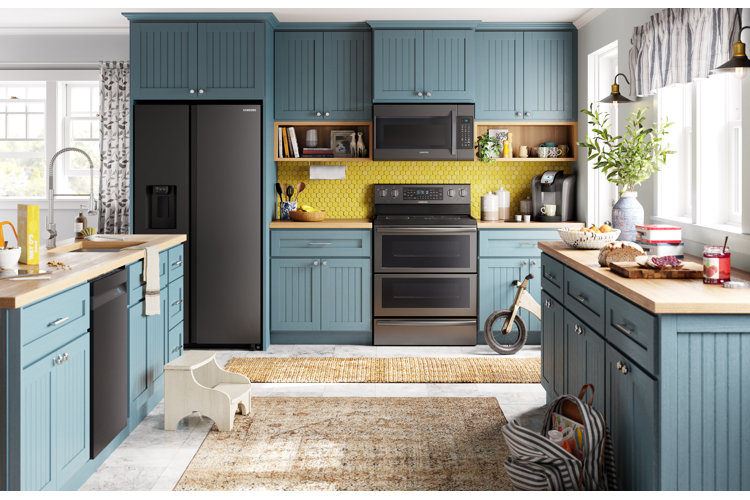
The right kitchen cabinets can amplify the amount of storage space in your kitchen and instantly elevate the look and layout of your space. So what better way to ensure you achieve your dream kitchen but to learn how to install kitchen cabinets yourself? If you have a knack for DIY projects and love a good remodel, consider taking charge of your own kitchen revamp. Get empowered to do your own installation by following our step-by-step instructions.
Before You Get Started:
Number of People Required: 2
We recommend having at least one other person with you to help move/position cabinets and to hold cabinet frames in place while the other person drills the frame into the wall. This is especially important when installing the upper cabinets.
What You Will Need:
- Pencil
- Notepad
- Stud Finder
- Tape Measurer
- Duct Tape
- 4-Foot Level
- Laser Level
- Standard Ladder
- Drill & Drill Bits (preferably a 3/16" drill bit)
- 4-8 Mounting Screws Per Cabinet (Use 2"–3" screws or the screw type specified by the manufacturer)
- Toggle Bolts (only if you can't find wall studs)
- Cabinetry Clamps
- Shims (These are wood wedges used to help level cabinets on uneven floors and warped walls)
- Jig Saw/Saw Drill Bit
- Shelf Rests/Support Pegs
- Cabinet Hinges
- Cabinet Hinge Jig
How to Install Kitchen Cabinets
In this section, we walk you through all the steps to help you install kitchen cabinets successfully and empower you to do it yourself. Read below to get started.
1. Identify the type of cabinets you purchased.
If you purchased pre-assembled cabinetry, you can move right on to step two and start your measurements. If you purchased ready-to-assemble cabinets, you'll need to devote some time to putting the frames together so you can accurately visualize the height, width, and depth of the cabinets before you measure. Review the manufacturer's specific product information, installation instructions, and hardware compatibility to ensure you're off to a good start.
Tip!
Going for custom cabinetry? Figure out the best way to measure your kitchen for custom cabinets, here.
2. Check for high points on the floor.
If you know you have flat kitchen floors, you can move on to step three. However, older homes sometimes have uneven floors, which can affect the appearance of your cabinets and kitchen islands once installed. Test the flatness of your kitchen floor by using a laser level. This will detect any unevenness in the floor. Mark the highest points with duct tape. Use each high point as the basis for your cabinet height measurements once you've identified the highest point along each cabinet wall. If you have uneven floors you will need to use building shims to level out the lower-floor points, which we review in step nine – but we're getting ahead of ourselves! Onto step three for measurements.
Tip!
Planning to install a floating floor after you install your cabinets? Make sure to use a floating floor board as the starting point for height measurements so you can easily slide them underneath the cabinets and make flooring installs a breeze. Check out What Is a Floating Floor? for more information.
3. Take measurements for bottom and top cabinet frames.
Take your tape measurer and measure the height, width, and depth of each cabinet frame including corner cabinet frames (you can save time by measuring once for identical cabinet sizes). Then record the measurements for each with your paper and pencil. This will help make the wall-marking process easier when you go to install the cabinets.
4. Measure and mark the dimensions for the bottom and top cabinets.
Reference your cabinet frame measurements and use your tape measurer to mark the height of the bottom cabinets on the wall with your pencil. You can also mark the depth and widths of each cabinet to visually place each cabinet, and then reference these marks once you start installing. For this next part, you'll need a ladder. The placement of your upper cabinets depends on your ceiling height and your design preferences. We recommend that the bottom of the upper cabinets rests 18"–20" above the countertop. This ensures you can still reach upper cabinet storage with ease, while leaving enough space for small countertop appliances.
Measure 18"–20" inches, starting at the height-level marker for bottom cabinets, and mark the point with your pencil. Have kitchen countertops already picked out? Make sure to account for them in your measurements. If not, you can always add two inches to your measurements to accommodate the standard countertop thickness. Then, reference your notepad measurements to measure for the height of the upper cabinets from the 18"–20" mark, upwards.
Repeat this marking process for each cabinet box until you have a visual for your kitchen cabinet placement. This will help make the installation process a breeze.
Wall studs refer to the wood frame reinforcements behind drywall. It's important to drill cabinet boxes into wall studs whenever possible because the wood frame provides an extra layer to drill into, ultimately creating a sturdier support structure compared to thin drywall.
For the most seamless experience, we recommend using a stud finder. These are usually magnetic or electric handheld devices, which can detect the layout of interior wall structures. Some have color-coded signals that glow green when placed on the portion of the wall that contains a wall stud frame. Use a stud finder along each wall to find and mark each wall stud. Note their placement in proximity to your cabinet markers to determine if you will need to drill in areas that don't have wall studs.
If cabinet placement requires that you drill into an area without a wall stud, make sure you use a toggle bolt rather than standard screws. A toggle bolt has spring-like wings that open once placed through a drill hole and help to reinforce heavy objects on drywall or hollow wall frames because it distributes the weight and pressure onto the outstretched wing components. Start by drilling a hole with your drill bit. Once you've placed the toggle bolt through the hole, tighten the screw like normal, using your drill.
Tip!
When installing kitchen cabinets, use this stage to review your kitchen's electrical plans and mark where electrical units/wires are. This helps ensure a safe installation.
6. Start with the upper corner cabinets.
We recommend starting your installation by installing the upper corner cabinets because you can use them as a marker for the rest of the upper cabinets. This way, you also won't have to bend over the bottom cabinets or risk damaging them while installing the upper cabinets. Ensure success by having one person hold the corner cabinet box in place while the other stands on the ladder to help reposition the cabinet correctly. Once you and your helper have the cabinet box in position with the measurement markers, use a 4' level to check for levelness.
You can begin your installation once you confirm the cabinet box is level. Many manufacturers provide the specific screws you need, or list compatible screws and drill bits on their installation instructions. Be sure to reference this list to determine if you have the right hardware to pair with the product.
7. Drill upper cabinets into place as instructed.
Have your helper hold the upper cabinet in place for this step. Use a 3/16" drill bit unless the manufacturer instructions state otherwise. This size pairs well with cabinet screws and doesn't create the same amount of pressure as heavy-duty drill bits (therefore protecting the cabinet frames as you drill). Most cabinet boxes come with pre-drilled holes to help you identify the best drill spots, but you can also mark them out yourself. Cabinets typically have one to two pilot holes in each corner for reference. Use your drill with the 3/16" drill bit to create a pilot hole through the back of the cabinet box and into the wall stud. Repeat this process for each drill spot/marker on the part of the cabinet box that will attach to the wall.
Now it's time to get drilling. Attach a 2"–3" cabinet screw (or the screw type specified by the manufacturer) to the drill bit. Place it in the pilot hole, and drill it into the hole. Repeat this process for each pilot hole.
Tip!
Always reference the manufacturer instructions to ensure you use the right hardware in the correct spots during your cabinet installation.
8. Attach the installed cabinet to the next cabinet box.
Once you have your first upper cabinet successfully attached to the wall, it's time to add the next cabinet. Have your helper hold the new cabinet directly next to the installed cabinet. Use your 4' level to make sure the tops of the cabinets line up. With your helper still holding the second cabinet box in place, attach the adjacent sides of both cabinets with a cabinetry clamp. This helps lock both cabinets in place and prevents the second cabinet from moving when drilled into.
Attach a 2"–3" cabinet screw (or the screw type specified by the manufacturer) to your drill bit and drill into the bottom inner corners of your installed cabinet that rest against the other cabinet. Repeat this process in the top corners of the installed cabinet that touch the new cabinet. You don't need to drill pilot holes for this part. Then focus your attention on the second cabinet. Repeat the above steps to create pilot holes and drill screws through the back of the cabinet and into the wall studs. Before moving onto the next cabinet, drill a cabinet screw into the inner bottom and top corners that touch the first cabinet to further lock them in place.
Place your 4' level' on top of both cabinets to ensure levelness before moving onto the next cabinet and repeating the above steps.
9. Align bottom cabinets with the height marker.
If you identified uneven points on your floor, start by comparing your bottom cabinet height to the desired height marker. If one side of a bottom cabinet rests lower than the base height line on the wall, it's time to add some shims. Insert as many of these small wood planks as you need beneath the cabinet to align the top of the cabinet with the desired height line. Then use your drill and cabinet screws to fasten the bottom edges of the cabinet to the planks to make it even more secure.
Tip!
When learning how to install cabinets, it's extremely important to account for any other kitchen renovations in the works. If you plan to install floating floors, make sure to raise the bottom cabinets to the proposed floor height. You can do this by lining the bottom of the cabinets with shim planks of the same thickness as your future flooring. This ultimately ensures that any built-in kitchen appliances like dishwashers or ovens will be able to fit in the desired spot and open without hitting the floor. Once you install your floating floor, you can install toe kicks along the bottom portion of the cabinets to hide any gaps.
10. Cut holes for outlets and appliances.
Make sure you cut holes in the back of the designated bottom cabinets for outlets and undersink plumbing components before you attach the bottom cabinets to the walls. You can do this using a jig saw or a specialized saw drill bit.
11. Start with the bottom corner cabinet.
With the upper cabinets installed, you can focus your attention on the bottom cabinets. Like with upper cabinets, we recommend starting by installing any corner cabinetry because you can use it as a guide for bottom cabinet placement.
12. Drill and attach bottom cabinets as instructed.
Repeat the process you completed for the upper cabinets. Start by using your 3/16" drill bit to drill pilot holes through the back of the cabinet and through the wall studs. Then attach a 2"–3" cabinet screw (or the screw type specified by the manufacturer) to the drill bit and drill each into the corresponding pilot holes. We recommend not tightening them all the way until you have a chance to check for levelness across the entire bottom layer of the cabinets. Place the next bottom cabinet directly beside the one you installed. Check for levelness. Then attach a cabinetry clamp to the joined sides of both cabinets to lock them in place. Take your drill/drill bit and screws and drill the screws into the top and bottom corners of the installed cabinet that touch the new cabinet.
Repeat this process for the next cabinet, drilling into the wall studs before drilling into the side that adjoins to the first cabinet. Repeat this step for all cabinets; periodically checking for levelness. Once you install all of the bottom cabinets, check for levelness a final time before tightening each screw.
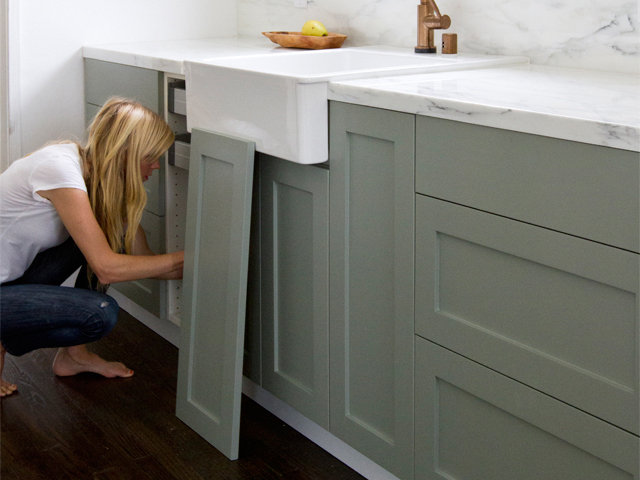
13. Install the doors, drawers, and shelves.
With your upper and lower cabinets installed, you can now move onto the finishing touches. Start by attaching any cabinet shelving. You can skip this step if your pre-assembled cabinets already have built-in shelving. If not, you can easily attach shelves by placing shelf rests in pre-drilled holes along the interior sides of the cabinet. Then place the shelf on top and you're good to go! If you have to drill your own shelf supports, be sure your shelf rests flat by using a small level.
For cabinet doors, we recommend attaching the hinges to the doors first. Lay the cabinet doors on a flat work surface to get started. Mark and measure where you want the hinges to go by holding the cabinet door up to the face-frame edge of the cabinet box. Then lay your door on a work surface. Use a hinge jig to help control the depth of the screw and placement of the hinge as you drill it into the marked spot on the door edge. Repeat the same process for the bottom hinge. When drilling the hinge to the cabinet box itself, it's helpful to have an extra pair of hands.
As for cabinet drawers, be sure to reference the manufacturer's instructions for your specific drawer design. You may need to drill the sliding mechanisms into the cabinet boxes yourself, or they may come pre-installed. Lock the drawer into place on the sliding mechanism before attaching the drawer face.
Tip!
Don't complete this step on the bottom cabinets if you haven't installed your countertop yet.
14. Attach pulls and handles.
Choose your cabinetry hardware and start attaching them to the cabinet drawers and doors. Get specific detailed instructions in How to Measure Drawer Pulls & Cabinet Pulls before following our guide on How to Install Cabinet Hardware.
Itching to get started now that you know how to install kitchen cabinets? Check out our cabinetry selections here:
