How to Install Under Cabinet Lighting: Your DIY Guide
How to install under cabinet lighting efficiently.
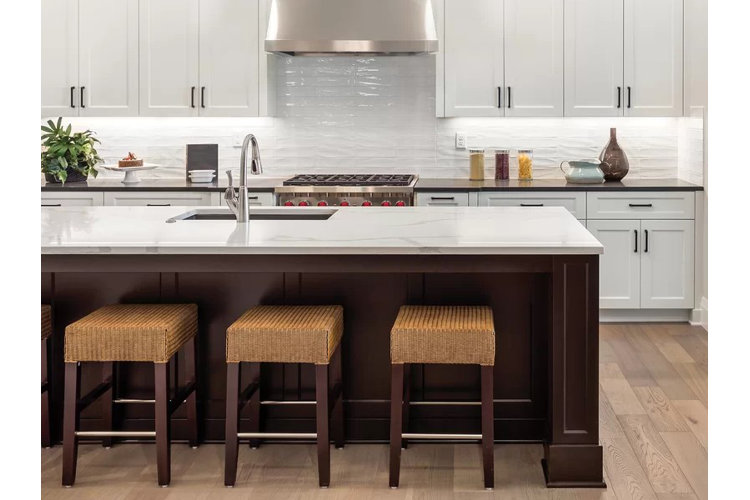
Although under cabinet lighting is not solely designed for the kitchen, this is the most popular installation location. The ambient glow can help provide direct task lighting on kitchen counters, create a high-end look, and provide a budget-friendly upgrade that is simple to complete. This guide will give you step-by-step instructions for how to install under cabinet lighting and transform your space quickly and efficiently.
Types of Under Cabinet Lighting
Before you select your under cabinet lighting placement, you need to choose the best type of lights for your cabinet layout, aesthetic preferences, along with the power source.
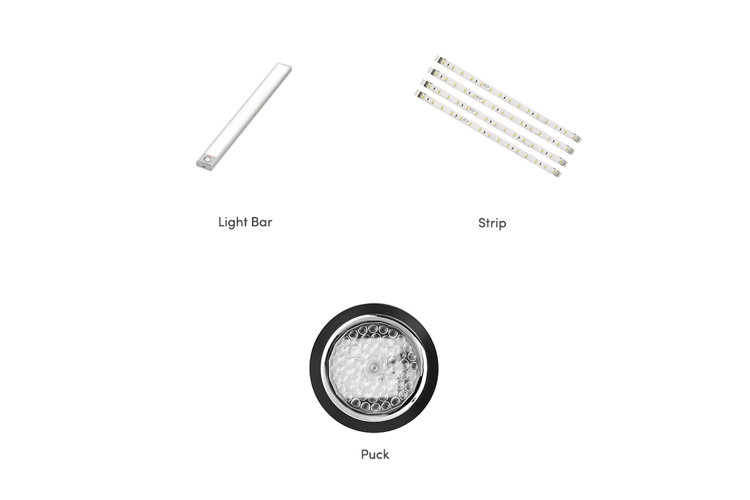
Light Bar: These long bars are rectangular in shape which allows them to cast an even light across the countertop. They usually only use a plug-in power source, though it is possible to find battery-powered options. Light bars often come with remotes and dimmer options. Due to the specific lengths they come in, light bars only be used on cabinets of a particular size.
Strip: There are two types of strip lights available. The first is LED strips that can be cut and adjusted before being fit under your cabinet. Under cabinet LED lighting installation is preferable as it can be easily hidden and offers enough length to cut and adjust according to your cabinet size and layout. The second type of strip lights are closer to thin light bars which are simply installed beneath the cabinet with screws. They can be either plug-in or battery operated.
Puck: As their name suggests, puck lights – also known as spot lights – are round and shaped like pucks. They cast individual pools of light and are best placed beneath each individual cabinet to avoid dark spots in between. Installing under cabinet puck lights is easy to do as they are frequently battery operated, requiring little mounting work.
Tape: Tape lights are almost identical to LED strip lights, with the exception of having an adhesive backing. This easy under cabinet lighting uses the adhesive to attach to the underside of your cabinets. They too can be cut and positioned as needed, and are most often found as plug-ins.
Rope: Rope lights are long strings of lights which are encased in plastic. They come in rope-like lengths and are easy to maneuver, but cannot be cut like LED strip lights. They most commonly come as plug-in options.
Recessed: These lights are recessed into a specially cut hole beneath your cabinet which keeps them from being visible from the front, while still casting their downward glow. Recessed lights take the most installation time, and are generally hard-wired. If you aren't sure how to hardwire under cabinet lighting, it is best to hire a professional electrician to do the job for you.
Once you have decided on the type of lighting you prefer, you can begin learning how to install under cabinet lighting. This starts with preparing your space.
- If your installation is going to require the use of screws and/or cutting, it is best to empty all cabinets first to ensure you have nothing hindering the job. You can skip this step if you are using adhesive lighting.
- Next, clear all the counter space beneath your cabinets. This will make it easier to measure and reach the installation locations.
- Once again, if you plan to hardwire your lighting, it is better to call in a professional electrician. This is also ideal if you plan to install under cabinet lighting throughout the entire kitchen.
- If you don't have enough outlets and don't wish to install additional ones, it might be better to use battery-operated lights.
- If you are installing your under cabinet lighting in the bathroom, ensure you purchase damp-rated lighting to avoid any moisture problems.
Tip!
Most people prefer installing LED lights in the kitchen because they are energy efficient, last longer, and cast soft and warm light. Fluorescent lights are the second choice as they outlast incandescent lights and are often dimmable.
How to Install Light Bars, LED Strips, & Recessed Lighting
These instructions are applicable for plug-in under cabinet lights.
Tools
- Under cabinet lights and mounting kit (ensure any screws it comes with are the right length for your cabinet bottoms)
- Drill
- Pencil
- Hole saw (if needed)
- Hammer (if needed)
Step 1: Begin by laying out your lighting so you can understand how each component goes together.
- No matter what type of light you are using, you should plan out where the lights are going to be installed. If you are using plug-ins you need to ensure outlets are nearby, and make sure the lights will both fit the cabinets and reach the distances required.
- The lights should be at least 2 inches shorter than the width of the cabinet and slightly less deep than the recessed space.
- Take into consideration things such as the microwave and oven hood, if you need to bridge any gaps, you may want to use two separate lines which will in turn require two plug-in outlets.
- You want to try to place your lights as evenly as possible to make for the best pattern. Even though the fixtures are hidden, the lighting will show any uneven or odd installations.
- A good rule of thumb is to make sure each under cabinet lighting placement is centered beneath every set of cabinet doors – or at least use this as a foundation for your layout.
Step 2: Hold the lights up to where you plan to install them and use a pencil to mark any out necessary mounting holes.
- The bottom front of the cabinet is usually the best spot for under cabinet lighting placement to ensure they are hidden out of sight.
- Mounting kits vary as you get different installation options such as channels and mounting caps. Ensure you read all instructions on how your lights need to be mounted.
- Additionally, mark any spots you will need to cut out – particularly for recessed lights.
Step 3: (Optional) If your under cabinet mounting has wires that need to be hidden or your outlet is inside the cabinet, you will need to cut out the necessary holes to do so.
- Depending on the width of the cable, you can use a drill or hole saw to cut accurate holes.
- Once complete, thread your wires through the holes from the inside of the cabinet.
- Do not plug them in yet.
Step 4: This step varies depending on the type of lighting you choose.
For Recessed Lights: If your lights are going to be recessed, you will need to cut holes for them to fit in.
- Use the hole saw to cut the appropriate spaces for the lights
LED Strips: The great thing about under cabinet led lighting installation is the strips come in rolls that can be cut to length as needed.
- Make sure to only cut on the designated markings and try to be as accurate as possible.
- Follow all instructions for the connector clips to ensure you make the best connections.
- If your LED strip lights come with mounting channels, make sure to cut them while leaving enough room on both ends of each channel to fit the clips.
- Once they are connected you can slide your lights into the mounting channels.
- If you are connecting multiple sections together, make sure the wires have extra slack to make your job as easy as possible.
Step 5: Begin by ensuring your screws are the right length. If they are too long they will poke up through the bottom of the cabinet. If the screws that come with your kit are too long, you will need to purchase appropriately sized ones.
- Drill shallow pillow holes and then check if the light mounts will fit correctly.
- * To keep from drilling all the way through the bottom of your cabinet, measure the bottom thickness of the cabinet and then place tape on the drill bit to indicate this length so you know when to stop. Make sure this matches the length of your screws.
- Place the lighting fixtures in their positions and screw them in all the way.
- Some mounting kits come with mounting clips which will simply need to be hammered or screwed into place.
- If you want to bridge any gaps, you can drill holes and hide the wires through the cabinet supports.
- If you are using mounting channels, you can screw them in place.
Tip!
If your light has a lens, then make sure to face toward the backsplash.
Step 6: If your lights use mounting caps, then you can attach the lights to them at this point (usually with a twist and locking motion).
Step 7: Make sure everything is securely mounted and in place. Finally, plug them in and ensure they work.
How to Install Tape Lights
There are a number of different types of lights that have adhesive backings rather than requiring screws. This can include LED strips, puck lights, and tape lights. If this is the case, you will need to do no cutting to install them.
If your lights are battery powered, ensure the batteries are correctly inserted and functional.
Simply peel off the back protective layer from the adhesive and press them in place.
Some channels are also light enough to use adhesives such as double-sided tape, to adhere them to the cabinet bottom.
How to Install Rope Lights
Rope lights usually come with plastic mounting clips that will either need to be hammered or screwed into place.
Press the rope lights into the U-shaped bend of the clips and then install them.
Learning how to install under cabinet lighting is not a difficult task when you have the know-how.
