How to Move a Pool Table
It's not as hard as you think.
A pool table is the crowning glory of any game room, so it's natural to want to take yours with you when you move. Weighing anywhere from 300 to nearly 1,000 lbs. and comprised of several well-secured pieces, pool tables can be difficult to move without professional help. However, with the right know-how and muscle power, you can successfully move a pool table without hiring a pro. In this guide, learn the steps of how to disassemble and move a pool table.
For more information on pool tables such as sizing and styles, check out our pool table buying guide.
In This Guide
How Much Room Do You Need for a Pool Table?
How to Move a Pool Table a Short Distance
How to Disassemble a Pool Table
How to Reassemble a Pool Table
How Much Room Do You Need for a Pool Table?
Before you fully disassemble your pool table and move it to its new home, it's important to make sure that it has enough room around it for comfortable play.
To ensure comfortable play, you should allow for the length of a pool cue (58") plus at least 6" of swinging distance between your pool table and any surrounding wall or obstacle. Measure your pool table and add 64" to both the length and the width to find the minimum room size that can comfortably accommodate a game of pool on your pool table.
How to Move a Pool Table a Short Distance
If you're interested in learning how to move a pool table from one spot to another on the same floor of your home, you're in luck! It's much less complicated than moving a pool table from floor to floor or home to home, which requires disassembly.
That said, moving a pool table without disassembling it can put a lot of strain on your pool table's construction, which can damage the table or impact the integrity of your play.
What You'll Need
Measuring tape
Four high-capacity furniture dollies
Level
A friend or two (optional but encouraged)
Step 1: Measure your pool table and surrounding architectural features.
Before you do anything, make sure your pool table will fit in its new location by measuring its height, width, and length. Measure any doorways, arches, poles, or beams that may be in its path to ensure it will be able to move through without a hitch.
Step 2: Acquire a set of four high-capacity furniture dollies.
Equipped with lockable wheels and simple, sturdy frames, dollies are a must-have when moving heavy furniture. Make sure the dollies you choose can manage the weight of your pool table and have felted sides that won't damage your pool table's feet.
Step 3: Clear off the pool table and the surrounding areas.
Clear a path to your pool table's new location.
Step 4: Lift one corner of the table, and position a dolly beneath its foot.
If your pool table is on the lighter side, you can do this alone. Move the dolly in place by pushing it with your foot. If your pool table is heavy or if you want to make the process easier for yourself, enlist a friend to help you lift the pool table or position the dolly.
Step 5: Brace the dolly.
To prevent your pool table from moving around while you position the other dollies, lock the wheels in place using the dolly's brace.
Step 6: Repeat steps 3 and 4 for the other three legs of your pool table.
Step 7: Unlock the dollies' wheels, and move your pool table to its new location.
Going slowly is key – the heft of a pool table can easily damage walls and other objects if you lose control.
Step 8: Lock the dollies' wheels.
Once in place, you want to ensure your pool table won't move while you remove the dollies.
Step 9: Remove the dollies one at a time by lifting the corners of your pool table.
Lift each corner of the pool table and move the dolly out of position once it is freed. Again, it helps to have a friend's assistance here. Lower carefully – try not to drop the pool table on the floor or on your foot.
Step 10: Check that your pool table is still level.
Using a carpenter's level positioned longways in the center of your pool table, ensure that it is still level after the move. If not, consult your table's user manual for instructions on how to adjust it properly.
How to Disassemble a Pool Table
If you are moving your table long distances, whether it's to a new room in your home (that can't be done by the steps above) or to a new home, you will need to disassemble it first.
What You'll Need
Pool table
Staple remover or flathead screwdriver
Socket wrench
Power drill
A few friends
Step 1: Detach the pockets.
The pockets are often secured to the pool table's rails by bolts and staples. The bolts can be removed with a socket wrench or power drill and the staples can be removed with a staple remover or a flathead screwdriver. Approaching from below might be easier – just be sure to protect your eyes from falling parts. Depending on your pool table's construction, you may need to remove the pocket bolts after the rails on step 3. Set the pockets aside somewhere safe.
Step 2: Remove the rail screws.
Locate the screws securing the rails to the table. There are usually two to four screws located on the underside of each rail. Most often, these can be removed with the appropriately sized socket wrench, but if not, you may need to order specialty tools from the manufacturer. Save the screws somewhere you'll remember them.
Step 3: Remove the rails.

Remove the rails by lifting gently upward or flipping them toward the center of the table. Handle the rails gently, and make sure to store them somewhere safe during the moving process.
Step 4: Remove the felt.
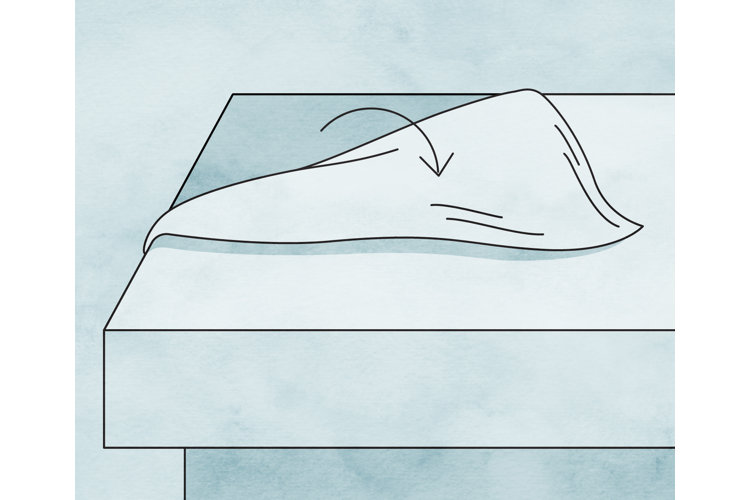
Your pool table's felt will be secured to the slate table with either staples or glue. Carefully remove staples with a staple remover or flathead screwdriver. If the felt is glued down, gently pull one corner back from the edge of the table and work your way around, loosening as you go. Once freed, fold the felt without pressing on the creases, and store it somewhere safe.
Step 5: Remove the slate screws.
Locate the screws holding your table's slate slabs in place on the frame. Scrape away any protective covering over the screws, and remove them using a power drill. Be extra careful not to strip the screws or chip the slate. Pack the screws securely.
Step 6: Remove the slate tabletop.
Your pool table's slate tabletop may be comprised of three slate slabs that can weigh over 300 lbs. each or one that can weigh nearly 1,000 lbs. on its own. Because of this, it is necessary to get some help moving these pieces from the table to the moving vehicle. Enlist several strong friends to help you gently lift the slate panels off the table's frame. It is extra important to be careful at this stage – damage to your pool table's slate may compromise its integrity and require costly replacement.
Step 7: Flip your pool table, and remove its legs.
Have a friend help you flip the frame. Typically, pool tables' legs are screwed in place and can be removed with a power drill or socket wrench. If you can't reach the legs because your pool table frame's slats are in the way, detach them by pulling gently upwards before you flip your table.
Step 8: Make sure it's packed safely.
Once fully disassembled, your pool table is ready for the big move. If you are moving it from home to home, you will need a moving vehicle, ideally a large van or truck, that can accommodate your pool table without much crowding.
If your table has more than one slate slab, these can be safely stacked when moving. It's a good idea to wrap the slate in a soft blanket or plastic sheeting to minimize the chance of damage during the move. It's very important to use well-fastened furniture straps to hold the slate in place in the vehicle.
You can safely stack your pool table's wooden frame atop the slate for the move. As with the slate, make sure to secure the frame, legs, and rails in place with furniture straps, and protect exposed edges with felt covers or blankets.
Store your pool table's felt in a sealed plastic bag to protect it from moisture and damage.
Don’t forget the pockets, screws, and pool table accessories – you can't play a good game of pool without cues or balls!
How to Reassemble a Pool Table
To reassemble your pool table, follow the disassembly instructions in reverse order. There are a few additional steps outlined below.
What You'll Need
All the disassembled parts of your pool table
Socket wrench (for reattaching bolts)
Power drill (for reattaching screws)
Measuring tape
Level
Beeswax or other sealant, like putty
Blowtorch
Staple gun
A few friends
Step 1: Unpack all your pool table components carefully.
Bring them to the location you'd like to place your pool table.
Step 2: Lay the frame upside down on the floor and reattach the legs.
Use a power drill or socket wrench to fasten the legs' bolts or screws.
Step 3: Flip the table right-side up and reassemble the frame, if necessary.
If you had to take apart the frame slats to detach the legs earlier, slide them back into place.
Step 4: Place the slate panels.
You'll need assistance to lift them. If your pool table is made up of more than one slate panel, you'll need to use a measuring tape to ensure that the central seam or central slab is exactly on the midline of the frame.
Step 5: Ensure the slate is level.
Once the slate panels are in place, use a level to ensure the tabletop is still flat. If the tabletop is unlevel, you may need to place a shim beneath one or more of the panels.
Step 6: Seal the slate panels with beeswax.
You'll need to seal the seams between the slate panels (if your table has more than one) and the holes over the screws using beeswax. To do this, use a propane torch to melt beeswax into the seams and holes. Let it solidify overnight, and scrape the excess away using a paint scraper. This should leave a perfectly flat surface. You can also use special glue or putty, but be sure to follow the instructions provided if you opt to use those.
Step 7: Place the felt.
Unfold the felt gently, and line its slits up with the pocket cutouts on the slate. To ensure the felt is taut while you staple, staple in sections at a time. Place a few staples at one side of one corner, then cross to the opposite side of the table, pull the felt taut, and place a few staples there. Move to the adjacent corner, pull the felt taut, and place a few staples. Repeat this process, pulling the felt taut and placing a few staples at a time, until the entire surface is tightly secured. Reassembling a pool table after a move is a good opportunity to replace worn-out felt if you so desire.
Step 8: Reattach the pockets if they are secured to the rails with bolts.
This step is necessary if the bolts holding the pockets in place are inaccessible when the rails are in position. Use a socket wrench or power drill.
Step 8: Place the rails back into position and secure.
Use a socket wrench or power drill to attach the rails to the tabletop.
Step 9: Staple the pockets to the tabletop.
Using a staple gun, re-staple your pool table's pockets to the wooden part of the table frame. Make sure to staple in several places so the pockets hold tight.
Step 10: Make sure the table is level once more.
Once the table is fully assembled, use a carpenter’s level to test whether it is level. Again, if your table is no longer level after the move, consult the manufacturer's instructions for information on how to adjust it or install a shim.
