How to Use a Turkey Fryer
The secret to the best fried turkey, revealed.
Who doesn’t enjoy a deep fried turkey every once in a while? With your own turkey fryer, you can enjoy this bird whenever you please instead of waiting for Thanksgiving to roll around. Here’s how to use a turkey fryer to make the best fried turkey whenever the mood strikes.
How to Use a Turkey Fryer in 7 Steps
Follow these steps to make the best fried turkey.
1. Prioritize Safety
Deep-frying a turkey can be extremely dangerous. That’s because turkey fryers use a large amount of hot oil that, when tipped over, can lead to devastating fires. If you are not used to using a turkey fryer, it’s extremely important to be cautious when operating this appliance.
Remember to never fry a frozen turkey that is not thawed due to the explosion that can occur when ice mixes with hot oil.
Here’s a list of safety precautions to follow when using a turkey fryer:
- Wear protective gear such as an apron, mitts, and closed-toe shoes.
- Keep a fire extinguisher close by.
- Do not leave your fryer unattended or move it when in use.
- Do not walk near the propane tank and fryer to avoid anything tipping over.
- Always keep the fryer at 350℉. If it gets higher than 400℉, turn it off and wait for it to cool.
- Keep children and pets away from the area until you’re completely finished frying the turkey and cleaning the fryer.
2. Prepare Your Fryer & Cooking Area
Preparation is key to make sure both the fryer and your cooking area are safe.
Prepare the Fryer
Wash your turkey fryer thoroughly before use and follow the instruction manual to set it up properly. You will need to separately purchase a propane tank to fuel the fryer. Most turkey fryers will come with the following parts:
Burner: This is what attaches to the propane tank to create a flame responsible for heating the pot. Stock Pot with Lid: Your stock pot sits on top of the burner. This is what will hold your turkey and basket/poultry holder. Use the lid to close the pot and keep all the heat concealed.
Basket/Poultry Holder: Place your turkey in the basket or poultry holder prior to dunking it in the oil. Your turkey will sit in the basket inside the pot as it cooks.
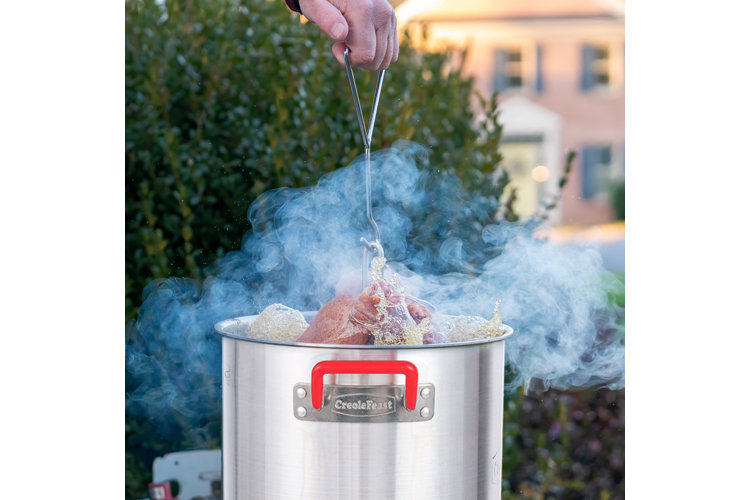
Lifter/Hanger: The lifter, sometimes called a hanger, is what you will use to lower and lift the basket from the pot. This ensures hot oil does not splatter on your hand or arm.
Thermometer: Use the thermometer to read the temperature of the oil inside the fryer to make any temperature adjustments.
To see how much oil you will need, do a test run with water. Fill the pot up with water and dunk your thawed turkey in the water. If water covers your turkey by about half an inch, then you’ve reached the perfect amount.
Prepare the Cooking Area
- Place your set-up fryer in a large, open area outdoors.
- Make sure the area is flat, level, and sturdy. Never place the fryer on wood or asphalt, as these are flammable.
- Ensure that the fryer is at least 10 feet away from your home on all sides.
- Keep debris or objects away from the propane tank and assembled fryer at all times.
3: Get Your Turkey Ready
Prior to turning on your fryer and heating up the oil, you should prep your turkey so it’s ready to go. If you are not using a fresh turkey, you must thaw your frozen turkey out completely before frying. Frozen turkeys take approximately one whole day to thaw for each 4 to 5 lbs. So, if you are wanting to fry an 8-lb turkey, you would need to plan for a two-day thawing process.
Once your turkey is ready, remove the giblets and neck from the body cavity located inside the turkey. Inspect the thawed turkey to make sure there are no hidden pockets of ice.
Before bringing the turkey outside to the fryer, pat it completely dry with paper towels. Moisture from the turkey can cause the oil to splatter, so it’s important to not skip this step. Once your turkey is dry, season it to your liking or inject it with your favorite marinade, but do not stuff your turkey. Stuffed turkeys will have to be baked instead of deep-fried.
Make cuts to the turkey around the wings and legs, as well as the neck, so the oil can drain when you go to remove it from the fryer.
Tip!
Check the weight of your turkey prior to deep-frying. Turkeys below 14 lbs. can be deep-fried whole. Turkeys 15 lbs. or higher will have to be fried in sections and require you to fry the legs, thighs, and breasts separately.
4: Deep-Fry According to Designated Time
Wearing your apron and protective gloves, pour the amount of oil you measured from the test in step 2 into the pot. Place your thermometer onto the sides of the pot and preheat the fryer to 350℉.
While the oil is heating, set out your fully-thawed turkey to come to room temperature before placing it in the pot. Once the pot has reached 350℉, turn off the burner and lower the basket into the pot with your lifter. Keep the basket empty and in the oil for 30 seconds. This helps to preheat the basket and prevents the turkey from sticking to the basket when it's frying.
After 30 seconds, remove the basket from the pot with the lifter and place your seasoned turkey inside. Slowly lift the basket back into the pot, turn the burner on, and cook according to the following chart:
Turkey Size & Cooking Time:
- 5–8 lbs. = 20–40 minutes
- 10–12 lbs. = 40–60 minutes
- 15–20 lbs. = 60–80 minutes
- 20–25 lbs. = 80–100 minutes
Here are some tips to keep in mind when using your deep turkey fryer to make the best fried turkey:
- Dark meat needs to cook until it reaches an internal temperature between 175–180℉.
- White meat needs to cook until it reaches an internal temperature between 165–170℉.
- Once your turkey is done frying, slowly lift the basket out of the deep turkey fryer with your lifter.
- Remove your turkey from the basket and set it on a roasting pan to drain.
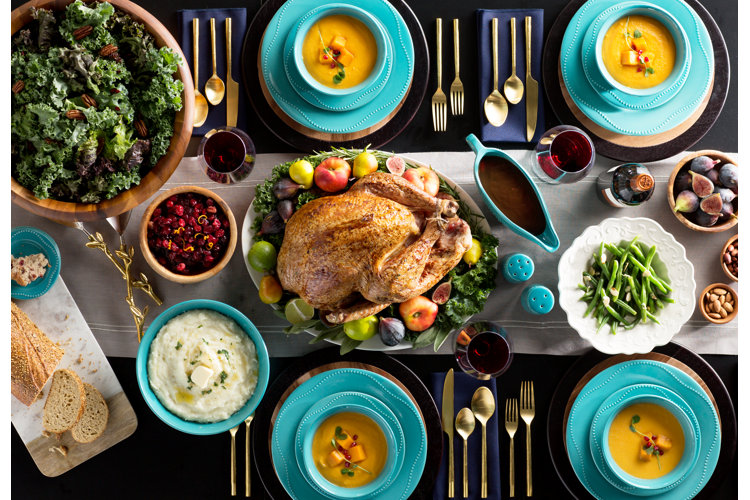
- Wait at least 20 minutes before carving your turkey with a carving knife and serving it.
5: Start Shutting Down the Area
Knowing how to use a turkey fryer properly doesn’t stop after the prep and frying steps. It also includes cleaning up correctly and safely!
Start the clean-up process by shutting off your propane tank or gas supply and allowing the oil to cool completely. This will take between 30 minutes to an hour or more, depending on how much oil you used and how hot your deep turkey fryer got.
6: Drain the Oil
Next, you will need to drain the oil. To do this, have a food-grade container on standby to collect the drained oil so you can use it for the next frying session. An empty oil bottle works best since it has enough room to collect all the oil, though you may need to use several bottles if you’re draining a lot of oil.
If your turkey fryer has a drain valve, place your open container under the valve and allow the oil to drain into your container. If your deep turkey fryer doesn’t have a drain valve, you will need to use a funnel, then gently tip the fryer so the funnel can seep oil into the container.
Keep the oil for the next frying session by sealing the containers you’ve used to collect the oil and storing them in a cool, dark place for up to 6 months. You can also refrigerate or freeze the oil until you’re ready to use it again.
7: Wash the Pot & Basket
After the oil is completely removed, it’s time to clean the pot and the basket still outside. Add two quarters of degreasing dish soap to the bottom of the pot and fill it with enough hot water to completely cover your basket.
Leave the soap and water in the pot for 10 minutes before taking a bristle brush to scrub the basket and inside of the pot. Next, use a sponge to do another scrub down of the inside and outside of the pot.
If your pot has a drain valve, open the valve with the soapy water still inside to let it run through the valve completely and clean out the oil residue until all the water is out. Then use a small-diameter bottle brush to clean the inside of the valve spigot. If your deep turkey fryer does not have a valve, then dump the water out.
Next, use a garden hose to rinse out the remaining soap (with the valve still open). Look around the pot completely to make sure no grease is left. If everything is clean, allow all your pieces to air-dry completely for storing.
Now that you know how to use a turkey fryer safely, it’s time to make the best fried bird!
