How to Install a Ceiling Light
You got this.
Knowing how to install a ceiling light can help you refresh your space. A new light fixture can add style overhead, especially if you’re looking to make an eye-catching statement.
Even though installing your own light fixture may seem like an intimidating task, we’ll break it down into easy steps. From pendant lights to recessed fixtures, keep reading for a step-by-step guide on everything you need to know.
Important Safety Note:
If you don't have experience with electrical wiring and light fixture installation, we highly recommend hiring a licensed electrician to safely complete this process. Check the box for professional installation on a light fixture's product page at checkout, and we'll connect you with a licensed professional to complete the setup for you. Whether you need to replace an existing ceiling light, add a light fixture to a wired location, or redirect electrical wires to a preferred installation spot, we've got you covered.
In this guide:
How to Install a Hanging Light
How to Install Recessed Lighting
How to Install Track Lighting
Frequently Asked Questions
Before You Begin
Before you begin installing your ceiling light, here are a few steps to consider:
1. Find the Right Ceiling Light
From chandeliers to pendant lights to flush mounts, there are a variety of ceiling lights to choose from. Some shapes and designs are better suited for specific spaces, like pendant lights above a kitchen island or semi-flush mounts in the hallway. Check out our guide on Types of Ceiling Lights: How to Choose The Right One for a full breakdown on every option.
Tip!
Wondering what a pendant light is and how to choose the right one? We answer all your questions in our comprehensive Guide to Pendant Lights.
2. Measure for the Correct Size
After you’ve chosen which type of ceiling light works best for your space, it’s important to find the right size. Check out our guide on How to Measure for a Ceiling Light for sizing tips and placement ideas for every room.
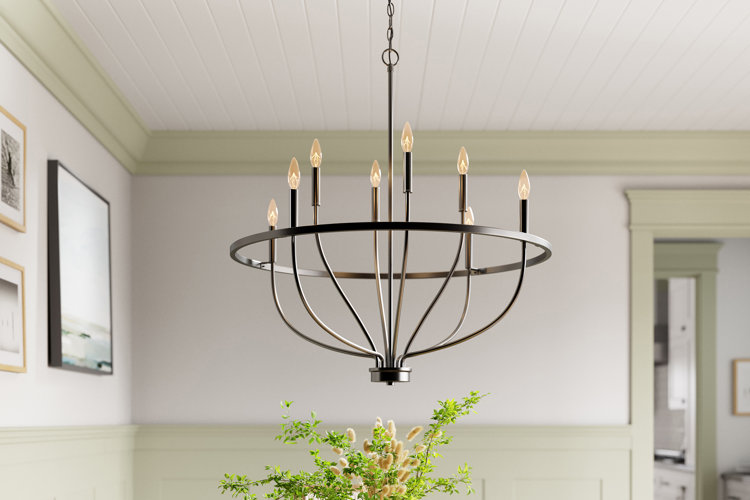
3. Understand the Parts of a Ceiling Light
Before you begin installing your ceiling light, it’s best to familiarize yourself with its different parts. Use the diagram above to learn which components you'll be using during the installation process.
How to Install a Hanging Light
Most hanging light fixtures have a similar installation process. Follow these instructions on how to install a chandelier, flush/semi-flush mount, or pendant light.
What You'll Need:
- Phillips head screwdriver
- Flat head screwdriver
- Wire caps
- Electrical tape
- Wire stripper
- Safety glasses
- Wire connectors
- Friend to help lift the light
- Step stool or ladder
- Lightbulbs
1. Turn Off Power
Locate your electrical panel and switch off the circuit that controls the room. If the circuits aren’t labeled, turn on the room’s lights and flip breakers one at a time until the lights go out. Once you’ve confirmed the correct circuit, switch off the light at the wall as an extra precaution.
2. Remove the Old Fixture
If you’re replacing an existing fixture, start by removing the cover, shade, or mounting plate. Take out any lightbulbs, then carefully detach the fixture from the ceiling. Disconnect the wires, keeping the fixture supported as you work. This step is easier with a second set of hands nearby.
Tip!
Installing a ceiling light where one didn’t exist before? It’s best to consult a licensed electrician to safely connect your fixture to a power source.
3. Secure Screws
Inspect the electrical box and mounting bracket where the new fixture will be installed. If any screws feel loose, tighten them with a screwdriver to ensure a stable base.
4. Connect Wires
Follow the manufacturer’s instructions for your specific fixture. In most cases, you’ll connect wires by color, black to black and white to white. The grounding wire (usually green or bare copper) attaches to the grounding screw.
Strip about 1 inch of insulation from the fixture wires if needed. Twist the corresponding wires together, secure them with wire connectors, and wrap with electrical tape for added protection. Finally, connect the grounding wire.
5. Secure the Fixture Base
Carefully tuck the wires into the electrical box. Then, use the included hardware to attach the fixture’s base or canopy securely to the ceiling.
6. Install Bulbs
Install lightbulbs according to the fixture’s recommended wattage. For energy efficiency and longer lifespan, consider using LED bulbs.
7. Attach Trim & Cover
Install the trim, cover, or shade that came with your fixture. If your light includes a chain or cord, adjust it to your desired length. For more guidance, see our guide How to Measure for a Ceiling Light.
8. Restore Power
Turn the power back on at the circuit breaker, then flip the light switch to test your new fixture. If everything works properly, you’re all set to enjoy your updated lighting.
Recessed lighting is a great way to brighten up rooms while maintaining a streamlined, barely-there profile. Read our guide on Types of Recessed Lights: How to Choose the Right One for Your Home to learn more about recessed lighting. Here's how to install recessed lighting for the best results.
What You'll Need:
- Stud finder
- Hole saw
- Tape measure
- Drill
- Drill bits
- Recessed light housings
- Recessed light trims
- Wire connectors
- Electrical tape
- Lightbulbs
1. Access Your Ceiling Setup
Check the area above your ceiling for insulation. If insulation is present, choose IC-rated (insulation-compatible) recessed lights to prevent overheating.
If installing between floors, make sure you have at least 8" of clearance above the ceiling. To measure, drill a small test hole and insert a wire to gauge the available depth.
Use a stud finder to locate and mark ceiling joists, and plan your layout so no fixtures are installed directly over them.
2. Turn Off Power
Switch off power to the room at your electrical panel. Turn off the wall switch as an added safety measure.
3. Mark Fixture Locations
Use the included template to outline each light’s position on the ceiling. Be sure to avoid joists. For help with spacing and layout, see our Recessed Lighting Calculator: 5 Steps to Figuring Out Your Lighting Layout guide.
4. Cut Openings
Use your hole saw to create the appropriate size housings for the lights.
5. Remove Existing Fixture (If Applicable)
If you’re replacing a current fixture, disconnect it from the power source and remove it before proceeding.
6. Run Wiring
Run electrical cable from the power source to the first light opening, leaving about 18" of extra wire for connections.
Use a wire snake to guide cables through the ceiling between openings. If there’s attic access, run wiring above the ceiling. For finished ceilings, use a flexible drill bit to route wiring through framing. Repeat for each fixture location.
7. Make Wire Connections
Open each fixture’s junction box and feed the cable through. Connect black wires to black, white to white, and ground wires (green or bare copper) together.
Secure each connection with wire connectors and wrap with electrical tape. Carefully tuck the wires into the junction box and replace the cover. Repeat for all fixtures.
8. Install the Housing
Compress the mounting clips on the housing and insert it into the ceiling opening. Push the fixture up until it sits flush with the ceiling, then engage the clips to secure it in place.
9. Attach the Trim
Recessed lighting trims are usually mounted with coil springs or rod springs. If your light has coil springs, hook each spring into its assigned hole inside the housing. Pull out each spring and hook it onto the trim, carefully guiding the trim into position. If your light has rod springs, squeeze and place both ends of each spring into their assigned positions. Push the trim up into position until it feels secure.
10. Install the Bulbs
Insert lightbulbs based on the manufacturer’s recommended wattage.
11. Restore Power
Turn the power back on at the breaker and test the lights using the wall switch to ensure everything is working properly.
There are two main types of track lighting: plug-in and hardwired. Plug-in track lights don’t require electrical wiring, but they do need to be installed near an outlet. Hardwired track lights connect directly to your home’s electrical system and require an existing ceiling electrical box.
The steps below assume an electrical box is already in place. If not, it’s best to consult a licensed electrician for installation.
What You'll Need:
- Screwdriver
- Drywall screws
- Tape measure
- Wire nuts
- Track and track heads
- Electrical cable
- Bulbs
1. Turn Off Power
Switch off power to the room at your electrical panel, and turn off the wall switch as an added safety precaution.
2. Document Existing Wiring
Before removing the old fixture, take a photo of the current wiring setup. Noting wire placement and colors will make reconnecting much easier later.
3. Remove the Old Fixture
Carefully detach the existing light fixture from the electrical box and disconnect the wires. You’ll use this same wiring to install your track lighting.
4. Install the Mounting Plate
Attach the mounting plate to the ceiling junction box using screws. Connect the house wires to the mounting plate wires with wire connectors, black to black, white to white, and ground (green or bare copper) to the grounding screw. Tuck the wires into the box, then secure the plate.
5. Mark the Layout
Measure and mark where the track will run on the ceiling. Use a pencil to ensure the track will be straight and properly aligned with the room.
6. Attach the Track
With a helper holding the track in place, align it with the mounting plate and attach it according to the manufacturer’s instructions.
7. Secure the Track
Use a stud finder to locate ceiling joists. Whenever possible, secure the track directly into joists. If joists aren’t available, drill pilot holes about every 12 inches and use anchors before inserting screws to firmly support the track.
8. Install the Live End Connector
Attach the live end connector by aligning its copper contacts with the track’s internal conductors. Twist and lock it into place according to the fixture instructions.
9. Insert Heads & Bulbs
Attach the track light heads by twisting them into position along the track. Install bulbs using the recommended wattage for your fixture.
10. Restore Power
Turn the power back on at the breaker and test the lights to ensure everything is functioning properly.
Frequently Asked Questions
What tools are needed to install a hanging light?
You will need screwdrivers, wire caps, electrical tape, wire stripper, safety glasses, wire connectors, a step stool or ladder, lightbulbs, and a friend to help.
How do I connect wires for a ceiling light?
Match wires by color: black to black, white to white, and connect the grounding wire to the grounding screw. Use wire caps and wrap them with electrical tape.
What should I do before removing an old light fixture?
Turn off the power at the circuit panel and switch off the light’s wall switches.
