How to Install Bookcase Lighting: Easy DIY Methods
Cast your books in the right light.
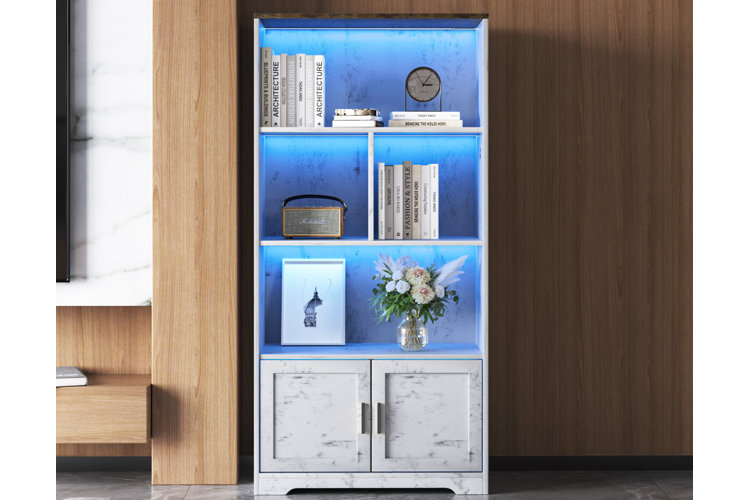
Bookcase lighting illuminates paperbacks, hardcovers, and decor, allowing you to show off your reading selections and easily find the title you want to read. Below, we've outlined multiple bookcase lighting methods and how to install them.
In this guide:
How to Install Under-Cabinet Lighting
How to Install Picture Lights
How to Install Track Lighting
How to Install Under-Cabinet Lighting
Here's a brief overview of under-cabinet lighting options for your bookcase and how to install them, including the basic materials you may need and step-by-step instructions:
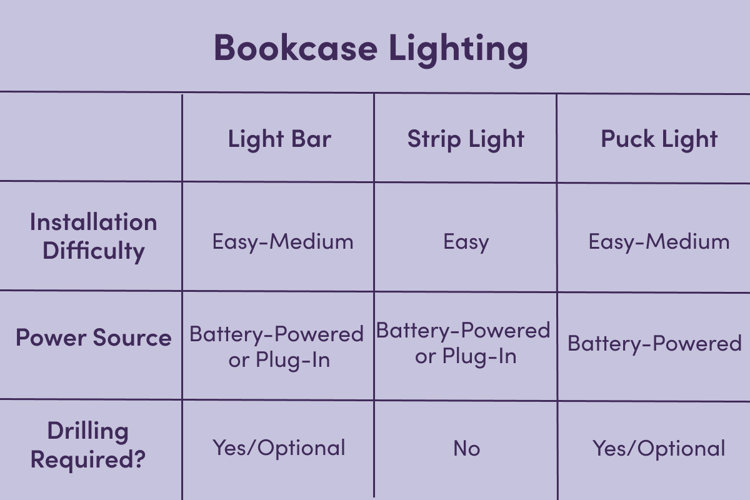
Light Bars: Under-cabinet light bars aren't just for kitchen cabinets! They also make excellent bookcase lighting. They come in a range of lengths and are meant to rest along the underside of each bookshelf to provide a barely-there appearance while casting even, elongated light on the shelf below. Under-cabinet light bars come in a variety of different forms, from stick-on battery-operated options to plug-in or hardwired options so you can make the best choice for your space and skill-level.
Strip or Tape Lights: Strip or tape lights are very similar because they come in rolls (typically multiple feet long) and usually have an adhesive backing that allows you to line bookcases, ceilings, and furniture with warm or multicolored light. You can even cut them to adjust the length so they’ll fit on bookshelves of different sizes. They can be plug-in or battery-operated and often come with a remote control so you can dim or change the color of the light for a cool ambience.
Puck Lights: Under-cabinet puck lights are another example of bookshelf lighting that gives you a variety of installation methods. These puck-shaped spotlights best help highlight book selections in narrow or cubby-style bookcases, but you can always use multiple to create pools of light on a wide bookshelf.
What You'll Need to Install Any of These Lights:
- Tape measure
- Pencil
- Ladder or step ladder (Depending on the height of the bookcase)
- Standard power drill
- Hole saw drill bit (Only if linking plug-in or hardwired lights)
- Set of under-cabinet light bars, puck lights, strip lights, or tape lights (1-3 or more for each bookshelf level).
- Set of linking cords (These usually come with the lighting set)
- Extension cords (To connect plug-in lights to nearby power outlets)
- Power strip/surge protector (If connecting multiple plug-in lights to a single outlet)
- Screws/screw-in bracket (If included and there isn't a pre-applied adhesive backing on the lights)
- Cable accessories (Organizers, covers, or ties to disguise cords on/around bookcases)
- Wire support clips (These keep linking cords and wires from drooping or hanging down on the bookshelf)
- Strip/tape light connectors (Usually come with a strip/tape light set)
- Splice connectors (To reconnect cut strip/tape lights. These usually come with a strip/tape light set)
- Electronic transformer (If specified by the manufacturer)
- Dimmer switch (If it comes with the product or the manufacturer marks the product as dimmer-compatible)
Step 1: Measure the Space
The first step to achieve a bookcase with lights is to get your measurements!
- Use a tape measure to determine and record the width of the underside of each shelf where you want to put a light bar, strip light, or puck light to light the shelf below.
- Depending on how wide each bookshelf is, you may need to account for more than one light to adequately light the length of the shelf. You may not even need to remove books from the shelf below for this step!
Step 2: Use the Saw to Cut Holes
You can skip to the next step if you plan to use battery-powered under-cabinet lights that don't require cords or wires.
- If you’re using plug-in lights, you will likely need to drill a small hole through the top portion of the shelf divider on each level of your bookcase in order to run link cords from one light to another.
- You will also likely need to use the hole saw to drill small holes through the side or back of the bookcase on each level on whichever side is closest to a nearby outlet.
- This allows you to discreetly run power cords from a connecting light bar, strip light, or puck light to a standard household outlet or surge protector. More on linking lights and electrical cords in Step 4.
Step 3: Mount the Under-Cabinet Lights
Follow the manufacturer's instructions for how to properly mount under-cabinet light bars, strip lights, or puck lights to the underside of each shelf. Most of these lights come with an adhesive backing to make installation a breeze.
Some come with brackets and screws for you to drill into the bookshelf for even more stability. We recommend using a tape measure and pencil to help mount lights in a central spot or to evenly space multiple lights along the length of the bookshelf. This will ensure a well-balanced and well-lit bookcase that shows off all of your books!
For battery-operated under-cabinet lights, you're free to turn them on at this point! Some are motion-sensor, tap, or remote-control operated.
Step 4: Connect Plug-In Lights
Once again, you can skip this step if you're going the battery-operated route. Now that you've successfully attached under-cabinet lights to each level of your bookcase, you can start connecting them.
Most products come with a set of linking cords with connectors on each end that plug into a corresponding outlet on each light. Linking cords pass electricity through light bars, puck lights, and strip lights when the entire display is plugged in. However, you may need additional linking cords or longer varieties depending on the amount of lights you want to include and how far apart you spaced each light.
Review the manufacturer's instructions to determine how to connect under-cabinet lights using linking cords. Each bookcase level should have its own set of under-cabinet lighting and linking cords that don't link to lighting above or below the current shelf. This makes the process so much easier and keeps you from having to drill too many holes in your bookcase.
Step 5: Attach to the Power Cord
Most plug-in under-cabinet lighting systems come with a connector attached to a power cord that you can plug into a standard household outlet or surge protector. This is also where the dimmer switch is usually located if there is one (unless your system comes with a remote control dimmer).
- Connect the power cord to the free end of the under-cabinet light closest to the side of the bookshelf with the drilled hole to connect lighting systems to exterior power outlets.
- Run the cord through the hole.
- Repeat this process for each shelf level of your bookcase.
- You may need an extension cord to help reach nearby outlets or surge protectors.
Step 6: Hide or Secure Wires
Now that you have everything connected, it's time to hide those wires! Start by using electrical tape or wire clips to keep linking cords tucked up and out of the way. You can also use cable covers to hide wires and extension cords in and around your bookcase and cable storage boxes to keep surge protectors hidden.
Step 7: Plug In & Enjoy!
Now for the part you've been waiting for. The big reveal. Plug each power cord from your under-cabinet light system into a surge protector or power strip. These are super handy because they have multiple outlets and help control voltage to prevent damage to electronics.
With each power cord plugged in, you can go ahead and plug the surge protector into the household outlet. Some come with an on/off switch as well. The result should be beautiful bookcase lights that you can enjoy for years to come.
Tip!
Get more tips in How to Install Under-Cabinet Lighting: Your DIY Guide.
How to Install Picture Lights
(Shop this image: Library-style bookcases, gold picture lights, wire baskets, and espresso machines.)
Picture lights just scream library, which is why they're perfect for lighting up bookcases. If you're tight on bookshelf space but still want a beautiful display with even and horizontal light, picture lights are the way to go. For the best results, install picture lights onto the top of bookcases on the face frame. The face frame lines the top portion of the bookcase above the top-most shelf and can vary in size depending on the bookcase design. Picture lights can be hardwired or battery-operated, but we recommend plug-in varieties for quick and seamless bookcase lighting.
What You'll Need:
- An extra pair of hands
- Tape measure
- Pencil
- Level
- Ladder or step ladder (Depending on the height of the bookcase)
- Standard power drill
- Hole saw drill bit (Only if linking plug-in or hardwired lights)
- One picture light per bookcase
- Extension cords (To connect plug-in picture lights to nearby power outlets)
- Mounting bracket & screws (These usually come with the product unless specified otherwise)
- Power strip/surge protector (If connecting multiple plug-in picture lights to a single outlet)
- Cable accessories (Organizers, covers, or ties to disguise cords on/around bookcases)
Step 1: Decide on Placement
First, consider how many picture lights you need. Do you have a single bookcase? One picture light may be enough. Is your bookcase wide with one or more shelf dividers that makes it look like multiple bookcases side-by-side? You might want to designate one picture light per "bookcase."
Step 2: Measure Each Installation Spot
Use a tape measure and pencil to mark the central spot on the face frame rail of your bookcase. If you have a double or triple bookcase, you'll want to repeat this process for each face frame rail.
This ensures that any picture lights you install over a set of bookshelves will disperse light from a central, even point (no dark spots!).
Step 3: Install Each Picture Light
Follow the instructions that came with your picture lights to determine the best way to install them on the bookcase. Most picture lights come with the screws and mounting equipment for installation, so all you need is a power drill and a step stool or ladder to reach the top level of the bookcase. Depending on the model, some picture lights come equipped with decorative plates and discreetly-placed screws, while others just come with the mounting bracket and screws.
- You may want to have someone hold the light in place as you secure it to the bookcase.
- Once you successfully install each picture light, check for levelness.
- Line a level up with the bottom edge of the decorative plate or mounting bracket. If the air bubble rests in the center, you're good to go! This is an important step because if your picture lights aren't level they could cast light at an angle instead of straight down the bookcase.
Step 4: Run Power Cords
You might need to move the bookcase slightly away from the wall for this step, but if you have a large or heavy bookcase anchored to the wall, no worries! Direct them down the side of the bookcase closest to a power outlet.
Feel free to use cable covers to disguise the wires as you go. Most picture lights come with lengthy power cords, but you can always use an extension cord if you need extra length to reach a power source.
Step 5: Plug Power Cords Into a Power Strip
Don't worry about not having enough outlets! Just grab a power strip or surge protector that has multiple outlets already built-in. Plug each cord into the power strip to help power multiple picture lights at the same time.
Step 6: Illuminate Your Bookcases!
Plug the surge protector/power strip into a standard household outlet and read to your heart's content with beautiful bookshelf lights.
(Shop this image: white bookcases, black track lighting, wall art, and wooden benches.)
While picture lights mount to the wall, track lighting mounts to the ceiling. Track lights have multiple bulbs that cast spotlights anywhere you angle them. This makes them perfect for showcasing books on bookshelves.
What You'll Need:
- An extra pair of hands (to help hold lighting components during installation)
- 6' – 8' ladder
- Standard power drill
- Track light fixture
- Mounting hardware (These are usually included with the track light)
- Drywall screws & wire nuts (Sometimes included with the product)
- Wire connectors (Unless they're present on the wires in the ceiling box)
- Compatible lightbulbs (Unless they're included with the light fixture)
Step 1: Ensure There's a Ceiling Box
Unless a ceiling box is covered with an existing light fixture, it should appear to be a hole in the ceiling with electrical wires hanging down. If you don't already have a ceiling electrical box in front of your bookcase, we highly recommend enlisting the services of a licensed electrician. They will likely need to run electrical lines to the spot and install a ceiling box before installing a track light. If you already have a ceiling electrical box in the right spot and are confident in your electrical expertise, go for it!
Step 2: Turn Off the Power
Turn off the power to the room you're working in via your home's main breaker system (usually located in the basement) to keep yourself safe as you work. Test the light switches in the room to make sure the power is off before you begin working.
Step 3: Remove the Existing Light Fixture
If you have an existing light fixture, this is where you might need an extra pair of hands and a ladder.
- Start by using a screwdriver or power drill to unscrew the existing light fixture's canopy or decorative mounting plate. This will reveal the ceiling box and the fixture's mounting bracket.
- Then, untwist and disconnect the fixture's wires from those in the ceiling box.
- Have a helper hold the fixture steady as you unscrew the mounting bracket and lower the fixture to the ground.
Step 4: Install the Mounting Bracket in the Ceiling Box
Be sure to use the product's instruction manual for specific steps to help prep and attach the mounting bracket. Typically, track lights come with compatible screws or bolts to help secure the mounting bracket to the ceiling box with the help of a power drill or screwdriver.
Step 5: Attach the Track Light
Use the instructions and materials provided to properly secure the track light frame to the mounting bracket. You may want a helper to hold the track light as you secure it to the mounting bracket.
Step 6: Attach the Track Light's Wires
Track lights usually have three built-in wires to attach to corresponding ceiling box wires. These include hot wires, neutral wires, and ground wires (if being used with a metal fixture). Reference the instruction manual to identify each of these wires on the track light. Normally, hot wires are black, neutral wires are white, and ground wires are green. The same applies for the wires in the ceiling box that connect to your home's electrical system.
- Twist the ends of the hot wires from the track light and ceiling box together.
- Repeat the process for both neutral wires and both ground wires.
- Secure each pair of wires with wire connectors and tuck them into the ceiling box.
Step 7: Attach the Canopy or Mounting Plate
With the wires connected, you can now secure the track light's canopy or mounting plate (follow the product manual to determine which screws or installation methods to use). This hides the ceiling box and electrical components for a polished look.
Step 8: Add Lightbulbs
Now, screw lightbulbs into each of the individual lights on the track light fixture. On Wayfair, you can find information about compatible lightbulbs under the specifications tab on the product's page.
Step 9: Turn the Power Back On
Now to show off all your hard work! Turn the power back on via your home's main circuit breaker. You may need to get back up on the ladder to readjust the direction of one or more of the track lights to cast light on the right spot on your bookcase.
Tip!
Elevate your bookcases even more with 30 Home Library Ideas for Every Book-Lover's Aesthetic and 17 Incredibly Cozy Reading Nook Ideas.
You Might Also Like
Start designing your dream reading nook!
